
# Elasticsearch integration
> 原文:[https://docs.gitlab.com/ee/integration/elasticsearch.html](https://docs.gitlab.com/ee/integration/elasticsearch.html)
* [Version Requirements](#version-requirements)
* [Installing Elasticsearch](#installing-elasticsearch)
* [Elasticsearch repository indexer](#elasticsearch-repository-indexer)
* [Omnibus GitLab](#omnibus-gitlab)
* [From source](#from-source)
* [Debian / Ubuntu](#debian--ubuntu)
* [CentOS / RHEL](#centos--rhel)
* [Mac OSX](#mac-osx)
* [Building and installing](#building-and-installing)
* [System Requirements](#system-requirements)
* [Enabling Elasticsearch](#enabling-elasticsearch)
* [Limiting namespaces and projects](#limiting-namespaces-and-projects)
* [Disabling Elasticsearch](#disabling-elasticsearch)
* [Adding GitLab’s data to the Elasticsearch index](#adding-gitlabs-data-to-the-elasticsearch-index)
* [Indexing through the administration UI](#indexing-through-the-administration-ui)
* [Indexing through Rake tasks](#indexing-through-rake-tasks)
* [Indexing small instances](#indexing-small-instances)
* [Indexing large instances](#indexing-large-instances)
* [Indexing limitations](#indexing-limitations)
* [GitLab Elasticsearch Rake tasks](#gitlab-elasticsearch-rake-tasks)
* [Environment variables](#environment-variables)
* [Indexing a specific project](#indexing-a-specific-project)
* [Elasticsearch index scopes](#elasticsearch-index-scopes)
* [Tuning](#tuning)
* [Guidance on choosing optimal cluster configuration](#guidance-on-choosing-optimal-cluster-configuration)
* [Elasticsearch integration settings guidance](#elasticsearch-integration-settings-guidance)
* [Deleted documents](#deleted-documents)
* [Troubleshooting](#troubleshooting)
* [Common issues](#common-issues)
* [Low-level troubleshooting](#low-level-troubleshooting)
* [Known Issues](#known-issues)
* [Reverting to basic search](#reverting-to-basic-search)
# Elasticsearch integration[](#elasticsearch-integration-starter-only "Permalink")
版本历史
* 在 GitLab [Starter](https://about.gitlab.com/pricing/) 8.4 中[引入](https://gitlab.com/gitlab-org/gitlab/-/merge_requests/109 "Elasticsearch 合并请求") .
* 在 GitLab [Starter](https://about.gitlab.com/pricing/) 9.0 中[引入](https://gitlab.com/gitlab-org/gitlab/-/merge_requests/1305)了对[Amazon Elasticsearch 的](https://docs.aws.amazon.com/elasticsearch-service/latest/developerguide/es-gsg.html)支持.
本文档介绍了如何使用 GitLab 设置 Elasticsearch. 启用后,您将受益于快速的搜索响应时间以及两个特殊搜索的优点:
* [Advanced Global Search](../user/search/advanced_global_search.html)
* [Advanced Syntax Search](../user/search/advanced_search_syntax.html)
## Version Requirements[](#version-requirements "Permalink")
| GitLab 版本 | Elasticsearch 版本 |
| --- | --- |
| GitLab 企业版 8.4-8.17 | Elasticsearch 2.4 with [Delete By Query Plugin](https://www.elastic.co/guide/en/elasticsearch/plugins/2.4/plugins-delete-by-query.html) installed |
| GitLab 企业版 9.0-11.4 | 弹性搜索 5.1-5.5 |
| GitLab 企业版 11.5-12.6 | Elasticsearch 5.6-6.x |
| manbetx 客户端打不开企业版 12.7+ | Elasticsearch 6.x-7.x |
## Installing Elasticsearch[](#installing-elasticsearch "Permalink")
Omnibus 软件包中*不*包括 Elasticsearch. 无论您使用的是 Omnibus 软件包还是从源代码安装的 GitLab,您都必须[自行安装](https://www.elastic.co/guide/en/elasticsearch/reference/6.8/install-elasticsearch.html "Elasticsearch 6.8 安装文档") . 提供有关安装 Elasticsearch 的详细信息超出了本文档的范围.
**注意:** Elasticsearch 应该安装在单独的服务器上,无论您自己安装还是使用云托管产品,例如 Elastic 的[Elasticsearch Service](https://www.elastic.co/elasticsearch/service) (在 AWS,GCP 或 Azure 上可用)或[Amazon Elasticsearch](https://docs.aws.amazon.com/elasticsearch-service/latest/developerguide/es-gsg.html) Service. 不建议在与 GitLab 相同的服务器上运行 Elasticsearch,这可能会导致 GitLab 实例性能下降.**注意:** **对于单节点 Elasticsearch 集群,功能集群的运行状况为黄色** (永远不会为绿色),因为已分配了主要分片,但副本却无法存在,因为没有其他节点可以为 Elasticsearch 分配副本.
将数据添加到数据库或存储库中并[在管理区域中启用 Elasticsearch 后](#enabling-elasticsearch) ,搜索索引将自动更新.
## Elasticsearch repository indexer[](#elasticsearch-repository-indexer "Permalink")
为了索引 Git 存储库数据,GitLab 使用了[Go 语言编写](https://gitlab.com/gitlab-org/gitlab-elasticsearch-indexer)的[索引器](https://gitlab.com/gitlab-org/gitlab-elasticsearch-indexer) .
Go 索引器的安装方式取决于您的 GitLab 版本:
* 对于 Omnibus GitLab 11.8 及更高版本,请参见[Omnibus GitLab](#omnibus-gitlab) .
* For installations from source or older versions of Omnibus GitLab, install the indexer [From Source](#from-source).
### Omnibus GitLab[](#omnibus-gitlab "Permalink")
从 GitLab 11.8 开始,Omnibus GitLab 中包含了 Go 索引器. 以前的基于 Ruby 的索引器已在[GitLab 12.3](https://gitlab.com/gitlab-org/gitlab/-/issues/6481)中删除.
### From source[](#from-source "Permalink")
首先,我们需要安装一些依赖项,然后构建并安装索引器本身.
该项目依靠[ICU](http://site.icu-project.org/)进行文本编码,因此我们需要确保在运行`make`之前安装了适用于您平台的开发包.
#### Debian / Ubuntu[](#debian--ubuntu "Permalink")
要在 Debian 或 Ubuntu 上安装,请运行:
```
sudo apt install libicu-dev
```
#### CentOS / RHEL[](#centos--rhel "Permalink")
要在 CentOS 或 RHEL 上安装,请运行:
```
sudo yum install libicu-devel
```
##### Mac OSX[](#mac-osx "Permalink")
要在 macOS 上安装,请运行:
```
brew install icu4c
export PKG_CONFIG_PATH="/usr/local/opt/icu4c/lib/pkgconfig:$PKG_CONFIG_PATH"
```
### Building and installing[](#building-and-installing "Permalink")
要构建和安装索引器,请运行:
```
indexer_path=/home/git/gitlab-elasticsearch-indexer
# Run the installation task for gitlab-elasticsearch-indexer:
sudo -u git -H bundle exec rake gitlab:indexer:install[$indexer_path] RAILS_ENV=production
cd $indexer_path && sudo make install
```
The `gitlab-elasticsearch-indexer` will be installed to `/usr/local/bin`.
您可以使用`PREFIX` env 变量更改安装路径. 如果这样做,请记住将`-E`标志传递给`sudo` .
Example:
```
PREFIX=/usr sudo -E make install
```
安装完成后,请在您实例的 Elasticsearch 设置下启用, [如下所述](#enabling-elasticsearch) .
## System Requirements[](#system-requirements "Permalink")
Elasticsearch 需要的资源超出了[GitLab 系统要求中](../install/requirements.html)记录的资源. 这些会因安装大小而异,但是,根据[官方指南](https://www.elastic.co/guide/en/elasticsearch/guide/current/hardware.html) ,您应确保每个 Elasticsearch 节点**至少至少**有**8 GiB RAM** .
请记住,这是 Elasticsearch 的**最低要求** . 对于生产实例,他们建议使用更多的资源.
所需的存储空间在很大程度上取决于要存储在 GitLab 中的存储库的大小,但是根据经验,由于所有存储库加起来,您应该至少有 50%的可用空间.
## Enabling Elasticsearch[](#enabling-elasticsearch "Permalink")
为了启用 Elasticsearch,您需要具有管理员权限. 导航到**管理区域** (扳手图标),然后导航到**设置>集成**并展开**Elasticsearch**部分.
单击**保存更改**以使更改生效.
可以使用以下 Elasticsearch 设置:
| Parameter | Description |
| --- | --- |
| `Elasticsearch indexing` | 启用/禁用 Elasticsearch 索引编制. 例如,您可能想要启用索引编制但禁用搜索以使索引有时间完全完成. 另外,请记住,此选项对现有数据没有任何影响,仅启用/禁用跟踪数据更改的后台索引器. 因此,通过启用此功能,您将不会为现有数据建立索引,请按照[将 GitLab 的数据添加到 Elasticsearch 索引中所述的](#adding-gitlabs-data-to-the-elasticsearch-index)那样,使用特殊的 Rake 任务. |
| `Elasticsearch pause indexing` | 启用/禁用临时索引暂停. 这对于群集迁移/重新索引很有用. 仍会跟踪所有更改,但是直到未暂停它们才提交给 Elasticsearch 索引. |
| `Search with Elasticsearch enabled` | 在搜索中使用 Elasticsearch 启用/禁用. |
| `URL` | 用于连接到 Elasticsearch 的 URL. 使用逗号分隔的列表来支持群集(例如, `http://host1, https://host2:9200` ). 如果您的 Elasticsearch 实例受密码保护,请在 URL 中传递`username:password` (例如, `http://<username>:<password>@<elastic_host>:9200/` ). |
| `Number of Elasticsearch shards` | 出于性能原因,Elasticsearch 索引分为多个碎片. 通常,较大的索引需要具有更多的分片. 在重新创建索引之前,对该值所做的更改才会生效. 您可以在[Elasticsearch 文档中](https://www.elastic.co/guide/en/elasticsearch/reference/current/indices-create-index.html#create-index-settings)阅读有关权衡的更多信息 |
| `Number of Elasticsearch replicas` | 每个 Elasticsearch 分片可以具有多个副本. 这些是分片的完整副本,可以提高查询性能或抵御硬件故障. 增大该值将大大增加索引所需的总磁盘空间. |
| `Limit namespaces and projects that can be indexed` | 启用此选项将允许您选择要索引的名称空间和项目. 所有其他名称空间和项目将改为使用数据库搜索. 请注意,如果启用此选项但未选择任何名称空间或项目,则不会为它们建立索引. [在下面阅读更多内容](#limiting-namespaces-and-projects) . |
| `Using AWS hosted Elasticsearch with IAM credentials` | 使用[AWS IAM 授权](https://docs.aws.amazon.com/IAM/latest/UserGuide/id_credentials_access-keys.html)或[AWS EC2 实例配置文件凭证](https://docs.aws.amazon.com/codedeploy/latest/userguide/getting-started-create-iam-instance-profile.html#getting-started-create-iam-instance-profile-cli)对 Elasticsearch 请求进行签名. 必须将策略配置为允许`es:*`操作. |
| `AWS Region` | 您的 Elasticsearch 服务所在的 AWS 区域. |
| `AWS Access Key` | AWS 访问密钥. |
| `AWS Secret Access Key` | AWS 秘密访问密钥. |
| `Maximum field length` | See [the explanation in instance limits.](../administration/instance_limits.html#maximum-field-length). |
| `Maximum bulk request size (MiB)` | 最大批量请求大小由 GitLab 基于 Golang 的索引器流程使用,并指示在将有效负载提交给 Elasticsearch 的批量 API 之前,它应在给定的索引过程中收集(并存储在内存中)多少数据. 此设置应与批量请求并发设置一起使用(请参见下文),并且需要通过`gitlab-rake`命令或通过`gitlab-rake`命令来适应 Elasticsearch 主机和运行 GitLab 基于 Golang 的索引器的主机的资源限制. Sidekiq 任务. |
| `Bulk request concurrency` | 批量请求并发指示可以并行运行多少个 GitLab 基于 Golang 的索引器进程(或线程)来收集数据,然后将其提交给 Elasticsearch 的批量 API. 这可以提高索引编制性能,但可以更快地填充 Elasticsearch 批量请求队列. 此设置应与最大批量请求大小设置(请参见上文)一起使用,并且需要容纳`gitlab-rake`的 Elasticsearch 主机和运行 GitLab 基于 Golang 的索引器的主机的资源限制命令或 Sidekiq 任务. |
### Limiting namespaces and projects[](#limiting-namespaces-and-projects "Permalink")
如果选择" `Limit namespaces and projects that can be indexed`更多选项可用 [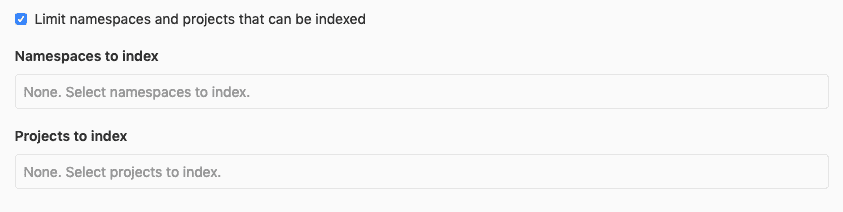](img/limit_namespaces_projects_options.png)
您可以选择名称空间和项目以排他索引. 请注意,如果名称空间是一个组,它将包括所有子组以及属于这些子组的要被索引的项目.
如果所有名称空间都已建立索引,Elasticsearch 仅提供跨组代码/提交搜索(全局). 在仅对名称空间的子集进行索引的特定情况下,全局搜索将不提供代码或提交范围. 这仅在索引命名空间的范围内才有可能. 当前,无法对多个已索引的名称空间进行编码/提交搜索(当仅对名称空间的子集进行索引时). 例如,如果两个组都已建立索引,则无法在两个组上运行单个代码搜索. 您只能在第一组上然后在第二组上运行代码搜索.
您可以通过编写感兴趣的部分名称空间或项目名称来过滤选择下拉列表.
[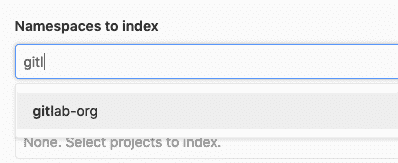](img/limit_namespace_filter.png)
**注意:**如果未选择名称空间或项目,则不会进行 Elasticsearch 索引.**警告:**如果您已经为实例建立索引,则必须重新生成索引,才能删除所有现有数据以进行过滤以使其正常工作. 为此,请运行 Rake 任务`gitlab:elastic:recreate_index`和`gitlab:elastic:clear_index_status` . 然后,从列表中删除名称空间或项目将按预期从 Elasticsearch 索引中删除数据.
## Disabling Elasticsearch[](#disabling-elasticsearch "Permalink")
要禁用 Elasticsearch 集成:
1. 导航到**管理区域** (扳手图标),然后导航到**设置>集成** .
2. 展开**Elasticsearch**部分,然后取消选中**Elasticsearch 索引**和**启用** **Elasticsearch 的** **搜索** .
3. 单击**保存更改**以使更改生效.
4. (可选)删除现有索引:
```
# Omnibus installations
sudo gitlab-rake gitlab:elastic:delete_index
# Installations from source
bundle exec rake gitlab:elastic:delete_index RAILS_ENV=production
```
## Adding GitLab’s data to the Elasticsearch index[](#adding-gitlabs-data-to-the-elasticsearch-index "Permalink")
启用 Elasticsearch 索引编制后,您的 GitLab 实例中的新更改将在发生更改时自动进行索引. 要回填现有数据,可以使用以下方法之一在后台作业中对其进行索引.
### Indexing through the administration UI[](#indexing-through-the-administration-ui "Permalink")
[Introduced](https://gitlab.com/gitlab-org/gitlab/-/merge_requests/15390) in [GitLab Starter](https://about.gitlab.com/pricing/) 12.3.
通过管理区域建立索引:
1. [Configure your Elasticsearch host and port](#enabling-elasticsearch).
2. 创建空索引:
```
# Omnibus installations
sudo gitlab-rake gitlab:elastic:create_empty_index
# Installations from source
bundle exec rake gitlab:elastic:create_empty_index RAILS_ENV=production
```
3. [Enable **Elasticsearch indexing**](#enabling-elasticsearch).
4. Click **索引所有项目** in **管理区域>设置>集成> Elasticsearch**.
5. 单击确认消息中的**检查进度** ,以查看后台作业的状态.
6. 个人摘要需要手动编制索引:
```
# Omnibus installations
sudo gitlab-rake gitlab:elastic:index_snippets
# Installations from source
bundle exec rake gitlab:elastic:index_snippets RAILS_ENV=production
```
7. 索引完成后,启用[**Search with Elasticsearch**](#enabling-elasticsearch) .
### Indexing through Rake tasks[](#indexing-through-rake-tasks "Permalink")
可以使用 Rake 任务执行索引.
#### Indexing small instances[](#indexing-small-instances "Permalink")
**警告:**这将删除您现有的索引.
如果数据库大小小于 500 MiB,并且所有托管存储库的大小小于 5 GiB:
1. [Configure your Elasticsearch host and port](#enabling-elasticsearch).
2. 索引您的数据:
```
# Omnibus installations
sudo gitlab-rake gitlab:elastic:index
# Installations from source
bundle exec rake gitlab:elastic:index RAILS_ENV=production
```
3. 索引完成后,启用[**Search with Elasticsearch**](#enabling-elasticsearch) .
#### Indexing large instances[](#indexing-large-instances "Permalink")
**警告:**执行异步索引编制将生成很多 Sidekiq 作业. 确保具有[可扩展和高度可用的设置](README.html)或创建[额外的 Sidekiq 进程](../administration/operations/extra_sidekiq_processes.html)以为该任务做准备
1. [Configure your Elasticsearch host and port](#enabling-elasticsearch).
2. 创建空索引:
```
# Omnibus installations
sudo gitlab-rake gitlab:elastic:create_empty_index
# Installations from source
bundle exec rake gitlab:elastic:create_empty_index RAILS_ENV=production
```
3. 如果这是您的 GitLab 实例的重新索引,请清除索引状态:
```
# Omnibus installations
sudo gitlab-rake gitlab:elastic:clear_index_status
# Installations from source
bundle exec rake gitlab:elastic:clear_index_status RAILS_ENV=production
```
4. [Enable **Elasticsearch indexing**](#enabling-elasticsearch).
5. 索引大型 Git 存储库可能需要一段时间. 为了加快此过程,您可以暂时禁用自动刷新和复制. 根据我们的经验,您可以预期索引编制时间将减少 20%. 索引完成后,我们将启用它们. 此步骤是可选的!
```
curl --request PUT localhost:9200/gitlab-production/_settings --header 'Content-Type: application/json' --data '{
"index" : {
"refresh_interval" : "-1",
"number_of_replicas" : 0
} }'
```
6. 索引项目及其相关数据:
```
# Omnibus installations
sudo gitlab-rake gitlab:elastic:index_projects
# Installations from source
bundle exec rake gitlab:elastic:index_projects RAILS_ENV=production
```
这为需要索引的每个项目加入了一个 Sidekiq 作业. 您可以在**管理区域>监视>后台作业>队列选项卡中**查看作业,然后单击`elastic_indexer` ,也可以使用 Rake 任务查询索引状态:
```
# Omnibus installations
sudo gitlab-rake gitlab:elastic:index_projects_status
# Installations from source
bundle exec rake gitlab:elastic:index_projects_status RAILS_ENV=production
Indexing is 65.55% complete (6555/10000 projects)
```
如果要将索引限制为一定范围的项目,可以提供`ID_FROM`和`ID_TO`参数:
```
# Omnibus installations
sudo gitlab-rake gitlab:elastic:index_projects ID_FROM=1001 ID_TO=2000
# Installations from source
bundle exec rake gitlab:elastic:index_projects ID_FROM=1001 ID_TO=2000 RAILS_ENV=production
```
其中`ID_FROM`和`ID_TO`是项目 ID. 这两个参数都是可选的. 上面的示例将索引从 ID `1001`到(并包括)ID `2000`所有项目.
**故障排除:**有时`gitlab:elastic:index_projects`排队的项目索引作业可能会中断. 出于多种原因可能会发生这种情况,但是再次运行索引任务始终是安全的. 它将跳过已经建立索引的存储库.
当索引器在数据库中存储每个已索引存储库的最后一次提交 SHA 时,您可以使用特殊参数`UPDATE_INDEX`运行索引器,它将再次检查每个项目存储库以确保对存储库中的每个提交都进行了索引,这很有用.如果您的索引已过时:
```
# Omnibus installations
sudo gitlab-rake gitlab:elastic:index_projects UPDATE_INDEX=true ID_TO=1000
# Installations from source
bundle exec rake gitlab:elastic:index_projects UPDATE_INDEX=true ID_TO=1000 RAILS_ENV=production
```
您还可以使用`gitlab:elastic:clear_index_status` Rake 任务来强制索引器"忘记"所有进度,因此它将从头开始重试索引过程.
7. 个人代码段与项目无关,需要单独编制索引:
```
# Omnibus installations
sudo gitlab-rake gitlab:elastic:index_snippets
# Installations from source
bundle exec rake gitlab:elastic:index_snippets RAILS_ENV=production
```
8. 在建立索引后再次启用复制和刷新(仅在您之前禁用它的情况下):
```
curl --request PUT localhost:9200/gitlab-production/_settings --header 'Content-Type: application/json' --data '{
"index" : {
"number_of_replicas" : 1,
"refresh_interval" : "1s"
} }'
```
启用上述刷新后,应调用强制合并.
对于 Elasticsearch 6.x,在进行强制合并之前,索引应处于只读模式:
```
curl --request PUT localhost:9200/gitlab-production/_settings --header 'Content-Type: application/json' --data '{
"settings": {
"index.blocks.write": true
} }'
```
然后,启动强制合并:
```
curl --request POST 'localhost:9200/gitlab-production/_forcemerge?max_num_segments=5'
```
此后,如果索引处于只读模式,请切换回读写模式:
```
curl --request PUT localhost:9200/gitlab-production/_settings --header 'Content-Type: application/json' --data '{
"settings": {
"index.blocks.write": false
} }'
```
9. 索引完成后,启用[**Search with Elasticsearch**](#enabling-elasticsearch) .
### Indexing limitations[](#indexing-limitations "Permalink")
对于存储库和摘要文件,GitLab 最多只能索引 1 MiB 的内容,以避免索引超时.
## GitLab Elasticsearch Rake tasks[](#gitlab-elasticsearch-rake-tasks "Permalink")
耙任务可用于:
* [生成并安装](#building-and-installing)索引器.
* [禁用 Elasticsearch](#disabling-elasticsearch)时删除索引.
* [将 GitLab 数据添加](#adding-gitlabs-data-to-the-elasticsearch-index)到索引.
以下是一些可用的 Rake 任务:
| Task | Description |
| --- | --- |
| [`sudo gitlab-rake gitlab:elastic:index`](https://gitlab.com/gitlab-org/gitlab/blob/master/ee/lib/tasks/gitlab/elastic.rake) | 启用 Elasticsearch 索引并运行`gitlab:elastic:create_empty_index` , `gitlab:elastic:clear_index_status` , `gitlab:elastic:index_projects`和`gitlab:elastic:index_snippets` . |
| [`sudo gitlab-rake gitlab:elastic:index_projects`](https://gitlab.com/gitlab-org/gitlab/blob/master/ee/lib/tasks/gitlab/elastic.rake) | 遍历所有项目并在 Sidekiq 作业中排队以在后台对它们进行索引. |
| [`sudo gitlab-rake gitlab:elastic:index_projects_status`](https://gitlab.com/gitlab-org/gitlab/blob/master/ee/lib/tasks/gitlab/elastic.rake) | 确定索引的总体状态. 通过计算索引项目的总数,除以项目总数,然后乘以 100 即可完成. |
| [`sudo gitlab-rake gitlab:elastic:clear_index_status`](https://gitlab.com/gitlab-org/gitlab/blob/master/ee/lib/tasks/gitlab/elastic.rake) | 删除所有项目的 IndexStatus 的所有实例. |
| [`sudo gitlab-rake gitlab:elastic:create_empty_index[<TARGET_NAME>]`](https://gitlab.com/gitlab-org/gitlab/blob/master/ee/lib/tasks/gitlab/elastic.rake) | 生成一个空索引,并为该索引分配一个别名(仅当该索引不存在时). |
| [`sudo gitlab-rake gitlab:elastic:delete_index[<TARGET_NAME>]`](https://gitlab.com/gitlab-org/gitlab/blob/master/ee/lib/tasks/gitlab/elastic.rake) | 删除 Elasticsearch 实例上的 GitLab 索引和别名(如果存在). |
| [`sudo gitlab-rake gitlab:elastic:recreate_index[<TARGET_NAME>]`](https://gitlab.com/gitlab-org/gitlab/blob/master/ee/lib/tasks/gitlab/elastic.rake) | `gitlab:elastic:delete_index[<TARGET_NAME>]`和`gitlab:elastic:create_empty_index[<TARGET_NAME>]`包装器任务. |
| [`sudo gitlab-rake gitlab:elastic:index_snippets`](https://gitlab.com/gitlab-org/gitlab/blob/master/ee/lib/tasks/gitlab/elastic.rake) | 执行 Elasticsearch 导入,对片段数据进行索引. |
| [`sudo gitlab-rake gitlab:elastic:projects_not_indexed`](https://gitlab.com/gitlab-org/gitlab/blob/master/ee/lib/tasks/gitlab/elastic.rake) | 显示未索引的项目. |
| [`sudo gitlab-rake gitlab:elastic:reindex_cluster`](https://gitlab.com/gitlab-org/gitlab/blob/master/ee/lib/tasks/gitlab/elastic.rake) | 安排零停机群集重新索引编制任务. 此功能应与在 GitLab 13.0 之后创建的索引一起使用. |
**注意:** `TARGET_NAME`参数是可选的,如果未设置,它将使用当前`RAILS_ENV`的默认索引/别名.
### Environment variables[](#environment-variables "Permalink")
除了 Rake 任务,还有一些环境变量可用于修改过程:
| 环境变量 | 数据类型 | 它能做什么 |
| --- | --- | --- |
| `UPDATE_INDEX` | Boolean | 告诉索引器覆盖任何现有索引数据(对/错). |
| `ID_TO` | Integer | 告诉索引器仅索引小于或等于该值的项目. |
| `ID_FROM` | Integer | 告诉索引器仅索引大于或等于该值的项目. |
### Indexing a specific project[](#indexing-a-specific-project "Permalink")
因为`ID_TO`和`ID_FROM`环境变量使用`or equal to`比较,所以您可以通过使用两个具有相同项目 ID 号的变量来仅索引一个项目:
```
root@git:~# sudo gitlab-rake gitlab:elastic:index_projects ID_TO=5 ID_FROM=5
Indexing project repositories...I, [2019-03-04T21:27:03.083410 #3384] INFO -- : Indexing GitLab User / test (ID=33)...
I, [2019-03-04T21:27:05.215266 #3384] INFO -- : Indexing GitLab User / test (ID=33) is done!
```
## Elasticsearch index scopes[](#elasticsearch-index-scopes "Permalink")
执行搜索时,GitLab 索引将使用以下范围:
| 范围名称 | What it searches |
| --- | --- |
| `commits` | 提交数据 |
| `projects` | 项目数据(默认) |
| `blobs` | Code |
| `issues` | 发行数据 |
| `merge_requests` | 合并请求数据 |
| `milestones` | 里程碑数据 |
| `notes` | 笔记数据 |
| `snippets` | 片段数据 |
| `wiki_blobs` | 维基内容 |
## Tuning[](#tuning "Permalink")
### Guidance on choosing optimal cluster configuration[](#guidance-on-choosing-optimal-cluster-configuration "Permalink")
有关选择集群配置的基本指导,请参考[Elastic Cloud Calculator](https://cloud.elastic.co/pricing) . 您可以在下面找到更多信息.
* 通常,您将希望至少将一个 2 节点群集配置与一个副本一起使用,这将使您具有弹性. 如果存储使用量快速增长,则可能需要预先计划水平扩展(添加更多节点).
* 不建议将 HDD 存储与搜索群集一起使用,因为它会影响性能. 最好使用 SSD 存储(例如 NVMe 或 SATA SSD 驱动器).
* 您可以使用[GitLab Performance Tool](https://gitlab.com/gitlab-org/quality/performance)来对不同搜索集群大小和配置的搜索性能进行基准测试.
* `Heap size`应设置为不超过物理 RAM 的 50%. 此外,不应将其设置为超过基于零的压缩 oop 的阈值. 确切的阈值会有所不同,但是在大多数系统上 26 GB 是安全的,但在某些系统上也可能高达 30 GB. 有关更多详细信息,请参见[设置堆大小](https://www.elastic.co/guide/en/elasticsearch/reference/current/heap-size.html#heap-size) .
* 每个节点的 CPU(CPU 核心)数通常对应于以下所述`Number of Elasticsearch shards`设置.
* 一个好的指导方针是确保每个节点的已配置 GB 堆中的碎片数保持在 20 个以下. 因此,具有 30GB 堆的节点最多应具有 600 个分片,但是越低于此限制,您可以使其越好. 通常,这将有助于群集保持良好的运行状况.
* 小碎片会导致小段,这会增加开销. 旨在将平均分片大小保持在至少几 GB 到几十 GB 之间. 另一个考虑因素是文档数量,您应该针对此简单的分片`number of expected documents / 5M +1`公式: `number of expected documents / 5M +1` .
* `refresh_interval`是每个索引设置. 如果您不需要实时数据,则可能需要将其从默认的`1s`调整为更大的值. 这将改变您看到新结果的时间. 如果这对您很重要,则应使其尽可能接近默认值.
* 如果您有大量繁重的索引操作,则可能需要将[`indices.memory.index_buffer_size`](https://www.elastic.co/guide/en/elasticsearch/reference/current/indexing-buffer.html)提高到 30%或 40%.
### Elasticsearch integration settings guidance[](#elasticsearch-integration-settings-guidance "Permalink")
* The `Number of Elasticsearch shards` setting usually corresponds with the number of CPUs available in your cluster. For example, if you have a 3-node cluster with 4 cores each, this means you will benefit from having at least 3*4=12 shards in the cluster. Please note, it’s only possible to change the shards number by using [Split index API](https://www.elastic.co/guide/en/elasticsearch/reference/current/indices-split-index.html) or by reindexing to a different index with a changed number of shards.
* `Number of Elasticsearch replicas`设置在大多数情况下应等于`1` (每个分片将具有 1 个副本). 不建议使用`0` ,因为丢失一个节点会破坏索引.
### Deleted documents[](#deleted-documents "Permalink")
每当对索引的 GitLab 对象进行更改或删除时(合并请求描述发生更改,从存储库中的 master 分支中删除文件,删除项目等),索引中的文档也会被删除. 但是,由于这些是"软"删除,因此"已删除文档"的总数增加了,因此浪费了空间. Elasticsearch 进行段的智能合并,以删除这些已删除的文档. 但是,根据 GitLab 安装中活动的数量和类型,可能会在索引中看到多达 50%的浪费空间.
通常,我们建议仅使用默认设置让 Elasticsearch 自动合并和回收空间. 在[Lucene 的"已删除文档处理"中](https://www.elastic.co/blog/lucenes-handling-of-deleted-documents "Lucene 处理已删除文件的方法") , *"总的来说,除了减小最大段大小外,最好将 Lucene 的默认值保持原样,并且不要对回收删除时感到担心."*
但是,某些较大的安装可能希望调整合并策略设置:
* 考虑将`index.merge.policy.max_merged_segment`大小从默认的 5 GB 减小到 2 GB 或 3 GB. 仅当段中至少有 50%的删除时才进行合并. 较小的段大小将允许合并更频繁地发生.
```
curl --request PUT localhost:9200/gitlab-production/_settings ---header 'Content-Type: application/json' --data '{
"index" : {
"merge.policy.max_merged_segment": "2gb"
}
}'
```
* 您还可以调整`index.merge.policy.reclaim_deletes_weight` ,它控制如何积极地定位删除. 但是,这可能会导致代价高昂的合并决策,因此,除非您了解取舍,否则我们建议不要更改此决策.
```
curl --request PUT localhost:9200/gitlab-production/_settings ---header 'Content-Type: application/json' --data '{
"index" : {
"merge.policy.reclaim_deletes_weight": "3.0"
}
}'
```
* 不要[强制合并](https://www.elastic.co/guide/en/elasticsearch/reference/current/indices-forcemerge.html "强制合并")以删除已删除的文档. [文档中](https://www.elastic.co/guide/en/elasticsearch/reference/current/indices-forcemerge.html "强制合并")的警告指出,这可能导致很大的网段,这些网段可能永远都无法收回,并且还可能导致严重的性能或可用性问题.
## Troubleshooting[](#troubleshooting "Permalink")
### Common issues[](#common-issues "Permalink")
以下是一些常见的陷阱以及如何克服它们:
* **如何验证我的 GitLab 实例正在使用 Elasticsearch?**
最简单的方法是通过运行以下`sudo gitlab-rails console`通过 rails 控制台( `sudo gitlab-rails console` ):
```
u = User.find_by_username('your-username')
s = SearchService.new(u, {:search => 'search_term'})
pp s.search_objects.class.name
```
如果看到`"ActiveRecord::Relation"` ,则说明您**未**使用 Elasticsearch.
If you see `"Kaminari::PaginatableArray"` you are using Elasticsearch.
**注意:**以上说明仅用于在索引所有名称空间时验证 GitLab 是否正在使用 Elasticsearch. 这仅用于仅索引[命名空间子集的](#limiting-namespaces-and-projects)方案.
* **我更新了 GitLab,现在找不到任何东西**
我们会不断更新索引策略,并致力于支持新版本的 Elasticsearch. 进行索引更改时,更新 GitLab 后可能需要重新编制[索引](#adding-gitlabs-data-to-the-elasticsearch-index) .
* **我索引了所有存储库,但找不到任何内容**
确保[如上所述对](#adding-gitlabs-data-to-the-elasticsearch-index)所有数据库数据建立索引.
除此之外,通过[Elasticsearch Search API](https://www.elastic.co/guide/en/elasticsearch/reference/current/search-search.html)检查数据是否在 Elasticsearch 端显示.
如果通过[Elasticsearch Search API](https://www.elastic.co/guide/en/elasticsearch/reference/current/search-search.html)显示,请检查是否通过 rails 控制台( `sudo gitlab-rails console` )显示:
```
u = User.find_by_username('your-username')
s = SearchService.new(u, {:search => 'search_term', :scope => 'blobs'})
pp s.search_objects.to_a
```
**注意:**以上说明不适用于仅索引[命名空间子集的情况](#limiting-namespaces-and-projects) .
有关搜索特定数据类型的更多信息,请参见[Elasticsearch 索引范围](#elasticsearch-index-scopes) .
* **我索引了所有存储库,但随后切换了 Elasticsearch 服务器,现在什么也找不到**
您将需要重新运行所有 Rake 任务,以重新索引数据库,存储库和 Wiki.
* **索引过程需要很长时间**
GitLab 实例中存在的数据越多,索引过程花费的时间就越长.
* **有些项目未编入索引,但我们不知道哪些项目**
您可以运行`sudo gitlab-rake gitlab:elastic:projects_not_indexed`以显示未建立索引的项目.
* **"如果未配置父字段,则无法指定父"**
如果您在 GitLab 8.12 之前启用了 Elasticsearch 并且尚未重建索引,则在许多不同情况下,您将获得异常:
```
Elasticsearch::Transport::Transport::Errors::BadRequest([400] {
"error": {
"root_cause": [{
"type": "illegal_argument_exception",
"reason": "Can't specify parent if no parent field has been configured"
}],
"type": "illegal_argument_exception",
"reason": "Can't specify parent if no parent field has been configured"
},
"status": 400
}):
```
这是因为我们在 GitLab 8.12 中更改了索引映射,并且应该删除旧索引并再次从头开始构建,请参阅[8-11-to-8-12 更新指南中的](https://gitlab.com/gitlab-org/gitlab/blob/master/doc/update/8.11-to-8.12.md#11-elasticsearch-index-update-if-you-currently-use-elasticsearch)详细信息.
* Exception `Elasticsearch::Transport::Transport::Errors::BadRequest`
如果您有此例外情况(就像上面的情况一样,但实际消息有所不同),请检查您是否具有正确的 Elasticsearch 版本并满足其他[要求](#system-requirements) . 还有一种简单的方法可以使用`sudo gitlab-rake gitlab:check`命令自动检查它.
* Exception `Elasticsearch::Transport::Transport::Errors::RequestEntityTooLarge`
```
[413] {"Message":"Request size exceeded 10485760 bytes"}
```
当您将 Elasticsearch 集群配置为拒绝某个大小以上的请求(在这种情况下为 10MiB)时,会看到此异常. 这相当于`http.max_content_length`在设置`elasticsearch.yml` . 将其增大到更大的大小,然后重新启动您的 Elasticsearch 集群.
AWS 根据基础实例的大小对此设置有[固定的限制](https://docs.aws.amazon.com/elasticsearch-service/latest/developerguide/aes-limits.html) (" HTTP 请求有效负载的最大大小").
* **即使一切似乎都正常运行,我的单节点 Elasticsearch 集群状态也从未从`yellow`变为`green`**
**对于单节点 Elasticsearch 集群,功能集群的运行状况为黄色** (永远不会为绿色),因为已分配了主要分片,但副本却无法存在,因为没有其他节点可为 Elasticsearch 分配副本. 如果您使用的是[Amazon Elasticsearch](https://docs.aws.amazon.com/elasticsearch-service/latest/developerguide/aes-handling-errors.html#aes-handling-errors-yellow-cluster-status) Service,这也适用.
**警告:**建议不要将副本数设置为`0` (GitLab Elasticsearch 集成菜单中不允许这样做). 如果您计划添加更多的 Elasticsearch 节点(总共超过 1 个 Elasticsearch 节点),则副本数将需要设置为大于`0`的整数值. 否则,将导致缺乏冗余(丢失一个节点将破坏索引).
如果您**对单节点 Elasticsearch 集群有绿色状态**的**严格要求** ,请确保您了解上一段概述的风险,然后只需运行以下查询将副本数设置为`0` (集群将不会再尝试创建任何碎片副本):
```
curl --request PUT localhost:9200/gitlab-production/_settings --header 'Content-Type: application/json' --data '{
"index" : {
"number_of_replicas" : 0
}
}'
```
* **我正在`health check timeout: no Elasticsearch node available`索引编制过程中 Sidekiq 中`health check timeout: no Elasticsearch node available`错误**
```
Gitlab::Elastic::Indexer::Error: time="2020-01-23T09:13:00Z" level=fatal msg="health check timeout: no Elasticsearch node available"
```
您可能没有在 Elasticsearch 集成菜单的**" URL"**字段中使用`http://`或`https://`作为值的一部分. 请确保在此字段中使用`http://`或`https://`作为我们使用的[Go](https://github.com/olivere/elastic)的[Elasticsearch 客户端,](https://github.com/olivere/elastic) [需要将该 URL 的前缀接受为有效](https://github.com/olivere/elastic/commit/a80af35aa41856dc2c986204e2b64eab81ccac3a) . 更正了网址格式后,请删除索引(通过[专用的 Rake 任务](#gitlab-elasticsearch-rake-tasks) ),然后[为实例的内容重新编制索引](#adding-gitlabs-data-to-the-elasticsearch-index) .
### Low-level troubleshooting[](#low-level-troubleshooting "Permalink")
当您遇到其他问题(包括性能不佳)时[,](../administration/troubleshooting/elasticsearch.html)可以使用[结构化的低级故障排除文档](../administration/troubleshooting/elasticsearch.html) .
### Known Issues[](#known-issues "Permalink")
* **[Elasticsearch `code_analyzer` doesn’t account for all code cases](https://gitlab.com/gitlab-org/gitlab/-/issues/10693)**
正在评估`code_analyzer`模式和过滤器配置以进行改进. 我们注意到由于我们的模式和过滤器配置, [一些边缘情况](https://gitlab.com/gitlab-org/gitlab/-/issues/10693#note_158382332)未返回预期的搜索结果.
在[问题 29443](https://gitlab.com/gitlab-org/gitlab/-/issues/29443)中,讨论了`code_analyzer`模式和过滤器的改进策略.
### Reverting to basic search[](#reverting-to-basic-search "Permalink")
有时,您的 Elasticsearch 索引数据可能存在问题,因此,如果没有搜索结果并且假定该范围内支持基本搜索,则 GitLab 将允许您恢复为"基本搜索". 这种"基本搜索"的行为就像您根本没有为实例启用 Elasticsearch 并使用其他数据源(即 PostgreSQL 数据和 Git 数据)进行搜索一样.
- GitLab Docs
- Installation
- Requirements
- GitLab cloud native Helm Chart
- Install GitLab with Docker
- Installation from source
- Install GitLab on Microsoft Azure
- Installing GitLab on Google Cloud Platform
- Installing GitLab on Amazon Web Services (AWS)
- Analytics
- Code Review Analytics
- Productivity Analytics
- Value Stream Analytics
- Kubernetes clusters
- Adding and removing Kubernetes clusters
- Adding EKS clusters
- Adding GKE clusters
- Group-level Kubernetes clusters
- Instance-level Kubernetes clusters
- Canary Deployments
- Cluster Environments
- Deploy Boards
- GitLab Managed Apps
- Crossplane configuration
- Cluster management project (alpha)
- Kubernetes Logs
- Runbooks
- Serverless
- Deploying AWS Lambda function using GitLab CI/CD
- Securing your deployed applications
- Groups
- Contribution Analytics
- Custom group-level project templates
- Epics
- Manage epics
- Group Import/Export
- Insights
- Issues Analytics
- Iterations
- Public access
- SAML SSO for GitLab.com groups
- SCIM provisioning using SAML SSO for GitLab.com groups
- Subgroups
- Roadmap
- Projects
- GitLab Secure
- Security Configuration
- Container Scanning
- Dependency Scanning
- Dependency List
- Static Application Security Testing (SAST)
- Secret Detection
- Dynamic Application Security Testing (DAST)
- GitLab Security Dashboard
- Offline environments
- Standalone Vulnerability pages
- Security scanner integration
- Badges
- Bulk editing issues and merge requests at the project level
- Code Owners
- Compliance
- License Compliance
- Compliance Dashboard
- Create a project
- Description templates
- Deploy Keys
- Deploy Tokens
- File finder
- Project integrations
- Integrations
- Atlassian Bamboo CI Service
- Bugzilla Service
- Custom Issue Tracker service
- Discord Notifications service
- Enabling emails on push
- GitHub project integration
- Hangouts Chat service
- Atlassian HipChat
- Irker IRC Gateway
- GitLab Jira integration
- Mattermost Notifications Service
- Mattermost slash commands
- Microsoft Teams service
- Mock CI Service
- Prometheus integration
- Redmine Service
- Slack Notifications Service
- Slack slash commands
- GitLab Slack application
- Webhooks
- YouTrack Service
- Insights
- Issues
- Crosslinking Issues
- Design Management
- Confidential issues
- Due dates
- Issue Boards
- Issue Data and Actions
- Labels
- Managing issues
- Milestones
- Multiple Assignees for Issues
- Related issues
- Service Desk
- Sorting and ordering issue lists
- Issue weight
- Associate a Zoom meeting with an issue
- Merge requests
- Allow collaboration on merge requests across forks
- Merge Request Approvals
- Browser Performance Testing
- How to create a merge request
- Cherry-pick changes
- Code Quality
- Load Performance Testing
- Merge Request dependencies
- Fast-forward merge requests
- Merge when pipeline succeeds
- Merge request conflict resolution
- Reverting changes
- Reviewing and managing merge requests
- Squash and merge
- Merge requests versions
- Draft merge requests
- Members of a project
- Migrating projects to a GitLab instance
- Import your project from Bitbucket Cloud to GitLab
- Import your project from Bitbucket Server to GitLab
- Migrating from ClearCase
- Migrating from CVS
- Import your project from FogBugz to GitLab
- Gemnasium
- Import your project from GitHub to GitLab
- Project importing from GitLab.com to your private GitLab instance
- Import your project from Gitea to GitLab
- Import your Jira project issues to GitLab
- Migrating from Perforce Helix
- Import Phabricator tasks into a GitLab project
- Import multiple repositories by uploading a manifest file
- Import project from repo by URL
- Migrating from SVN to GitLab
- Migrating from TFVC to Git
- Push Options
- Releases
- Repository
- Branches
- Git Attributes
- File Locking
- Git file blame
- Git file history
- Repository mirroring
- Protected branches
- Protected tags
- Push Rules
- Reduce repository size
- Signing commits with GPG
- Syntax Highlighting
- GitLab Web Editor
- Web IDE
- Requirements Management
- Project settings
- Project import/export
- Project access tokens (Alpha)
- Share Projects with other Groups
- Snippets
- Static Site Editor
- Wiki
- Project operations
- Monitor metrics for your CI/CD environment
- Set up alerts for Prometheus metrics
- Embedding metric charts within GitLab-flavored Markdown
- Embedding Grafana charts
- Using the Metrics Dashboard
- Dashboard YAML properties
- Metrics dashboard settings
- Panel types for dashboards
- Using Variables
- Templating variables for metrics dashboards
- Prometheus Metrics library
- Monitoring AWS Resources
- Monitoring HAProxy
- Monitoring Kubernetes
- Monitoring NGINX
- Monitoring NGINX Ingress Controller
- Monitoring NGINX Ingress Controller with VTS metrics
- Alert Management
- Error Tracking
- Tracing
- Incident Management
- GitLab Status Page
- Feature Flags
- GitLab CI/CD
- GitLab CI/CD pipeline configuration reference
- GitLab CI/CD include examples
- Introduction to CI/CD with GitLab
- Getting started with GitLab CI/CD
- How to enable or disable GitLab CI/CD
- Using SSH keys with GitLab CI/CD
- Migrating from CircleCI
- Migrating from Jenkins
- Auto DevOps
- Getting started with Auto DevOps
- Requirements for Auto DevOps
- Customizing Auto DevOps
- Stages of Auto DevOps
- Upgrading PostgreSQL for Auto DevOps
- Cache dependencies in GitLab CI/CD
- GitLab ChatOps
- Cloud deployment
- Docker integration
- Building Docker images with GitLab CI/CD
- Using Docker images
- Building images with kaniko and GitLab CI/CD
- GitLab CI/CD environment variables
- Predefined environment variables reference
- Where variables can be used
- Deprecated GitLab CI/CD variables
- Environments and deployments
- Protected Environments
- GitLab CI/CD Examples
- Test a Clojure application with GitLab CI/CD
- Using Dpl as deployment tool
- Testing a Phoenix application with GitLab CI/CD
- End-to-end testing with GitLab CI/CD and WebdriverIO
- DevOps and Game Dev with GitLab CI/CD
- Deploy a Spring Boot application to Cloud Foundry with GitLab CI/CD
- How to deploy Maven projects to Artifactory with GitLab CI/CD
- Testing PHP projects
- Running Composer and NPM scripts with deployment via SCP in GitLab CI/CD
- Test and deploy Laravel applications with GitLab CI/CD and Envoy
- Test and deploy a Python application with GitLab CI/CD
- Test and deploy a Ruby application with GitLab CI/CD
- Test and deploy a Scala application to Heroku
- GitLab CI/CD for external repositories
- Using GitLab CI/CD with a Bitbucket Cloud repository
- Using GitLab CI/CD with a GitHub repository
- GitLab Pages
- GitLab Pages
- GitLab Pages domain names, URLs, and baseurls
- Create a GitLab Pages website from scratch
- Custom domains and SSL/TLS Certificates
- GitLab Pages integration with Let's Encrypt
- GitLab Pages Access Control
- Exploring GitLab Pages
- Incremental Rollouts with GitLab CI/CD
- Interactive Web Terminals
- Optimizing GitLab for large repositories
- Metrics Reports
- CI/CD pipelines
- Pipeline Architecture
- Directed Acyclic Graph
- Multi-project pipelines
- Parent-child pipelines
- Pipelines for Merge Requests
- Pipelines for Merged Results
- Merge Trains
- Job artifacts
- Pipeline schedules
- Pipeline settings
- Triggering pipelines through the API
- Review Apps
- Configuring GitLab Runners
- GitLab CI services examples
- Using MySQL
- Using PostgreSQL
- Using Redis
- Troubleshooting CI/CD
- GitLab Package Registry
- GitLab Container Registry
- Dependency Proxy
- GitLab Composer Repository
- GitLab Conan Repository
- GitLab Maven Repository
- GitLab NPM Registry
- GitLab NuGet Repository
- GitLab PyPi Repository
- API Docs
- API resources
- .gitignore API
- GitLab CI YMLs API
- Group and project access requests API
- Appearance API
- Applications API
- Audit Events API
- Avatar API
- Award Emoji API
- Project badges API
- Group badges API
- Branches API
- Broadcast Messages API
- Project clusters API
- Group clusters API
- Instance clusters API
- Commits API
- Container Registry API
- Custom Attributes API
- Dashboard annotations API
- Dependencies API
- Deploy Keys API
- Deployments API
- Discussions API
- Dockerfiles API
- Environments API
- Epics API
- Events
- Feature Flags API
- Feature flag user lists API
- Freeze Periods API
- Geo Nodes API
- Group Activity Analytics API
- Groups API
- Import API
- Issue Boards API
- Group Issue Boards API
- Issues API
- Epic Issues API
- Issues Statistics API
- Jobs API
- Keys API
- Labels API
- Group Labels API
- License
- Licenses API
- Issue links API
- Epic Links API
- Managed Licenses API
- Markdown API
- Group and project members API
- Merge request approvals API
- Merge requests API
- Project milestones API
- Group milestones API
- Namespaces API
- Notes API
- Notification settings API
- Packages API
- Pages domains API
- Pipeline schedules API
- Pipeline triggers API
- Pipelines API
- Project Aliases API
- Project import/export API
- Project repository storage moves API
- Project statistics API
- Project templates API
- Projects API
- Protected branches API
- Protected tags API
- Releases API
- Release links API
- Repositories API
- Repository files API
- Repository submodules API
- Resource label events API
- Resource milestone events API
- Resource weight events API
- Runners API
- SCIM API
- Search API
- Services API
- Application settings API
- Sidekiq Metrics API
- Snippets API
- Project snippets
- Application statistics API
- Suggest Changes API
- System hooks API
- Tags API
- Todos API
- Users API
- Project-level Variables API
- Group-level Variables API
- Version API
- Vulnerabilities API
- Vulnerability Findings API
- Wikis API
- GraphQL API
- Getting started with GitLab GraphQL API
- GraphQL API Resources
- API V3 to API V4
- Validate the .gitlab-ci.yml (API)
- User Docs
- Abuse reports
- User account
- Active sessions
- Deleting a User account
- Permissions
- Personal access tokens
- Profile preferences
- Threads
- GitLab and SSH keys
- GitLab integrations
- Git
- GitLab.com settings
- Infrastructure as code with Terraform and GitLab
- GitLab keyboard shortcuts
- GitLab Markdown
- AsciiDoc
- GitLab Notification Emails
- GitLab Quick Actions
- Autocomplete characters
- Reserved project and group names
- Search through GitLab
- Advanced Global Search
- Advanced Syntax Search
- Time Tracking
- GitLab To-Do List
- Administrator Docs
- Reference architectures
- Reference architecture: up to 1,000 users
- Reference architecture: up to 2,000 users
- Reference architecture: up to 3,000 users
- Reference architecture: up to 5,000 users
- Reference architecture: up to 10,000 users
- Reference architecture: up to 25,000 users
- Reference architecture: up to 50,000 users
- Troubleshooting a reference architecture set up
- Working with the bundled Consul service
- Configuring PostgreSQL for scaling
- Configuring GitLab application (Rails)
- Load Balancer for multi-node GitLab
- Configuring a Monitoring node for Scaling and High Availability
- NFS
- Working with the bundled PgBouncer service
- Configuring Redis for scaling
- Configuring Sidekiq
- Admin Area settings
- Continuous Integration and Deployment Admin settings
- Custom instance-level project templates
- Diff limits administration
- Enable and disable GitLab features deployed behind feature flags
- Geo nodes Admin Area
- GitLab Pages administration
- Health Check
- Job logs
- Labels administration
- Log system
- PlantUML & GitLab
- Repository checks
- Repository storage paths
- Repository storage types
- Account and limit settings
- Service templates
- System hooks
- Changing your time zone
- Uploads administration
- Abuse reports
- Activating and deactivating users
- Audit Events
- Blocking and unblocking users
- Broadcast Messages
- Elasticsearch integration
- Gitaly
- Gitaly Cluster
- Gitaly reference
- Monitoring GitLab
- Monitoring GitLab with Prometheus
- Performance Bar
- Usage statistics
- Object Storage
- Performing Operations in GitLab
- Cleaning up stale Redis sessions
- Fast lookup of authorized SSH keys in the database
- Filesystem Performance Benchmarking
- Moving repositories managed by GitLab
- Run multiple Sidekiq processes
- Sidekiq MemoryKiller
- Switching to Puma
- Understanding Unicorn and unicorn-worker-killer
- User lookup via OpenSSH's AuthorizedPrincipalsCommand
- GitLab Package Registry administration
- GitLab Container Registry administration
- Replication (Geo)
- Geo database replication
- Geo with external PostgreSQL instances
- Geo configuration
- Using a Geo Server
- Updating the Geo nodes
- Geo with Object storage
- Docker Registry for a secondary node
- Geo for multiple nodes
- Geo security review (Q&A)
- Location-aware Git remote URL with AWS Route53
- Tuning Geo
- Removing secondary Geo nodes
- Geo data types support
- Geo Frequently Asked Questions
- Geo Troubleshooting
- Geo validation tests
- Disaster Recovery (Geo)
- Disaster recovery for planned failover
- Bring a demoted primary node back online
- Automatic background verification
- Rake tasks
- Back up and restore GitLab
- Clean up
- Namespaces
- Maintenance Rake tasks
- Geo Rake Tasks
- GitHub import
- Import bare repositories
- Integrity check Rake task
- LDAP Rake tasks
- Listing repository directories
- Praefect Rake tasks
- Project import/export administration
- Repository storage Rake tasks
- Generate sample Prometheus data
- Uploads migrate Rake tasks
- Uploads sanitize Rake tasks
- User management
- Webhooks administration
- X.509 signatures
- Server hooks
- Static objects external storage
- Updating GitLab
- GitLab release and maintenance policy
- Security
- Password Storage
- Custom password length limits
- Restrict allowed SSH key technologies and minimum length
- Rate limits
- Webhooks and insecure internal web services
- Information exclusivity
- How to reset your root password
- How to unlock a locked user from the command line
- User File Uploads
- How we manage the TLS protocol CRIME vulnerability
- User email confirmation at sign-up
- Security of running jobs
- Proxying assets
- CI/CD Environment Variables
- Contributor and Development Docs
- Contribute to GitLab
- Community members & roles
- Implement design & UI elements
- Issues workflow
- Merge requests workflow
- Code Review Guidelines
- Style guides
- GitLab Architecture Overview
- CI/CD development documentation
- Database guides
- Database Review Guidelines
- Database Review Guidelines
- Migration Style Guide
- What requires downtime?
- Understanding EXPLAIN plans
- Rake tasks for developers
- Mass inserting Rails models
- GitLab Documentation guidelines
- Documentation Style Guide
- Documentation structure and template
- Documentation process
- Documentation site architecture
- Global navigation
- GitLab Docs monthly release process
- Telemetry Guide
- Usage Ping Guide
- Snowplow Guide
- Experiment Guide
- Feature flags in development of GitLab
- Feature flags process
- Developing with feature flags
- Feature flag controls
- Document features deployed behind feature flags
- Frontend Development Guidelines
- Accessibility & Readability
- Ajax
- Architecture
- Axios
- Design Patterns
- Frontend Development Process
- DropLab
- Emojis
- Filter
- Frontend FAQ
- GraphQL
- Icons and SVG Illustrations
- InputSetter
- Performance
- Principles
- Security
- Tooling
- Vuex
- Vue
- Geo (development)
- Geo self-service framework (alpha)
- Gitaly developers guide
- GitLab development style guides
- API style guide
- Go standards and style guidelines
- GraphQL API style guide
- Guidelines for shell commands in the GitLab codebase
- HTML style guide
- JavaScript style guide
- Migration Style Guide
- Newlines style guide
- Python Development Guidelines
- SCSS style guide
- Shell scripting standards and style guidelines
- Sidekiq debugging
- Sidekiq Style Guide
- SQL Query Guidelines
- Vue.js style guide
- Instrumenting Ruby code
- Testing standards and style guidelines
- Flaky tests
- Frontend testing standards and style guidelines
- GitLab tests in the Continuous Integration (CI) context
- Review Apps
- Smoke Tests
- Testing best practices
- Testing levels
- Testing Rails migrations at GitLab
- Testing Rake tasks
- End-to-end Testing
- Beginner's guide to writing end-to-end tests
- End-to-end testing Best Practices
- Dynamic Element Validation
- Flows in GitLab QA
- Page objects in GitLab QA
- Resource class in GitLab QA
- Style guide for writing end-to-end tests
- Testing with feature flags
- Translate GitLab to your language
- Internationalization for GitLab
- Translating GitLab
- Proofread Translations
- Merging translations from CrowdIn
- Value Stream Analytics development guide
- GitLab subscription
- Activate GitLab EE with a license