
# Qt5 工具包简介
> 原文: [http://zetcode.com/gui/qt5/introduction/](http://zetcode.com/gui/qt5/introduction/)
在 Qt5 教程的这一部分中,我们将介绍 Qt5 库。 我们将安装 Qt5 库并创建我们的第一个小型 Qt5 应用。
Qt 最初是由挪威软件公司 Trolltech 开发的。 2008 年,该公司被诺基亚收购。 2012 年 8 月,一家芬兰开发公司 Digia 从诺基亚那里收购了 Qt 软件技术。 同时,创建了一个 Qt 项目,其中开源 Qt 的开发继续进行。 开源 Qt 工具包的网站可以在 [qt.io](http://www.qt.io) 中找到。 目前,由 Digia 的子公司 Qt 公司和开放源代码治理下的 Qt 项目(包括个人开发者和公司)共同开发 Qt。
## Qt
Qt 是一个跨平台的应用开发框架。 使用 Qt 开发的一些知名应用是 KDE,Opera,Google Earth,Skype,VLC,Maya 或 Mathematica。 Qt 于 1995 年 5 月首次公开发布。它具有双重许可。 它可以用于创建开源应用以及商业应用。 Qt 工具箱是一个非常强大的工具箱。 它在开源社区中已经建立。 全世界有成千上万的开源开发者在使用 Qt。
## 下载并解压缩
我们转到 [download.qt.io/official_releases/qt/](http://download.qt.io/official_releases/qt/) 页面。 (由于下载链接过去经常更改,因此您可能需要用 Google 搜索当前链接。)我们选择最新的 Qt 5.x 来源。 在创建本教程时,最新的数据是 Qt 5.5.1。 接下来,我们将从源代码安装 Qt。
```cpp
$ ls qt-everywhere-opensource-src-5.5.1.tar.gz
qt-everywhere-opensource-src-5.5.1.tar.gz
```
从下载页面,我们下载 Qt5 源。 我们使用 TAR 文件。 (我们为自己省了一些麻烦。ZIP 文件具有 Windows 行尾。)
```cpp
$ tar -xzvf qt-everywhere-opensource-src-5.5.1.tar.gz
```
该命令会将所有文件解压缩到目录`qt-everywhere-opensource-src-5.5.1/`。
```cpp
$ du -hs qt-everywhere-opensource-src-5.5.1
2.0G qt-everywhere-opensource-src-5.5.1
```
现在目录的大小为 2G。
```cpp
$ cd qt-everywhere-opensource-src-5.5.1/
```
我们转到创建的目录。 在`README`文件中,有安装说明。 安装简单明了,但需要花费大量时间。
## 从源安装
在开始构建 Qt5 之前,我们可能需要安装一些其他库。 例如,如果要从 Qt 连接到 MySQL,则需要在系统上安装`libmysqld-dev`。
我们以经典方式安装库。 在 Unix 系统上,软件的安装分为三个步骤。
* 配置
* 构建
* 安装
```cpp
$ ./configure -prefix /usr/local/qt5
Which edition of Qt do you want to use ?
Type 'c' if you want to use the Commercial Edition.
Type 'o' if you want to use the Open Source Edition.
```
首先,我们运行配置脚本。 该脚本将询问我们是否需要 Qt5 库的商业版或开源版。 该脚本将为我们的机器类型配置库。 默认情况下,Qt 将安装在`/usr/local/Qt-5.5.1/`目录中。 这可以通过配置脚本的`-prefix`参数进行更改。 我们将库安装到`/usr/local/qt5/`目录中。 请注意,此处的安装字有两个含义。 这是整个过程,包括所有三个步骤。 这也意味着“将文件移动到特定目录”,这是最后第三步。
```cpp
This is the Open Source Edition.
You are licensed to use this software under the terms of
the Lesser GNU General Public License (LGPL) versions 2.1.
You are also licensed to use this software under the terms of
the GNU General Public License (GPL) versions 3.
Type '3' to view the GNU General Public License version 3.
Type 'L' to view the Lesser GNU General Public License version 2.1.
Type 'yes' to accept this license offer.
Type 'no' to decline this license offer.
Do you accept the terms of either license? yes
```
确认许可协议。
```cpp
Running configuration tests...
The test for linking against libxcb and support libraries failed!
You might need to install dependency packages, or pass -qt-xcb.
```
如果脚本失败并显示上述消息,则我们需要安装一些其他 xcb 库,或者使用`-qt-xcb`选项再次运行该脚本。
```cpp
$ ./configure -prefix /usr/local/qt5 -qt-xcb
```
使用`-qt-xcb`选项,可以构建某些库,而不是针对系统库进行链接。
```cpp
...
Qt modules and options:
Qt D-Bus ............... yes (loading dbus-1 at runtime)
Qt Concurrent .......... yes
Qt GUI ................. yes
Qt Widgets ............. yes
Large File ............. yes
QML debugging .......... yes
Use system proxies ..... no
...
SQL drivers:
DB2 .................. no
InterBase ............ no
MySQL ................ yes (plugin)
OCI .................. no
ODBC ................. no
PostgreSQL ........... yes (plugin)
SQLite 2 ............. no
SQLite ............... yes (plugin, using bundled copy)
TDS .................. no
tslib .................. no
udev ................... yes
xkbcommon-x11........... yes (bundled copy, XKB config root: /usr/share/X11/xkb)
xkbcommon-evdev......... yes
zlib ................... yes (system library)
Qt is now configured for building. Just run 'make'.
Once everything is built, you must run 'make install'.
Qt will be installed into /usr/local/qt5
Prior to reconfiguration, make sure you remove any leftovers from
the previous build.
```
这是配置脚本的部分输出。 输出告诉我们准备构建哪些组件。 例如,将创建用于 MySQL 和 PostgreSQL 的 SQL 驱动程序,而不用于 DB2 或 InterBase。
```cpp
$ make
```
我们使用`make`命令开始构建过程。 Qt 工具包的构建可能要花费几个小时。 这取决于处理器的能力。
最后一步是安装文件或将文件移动到目录中。
```cpp
$ sudo make install
```
此命令完成安装过程。 该库现在安装在`/usr/local/qt5/`目录中。
我们要做的最后一件事是将 Qt5 路径添加到`PATH`系统变量。 bash 用户需要编辑`.profile`文件或`.bashrc`文件。
```cpp
$ PATH=/usr/local/qt5/bin:$PATH
$ export PATH
```
我们已经将 Qt5 库的 bin 目录的路径添加到`PATH`环境变量。 再次登录后,更改将处于活动状态。
## 从包安装
从包安装 Qt 更加容易。 Linux 包通常不包含最新的 Qt 版本。
```cpp
$ sudo apt-get install qt5-default
```
上面的命令在基于 Debian 的 Linux 上安装 Qt5。
## 版本
我们的第一个程序打印 Qt5 库的版本。
`version.cpp`
```cpp
#include <QtCore>
#include <iostream>
int main() {
std::cout << "Qt version: " << qVersion() << std::endl;
}
```
`qVersion()`函数在运行时以字符串形式返回 Qt 的版本号。
```cpp
$ g++ -o version version.cpp -I/usr/local/qt5/include/QtCore -I/usr/local/qt5/include -L/usr/local/qt5/lib -lQt5Core -fPIC
```
上面的命令将编译示例。 请注意,您的 Qt5 库可能安装在其他位置。
```cpp
$ ./version
Qt version: 5.5.1
```
本教程中使用的 Qt5 库的版本是 5.5.1。
## 测试一个小的 GUI 示例
最后,我们编写一个小应用。 该应用包含一个普通窗口。
`simple.cpp`
```cpp
#include <QApplication>
#include <QWidget>
int main(int argc, char *argv[]) {
QApplication app(argc, argv);
QWidget window;
window.resize(250, 150);
window.setWindowTitle("Simple example");
window.show();
return app.exec();
}
```
要构建此示例,我们使用`qmake`工具。
```cpp
$ qmake -project
```
该命令创建一个扩展名为`.pro`的项目文件。
`simple.pro`
```cpp
######################################################################
# Automatically generated by qmake (3.0) Fri Oct 30 17:11:00 2015
######################################################################
TEMPLATE = app
TARGET = simple
INCLUDEPATH += .
# Input
SOURCES += simple.cpp
QT += widgets
```
默认情况下,项目中不包括 Qt Widgets 模块。 因此,我们将模块添加到文件的末尾。
```cpp
$ qmake
$ make
```
我们使用上述命令构建程序。 `qmake`创建一个`Makefile`,`make`命令生成该程序。
如果 Qt5 安装目录不是`PATH`变量的一部分,我们可以提供`qmake`工具的完整路径。
```cpp
$ /usr/local/qt5/bin/qmake -project
$ /usr/local/qt5/bin/qmake
$ make
```
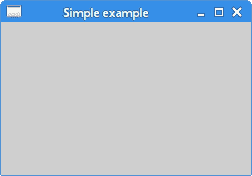
图:简单 example
本章是 Qt5 库的简介。
- ZetCode 数据库教程
- MySQL 教程
- MySQL 简介
- MySQL 安装
- MySQL 的第一步
- MySQL 快速教程
- MySQL 存储引擎
- MySQL 数据类型
- 在 MySQL 中创建,更改和删除表
- MySQL 表达式
- 在 MySQL 中插入,更新和删除数据
- MySQL 中的SELECT语句
- MySQL 子查询
- MySQL 约束
- 在 MySQL 中导出和导入数据
- 在 MySQL 中连接表
- MySQL 函数
- MySQL 中的视图
- MySQL 中的事务
- MySQL 存储过程
- MySQL Python 教程
- MySQL Perl 教程
- MySQL & Perl DBI
- 使用 Perl 连接到 MySQL 数据库
- MySQL 中的 Perl 错误处理
- 使用 Perl 进行 MySQL 查询
- 在 MySQL 中使用 Perl 绑定参数&列
- 在 MySQL 中使用 Perl 处理图像
- 使用 Perl 获取 MySQL 元数据
- Perl 的 MySQL 事务
- MySQL C API 编程教程
- MySQL Visual Basic 教程
- MySQL PHP 教程
- MySQL Java 教程
- MySQL Ruby 教程
- MySQL C# 教程
- SQLite 教程
- SQLite 简介
- sqlite3 命令行工具
- 在 SQLite 中创建,删除和更改表
- SQLite 表达式
- SQLite 插入,更新,删除数据
- SQLite SELECT语句
- SQLite 约束
- SQLite 连接表
- SQLite 函数
- SQLite 视图,触发器,事务
- SQLite C 教程
- SQLite Python 教程
- SQLite Perl 教程
- Perl DBI
- 使用 Perl 连接到 SQLite 数据库
- SQLite Perl 错误处理
- 使用 Perl 的 SQLite 查询
- 使用 Perl 绑定 SQLite 参数&列
- 使用 Perl 在 SQLite 中处理图像
- 使用 Perl 获取 SQLite 元数据
- 使用 Perl 进行 SQLite 事务
- SQLite Ruby 教程
- 连接到 SQLite 数据库
- 在 SQLite 中使用 Ruby 进行 SQL 查询
- 绑定参数
- 处理图像
- 使用 Ruby 获取 SQLite 元数据
- Ruby 的 SQLite 事务
- SQLite C# 教程
- SQLite C# 简介
- 使用SqliteDataReader检索数据
- ADO.NET 数据集
- 使用 C# 在 SQLite 中处理图像
- 使用 C# 获取 SQLite 元数据
- 使用 C# 的 SQLite 事务
- SQLite Visual Basic 教程
- SQLite Visual Basic 简介
- 使用SqliteDataReader检索数据
- ADO.NET 的数据集
- 使用 Visual Basic 在 SQLite 中处理图像
- 使用 Visual Basic 获取 SQLite 元数据
- 使用 Visual Basic 的 SQLite 事务
- PostgreSQL C 教程
- PostgreSQL Ruby 教程
- PostgreSQL PHP 教程
- PostgreSQL PHP 编程简介
- 在 PostgreSQL 中使用 PHP 检索数据
- 在 PostgreSQL 中使用 PHP 处理图像
- 用 PHP 获取 PostgreSQL 元数据
- 在 PostgreSQL 中使用 PHP 进行事务
- PostgreSQL Java 教程
- Apache Derby 教程
- Derby 简介
- Derby 的安装&配置
- Derby 工具
- ij 工具
- Derby 中的 SQL 查询
- 在 Derby 中使用 JDBC 进行编程
- Derby 安全
- 使用 Derby & Apache Tomcat
- NetBeans 和 Derby
- SQLAlchemy 教程
- SQLAlchemy 简介
- 原始 SQL
- 模式定义语言
- SQL 表达式语言
- SQLAlchemy 中的对象关系映射器
- MongoDB PHP 教程
- MongoDB JavaScript 教程
- MongoDB Ruby 教程
- Spring JdbcTemplate 教程
- JDBI 教程
- MyBatis 教程
- Hibernate Derby 教程
- ZetCode .NET 教程
- Visual Basic 教程
- Visual Basic
- Visual Basic 语法结构
- 基本概念
- Visual Basic 数据类型
- Visual Basic 中的字符串
- 运算符
- 控制流
- Visual Basic 数组
- Visual Basic 中的过程&函数
- 在 Visual Basic 中组织代码
- 面向对象编程
- Visual Basic 中的面向对象编程 II
- Visual Basic 中的集合
- 输入和输出
- C# 教程
- C# 语言
- C# 语法结构
- C# 基础
- C# 数据类型
- C# 中的字符串
- C# 运算符
- C# 中的流控制
- C# 数组
- C# 面向对象编程
- C# 中的方法
- C# 面向对象编程 II
- C# 属性
- C# 结构
- C# 委托
- 命名空间
- C# 集合
- C# 输入和输出
- C# 目录教程
- C# 字典教程
- 在 C# 中读取文本文件
- C# 中的日期和时间
- 在 C# 中读取网页
- C# HttpClient教程
- ASP.NET Core 教程
- ZetCode 图形教程
- Java 2D 游戏教程
- Java 游戏基础
- 动画
- 移动精灵
- 碰撞检测
- Java 益智游戏
- Java Snake
- Breakout 游戏
- Java 俄罗斯方块
- Java 吃豆人
- Java 太空侵略者
- Java 扫雷
- Java 推箱子
- Java 2D 教程
- 介绍
- 基本绘图
- 形状和填充
- 透明度
- 合成
- 剪裁
- 变换
- 特效
- 图像
- 文字和字体
- 命中测试,移动物体
- 俄罗斯方块
- Cario 图形教程
- Cario 图形库
- Cario 定义
- Cairo 后端
- Cairo 基本图形
- 形状和填充
- 渐变
- 透明度
- 合成
- 剪裁和遮罩
- 变换
- Cairo 文字
- Cairo 中的图像
- 根窗口
- PyCairo 教程
- PyCairo 简介
- PyCairo 后端
- PyCairo 中的基本绘图
- PyCairo 形状和填充
- PyCairo 渐变
- PyCairo 剪裁&遮罩
- PyCairo 的透明度
- PyCairo 中的变换
- PyCairo 中的文字
- PyCairo 中的图像
- 根窗口
- HTML5 画布教程
- 介绍
- HTML5 画布中的直线
- HTML5 画布形状
- HTML5 画布填充
- HTML5 画布中的透明度
- HTML5 画布合成
- HTML5 canvas 中的变换
- HTML5 画布中的文字
- HTML5 画布中的动画
- HTML5 画布中的 Snake
- ZetCode GUI 教程
- Windows API 教程
- Windows API 简介
- Windows API main函数
- Windows API 中的系统函数
- Windows API 中的字符串
- Windows API 中的日期和时间
- Windows API 中的一个窗口
- UI 的第一步
- Windows API 菜单
- Windows API 对话框
- Windows API 控件 I
- Windows API 控件 II
- Windows API 控件 III
- Windows API 中的高级控件
- Windows API 中的自定义控件
- Windows API 中的 GDI
- PyQt4 教程
- PyQt4 简介
- PyQt4 中的第一个程序
- PyQt4 中的菜单和工具栏
- PyQt4 中的布局管理
- PyQt4 中的事件和信号
- PyQt4 中的对话框
- PyQt4 小部件
- PyQt4 小部件 II
- PyQt4 中的拖放
- PyQt4 中的绘图
- PyQt4 中的自定义小部件
- PyQt4 中的俄罗斯方块游戏
- PyQt5 教程
- PyQt5 简介
- PyQt5 日期和时间
- PyQt5 中的第一个程序
- PyQt5 中的菜单和工具栏
- PyQt5 中的布局管理
- PyQt5 中的事件和信号
- PyQt5 中的对话框
- PyQt5 小部件
- PyQt5 小部件 II
- PyQt5 拖放
- PyQt5 中的绘图
- PyQt5 中的自定义小部件
- PyQt5 中的俄罗斯方块
- Qt4 教程
- Qt4 工具包简介
- Qt4 工具类
- Qt4 中的字符串
- Qt4 中的日期和时间
- 在 Qt4 中使用文件和目录
- Qt4 中的第一个程序
- Qt4 中的菜单和工具栏
- Qt4 中的布局管理
- Qt4 中的事件和信号
- Qt4 小部件
- Qt4 小部件 II
- Qt4 中的绘图
- Qt4 中的自定义小部件
- Qt4 中的打砖块游戏
- Qt5 教程
- Qt5 工具包简介
- Qt5 中的字符串
- Qt5 中的日期和时间
- Qt5 中的容器
- 在 Qt5 中处理文件和目录
- Qt5 中的第一个程序
- Qt5 中的菜单和工具栏
- Qt5 中的布局管理
- Qt5 中的事件和信号
- Qt5 小部件
- Qt5 小部件 II
- Qt5 中的绘图
- Qt5 中的自定义小部件
- Qt5 中的贪食蛇
- Qt5 中的打砖块游戏
- PySide 教程
- PySide 工具包简介
- PySide 中的第一个程序
- PySide 中的菜单和工具栏
- PySide 中的布局管理
- PySide 中的事件和信号
- PySide 中的对话框
- PySide 小部件
- PySide 小部件 II
- 在 PySide 中拖放
- 在 PySide 中绘图
- PySide 中的自定义小部件
- PySide 中的俄罗斯方块游戏
- Tkinter 教程
- Tkinter 简介
- Tkinter 中的布局管理
- Tkinter 标准小部件属性
- Tkinter 小部件
- Tkinter 中的菜单和工具栏
- Tkinter 中的对话框
- Tkinter 中的绘图
- Tkinter 中的贪食蛇
- Tcl/Tk 教程
- Tcl/Tk 简介
- Tcl/Tk 中的布局管理
- Tcl/Tk 小部件
- Tcl/Tk 中的菜单和工具栏
- Tcl/Tk 中的对话框
- Tcl/Tk 绘图
- 贪食蛇
- Qt 快速教程
- Java Swing 教程
- Java Swing 简介
- Java Swing 首个程序
- Java Swing 中的菜单和工具栏
- Swing 布局管理
- GroupLayout管理器
- Java Swing 事件
- 基本的 Swing 组件
- 基本的 Swing 组件 II
- Java Swing 对话框
- Java Swing 模型架构
- Swing 中的拖放
- Swing 中的绘图
- Java Swing 中的可调整大小的组件
- Java Swing 中的益智游戏
- 俄罗斯方块
- JavaFX 教程
- JavaFX 简介
- JavaFX 首个程序
- JavaFX 布局窗格
- 基本的 JavaFX 控件
- 基本 JavaFX 控件 II
- JavaFX 事件
- JavaFX 效果
- JavaFX 动画
- JavaFX 画布
- JavaFX 图表
- Java SWT 教程
- Java SWT 简介
- Java SWT 中的布局管理
- Java SWT 中的菜单和工具栏
- Java SWT 中的小部件
- Table小部件
- Java SWT 中的对话框
- Java SWT 绘图
- Java SWT 中的贪食蛇
- wxWidgets 教程
- wxWidgets 简介
- wxWidgets 助手类
- wxWidgets 中的第一个程序
- wxWidgets 中的菜单和工具栏
- wxWidgets 中的布局管理
- wxWidgets 中的事件
- wxWidgets 中的对话框
- wxWidgets 小部件
- wxWidgets 小部件 II
- wxWidgets 中的拖放
- wxWidgets 中的设备上下文
- wxWidgets 中的自定义小部件
- wxWidgets 中的俄罗斯方块游戏
- wxPython 教程
- wxPython 简介
- 第一步
- 菜单和工具栏
- wxPython 中的布局管理
- wxPython 中的事件
- wxPython 对话框
- 小部件
- wxPython 中的高级小部件
- wxPython 中的拖放
- wxPython 图形
- 创建自定义小部件
- wxPython 中的应用框架
- wxPython 中的俄罗斯方块游戏
- C# Winforms Mono 教程
- Mono Winforms 简介
- Mono Winforms 中的第一步
- Mono Winforms 中的布局管理
- Mono Winforms 中的菜单和工具栏
- Mono Winforms 中的基本控件
- Mono Winforms 中的高级控件
- 对话框
- Mono Winforms 中的拖放
- Mono Winforms 中的绘图
- Mono Winforms 中的贪食蛇
- Java Gnome 教程
- Java Gnome 简介
- Java Gnome 的第一步
- Java Gnome 中的布局管理
- Java Gnome 中的布局管理 II
- Java Gnome 中的菜单
- Java Gnome 中的工具栏
- Java Gnome 中的事件
- Java Gnome 中的小部件
- Java Gnome 中的小部件 II
- Java Gnome 中的高级小部件
- Java Gnome 中的对话框
- Java Gnome 中的 Pango
- 在 Java Gnome 中用 Cairo 绘图
- Cario 绘图 II
- Java Gnome 中的贪食蛇
- QtJambi 教程
- QtJambi 简介
- QtJambi 中的布局管理
- QtJambi 中的小部件
- QtJambi 中的菜单和工具栏
- QtJambi 对话框
- QtJambi 中的绘图
- QtJambi 中的自定义小部件
- 贪食蛇
- GTK+ 教程
- GTK+ 简介
- GTK+ 中的第一个程序
- GTK+ 中的菜单和工具栏
- GTK+ 布局管理
- GTK+ 事件和信号
- GTK+ 对话框
- GTK+ 小部件
- GTK+ 小部件 II
- GtkTreeView小部件
- GtkTextView小部件
- 自定义 GTK+ 小部件
- Ruby GTK 教程
- Ruby GTK 简介
- Ruby GTK 中的布局管理
- Ruby GTK 中的小部件
- Ruby GTK 中的菜单和工具栏
- Ruby GTK 中的对话框
- Ruby GTK Cario 绘图
- Ruby GTK 中的自定义小部件
- Ruby GTK 中的贪食蛇
- GTK# 教程
- GTK# 简介
- GTK 的第一步
- GTK# 中的布局管理
- GTK 中的菜单
- GTK# 中的工具栏
- GTK# 中的事件
- GTK# 中的小部件
- GTK 中的小部件 II
- GTK# 中的高级小部件
- GTK# 中的对话框
- Pango
- GTK# 中的 Cario 绘图
- GTK# 中的 Cario 绘图 II
- GTK# 中的自定义小部件
- Visual Basic GTK# 教程
- Visual Basic GTK# 简介
- 布局管理
- 小部件
- 菜单和工具栏
- 对话框
- Cario 绘图
- 自定义小部件
- 贪食蛇
- PyGTK 教程
- PyGTK 简介
- PyGTK 的第一步
- PyGTK 中的布局管理
- PyGTK 中的菜单
- PyGTK 中的工具栏
- PyGTK 中的事件和信号
- PyGTK 中的小部件
- PyGTK 中的小部件 II
- PyGTK 中的高级小部件
- PyGTK 中的对话框
- Pango
- Pango II
- PyGTK 中的 Cario 绘图
- Cario 绘图 II
- PyGTK 中的贪食蛇游戏
- PyGTK 中的自定义小部件
- PHP GTK 教程
- PHP GTK 简介
- PHP GTK 中的布局管理
- PHP GTK 中的小部件
- PHP GTK 中的菜单和工具栏
- 对话框
- Cario 绘图
- 自定义小部件
- 贪食蛇
- C# Qyoto 教程
- Qyoto 介绍
- 布局管理
- Qyoto 中的小部件
- Qyoto 中的菜单和工具栏
- Qyoto 对话框
- Qyoto 中的绘图
- Qyoto 中的绘图 II
- Qyoto 中的自定义小部件
- 贪食蛇
- Ruby Qt 教程
- Ruby Qt 简介
- Ruby Qt 中的布局管理
- Ruby Qt 中的小部件
- 菜单和工具栏
- Ruby Qt 中的对话框
- 用 Ruby Qt 绘图
- Ruby Qt 中的自定义小部件
- Ruby Qt 中的贪食蛇
- Visual Basic Qyoto 教程
- Qyoto 介绍
- 布局管理
- Qyoto 中的小部件
- Qyoto 中的菜单和工具栏
- Qyoto 对话框
- Qyoto 中的绘图
- Qyoto 中的自定义小部件
- 贪食蛇
- Mono IronPython Winforms 教程
- 介绍
- IronPython Mono Winforms 中的第一步
- 布局管理
- 菜单和工具栏
- Mono Winforms 中的基本控件
- Mono Winforms 中的基本控件 II
- Mono Winforms 中的高级控件
- 对话框
- Mono Winforms 中的拖放
- 绘图
- IronPython Mono Winforms 中的绘图 II
- IronPython Mono Winforms 中的贪食蛇
- IronPython Mono Winforms 中的俄罗斯方块游戏
- FreeBASIC GTK 教程
- Jython Swing 教程
- Jython Swing 简介
- Jython Swing 中的布局管理
- Jython Swing 中的组件
- Jython Swing 中的菜单和工具栏
- Jython Swing 中的对话框
- Jython Swing 中的绘图
- Jython Swing 中的半字节
- JRuby Swing 教程
- JRuby Swing 简介
- JRuby Swing 中的布局管理
- JRuby Swing 中的组件
- 菜单和工具栏
- JRuby Swing 中的对话框
- 在 JRuby Swing 中绘图
- JRuby Swing 中的贪食蛇
- Visual Basic Winforms 教程
- Visual Basic Winforms 简介
- 布局管理
- 基本控制
- 进阶控件
- 菜单和工具栏
- 对话框
- 绘图
- 拖放
- 贪食蛇
- JavaScript GTK 教程
- JavaScript GTK 简介
- 布局管理
- JavaScript GTK 中的小部件
- JavaScript GTK 中的菜单和工具栏
- JavaScript GTK 中的对话框
- JavaScript GTK 中的 Cario 绘图
- ZetCode Java 教程
- Java 教程
- Java 语言
- Java 语法结构
- Java 基础
- Java 数据类型
- Java 数据类型 II
- Java 字符串
- Java 数组
- Java 表达式
- Java 控制流程
- Java 面向对象的编程
- Java 方法
- Java 面向对象编程 II
- Java 包
- Java 中的异常
- Java 集合
- Java 流
- Java Future 教程
- Java Comparable和Comparator
- Java DOM 教程
- Java MVC 教程
- Java SAX 教程
- Java JAXB 教程
- Java JSON 处理教程
- Java H2 教程
- MongoDB Java 教程
- Java 正则表达式教程
- Java PDFBox 教程
- Java 文件教程
- Java Files.list教程
- Java Files.walk教程
- Java DirectoryStream教程
- Java 外部与内部迭代器
- Java 文件大小
- 用 Java 创建目录
- 用 Java 创建文件
- Java Log4j 教程
- Gson 教程
- Java RequestDispatcher
- Java HTTP GET/POST 请求
- Java InputStream教程
- Java FileOutputStream教程
- Java FileInputStream教程
- Java ZipInputStream教程
- Java FileWriter教程
- EJB 简介
- Java forEach教程
- Jetty 教程
- Tomcat Derby 教程
- Stripes 介绍
- 使用 Stripes 的 Java webapp,MyBatis,& Derby
- EclipseLink 简介
- Java 中的数据源
- JSTL 中的 SQL 查询标记
- Java 验证过滤器
- Hibernate 验证器
- 用 Java 显示图像
- Play 框架简介
- Spark Java 简介
- Java ResourceBundle教程
- Jtwig 教程
- Java Servlet 教程
- Java 套接字教程
- FreeMarker 教程
- Android 教程
- Java EE 5 教程
- JSoup 教程
- JFreeChart 教程
- ImageIcon教程
- 用 Java 复制文件
- Java 文件时间教程
- 如何使用 Java 获取当前日期时间
- Java 列出目录内容
- Java 附加到文件
- Java ArrayList教程
- 用 Java 读写 ICO 图像
- Java int到String的转换
- Java HashSet教程
- Java HashMap教程
- Java static关键字
- Java 中的HashMap迭代
- 用 Java 过滤列表
- 在 Java 中读取网页
- Java 控制台应用
- Java 集合的便利工厂方法
- Google Guava 简介
- OpenCSV 教程
- 用 Java8 的StringJoiner连接字符串
- Java 中元素迭代的历史
- Java 谓词
- Java StringBuilder
- Java 分割字串教学
- Java NumberFormat
- Java TemporalAdjusters教程
- Apache FileUtils教程
- Java Stream 过滤器
- Java 流归约
- Java 流映射
- Java InputStreamReader教程
- 在 Java 中读取文本文件
- Java Unix 时间
- Java LocalTime
- Java 斐波那契
- Java ProcessBuilder教程
- Java 11 的新功能
- ZetCode JavaScript 教程
- Ramda 教程
- Lodash 教程
- Collect.js 教程
- Node.js 简介
- Node HTTP 教程
- Node-config 教程
- Dotenv 教程
- Joi 教程
- Liquid.js 教程
- faker.js 教程
- Handsontable 教程
- PouchDB 教程
- Cheerio 教程
- Axios 教程
- Jest 教程
- JavaScript 正则表达式
- 用 JavaScript 创建对象
- Big.js 教程
- Moment.js 教程
- Day.js 教程
- JavaScript Mustache 教程
- Knex.js 教程
- MongoDB JavaScript 教程
- Sequelize 教程
- Bookshelf.js 教程
- Node Postgres 教程
- Node Sass 教程
- Document.querySelector教程
- Document.all教程
- JSON 服务器教程
- JavaScript 贪食蛇教程
- JavaScript 构建器模式教程
- JavaScript 数组
- XMLHttpRequest教程
- 从 JavaScript 中的 URL 读取 JSON
- 在 JavaScript 中循环遍历 JSON 数组
- jQuery 教程
- Google 图表教程
- ZetCode Kotlin 教程
- Kotlin Hello World 教程
- Kotlin 变量
- Kotlin 的运算符
- Kotlin when表达式
- Kotlin 数组
- Kotlin 范围
- Kotlin Snake
- Kotlin Swing 教程
- Kotlin 字符串
- Kotlin 列表
- Kotlin 映射
- Kotlin 集合
- Kotlin 控制流程
- Kotlin 写入文件
- Kotlin 读取文件教程
- Kotlin 正则表达式
- ZetCode 其它教程
- TCL 教程
- Tcl
- Tcl 语法结构
- Tcl 中的基本命令
- Tcl 中的表达式
- Tcl 中的控制流
- Tcl 中的字符串
- Tcl 列表
- Tcl 中的数组
- Tcl 中的过程
- 输入&输出
- AWK 教程
- Vaadin 教程
- Vaadin 框架介绍
- Vaadin Grid教程
- Vaadin TextArea教程
- Vaadin ComboBox教程
- Vaadin Slider教程
- Vaadin CheckBox教程
- Vaadin Button教程
- Vaadin DateField教程
- Vaadin Link教程
- ZetCode PHP 教程
- PHP 教程
- PHP
- PHP 语法结构
- PHP 基础
- PHP 数据类型
- PHP 字符串
- PHP 运算符
- PHP 中的控制流
- PHP 数组
- PHP 数组函数
- PHP 中的函数
- PHP 正则表达式
- PHP 中的面向对象编程
- PHP 中的面向对象编程 II
- PHP Carbon 教程
- PHP Monolog 教程
- PHP 配置教程
- PHP Faker 教程
- Twig 教程
- Valitron 教程
- Doctrine DBAL QueryBuilder 教程
- PHP Respect 验证教程
- PHP Rakit 验证教程
- PHP PDO 教程
- CakePHP 数据库教程
- PHP SQLite3 教程
- PHP 文件系统函数
- ZetCode Python 教程
- Python 教程
- Python 语言
- 交互式 Python
- Python 语法结构
- Python 数据类型
- Python 字符串
- Python 列表
- Python 字典
- Python 运算符
- Python 关键字
- Python 函数
- Python 中的文件
- Python 中的面向对象编程
- Python 模块
- Python 中的包
- Python 异常
- Python 迭代器和生成器
- Python 内省
- Python Faker 教程
- Python f 字符串教程
- Python bcrypt 教程
- Python 套接字教程
- Python smtplib教程
- OpenPyXL 教程
- Python pathlib教程
- Python YAML 教程
- Python 哈希教程
- Python ConfigParser教程
- Python 日志教程
- Python argparse 教程
- Python SQLite 教程
- Python Cerberus 教程
- Python PostgreSQL 教程
- PyMongo 教程
- PyMySQL 教程
- Peewee 教程
- pyDAL 教程
- pytest 教程
- Bottle 教程
- Python Jinja 教程
- PrettyTable 教程
- BeautifulSoup 教程
- pyquery 教程
- Python for循环
- Python 反转
- Python Lambda 函数
- Python 集合
- Python 映射
- Python CSV 教程-读写 CSV
- Python 正则表达式
- Python SimpleJson 教程
- SymPy 教程
- Pandas 教程
- Matplotlib 教程
- Pillow 教程
- Python FTP 教程
- Python Requests 教程
- Python Arrow 教程
- Python 列表推导式
- Python 魔术方法
- PyQt 中的QPropertyAnimation
- PyQt 中的QNetworkAccessManager
- ZetCode Ruby 教程
- Ruby 教程
- Ruby
- Ruby 语法结构
- Ruby 基础
- Ruby 变量
- Ruby 中的对象
- Ruby 数据类型
- Ruby 字符串
- Ruby 表达式
- Ruby 控制流
- Ruby 数组
- Ruby 哈希
- Ruby 中的面向对象编程
- Ruby 中的面向对象编程 II
- Ruby 正则表达式
- Ruby 输入&输出
- Ruby HTTPClient教程
- Ruby Faraday 教程
- Ruby Net::HTTP教程
- ZetCode Servlet 教程
- 从 Java Servlet 提供纯文本
- Java Servlet JSON 教程
- Java Servlet HTTP 标头
- Java Servlet 复选框教程
- Java servlet 发送图像教程
- Java Servlet JQuery 列表教程
- Servlet FreeMarker JdbcTemplate 教程-CRUD 操作
- jQuery 自动补全教程
- Java servlet PDF 教程
- servlet 从 WAR 内读取 CSV 文件
- Java HttpServletMapping
- EasyUI datagrid
- Java Servlet RESTFul 客户端
- Java Servlet Log4j 教程
- Java Servlet 图表教程
- Java ServletConfig教程
- Java Servlet 读取网页
- 嵌入式 Tomcat
- Java Servlet 分页
- Java Servlet Weld 教程
- Java Servlet 上传文件
- Java Servlet 提供 XML
- Java Servlet 教程
- JSTL forEach标签
- 使用 jsGrid 组件
- ZetCode Spring 教程
- Spring @Bean注解教程
- Spring @Autowired教程
- Spring @GetMapping教程
- Spring @PostMapping教程
- Spring @DeleteMapping教程
- Spring @RequestMapping教程
- Spring @PathVariable教程
- Spring @RequestBody教程
- Spring @RequestHeader教程
- Spring Cookies 教程
- Spring 资源教程
- Spring 重定向教程
- Spring 转发教程
- Spring ModelAndView教程
- Spring MessageSource教程
- Spring AnnotationConfigApplicationContext
- Spring BeanFactoryPostProcessor教程
- Spring BeanFactory教程
- Spring context:property-placeholder教程
- Spring @PropertySource注解教程
- Spring @ComponentScan教程
- Spring @Configuration教程
- Spring C 命名空间教程
- Spring P 命名空间教程
- Spring bean 引用教程
- Spring @Qualifier注解教程
- Spring ClassPathResource教程
- Spring 原型作用域 bean
- Spring Inject List XML 教程
- Spring 概要文件 XML 教程
- Spring BeanDefinitionBuilder教程
- Spring 单例作用域 bean
- 独立的 Spring 应用
- 经典 Spring 应用中的JdbcTemplate
- Spring EmbeddedDatabaseBuilder教程
- Spring HikariCP 教程
- Spring Web 应用简介
- Spring BeanPropertyRowMapper教程
- Spring DefaultServlet教程
- Spring WebSocket 教程
- Spring WebJars 教程
- Spring @MatrixVariable教程
- Spring Jetty 教程
- Spring 自定义 404 错误页面教程
- Spring WebApplicationInitializer教程
- Spring BindingResult教程
- Spring FreeMarker 教程
- Spring Thymeleaf 教程
- Spring ResourceHandlerRegistry教程
- SpringRunner 教程
- Spring MockMvc 教程
- ZetCode Spring Boot 教程
- Spring Boot 发送电子邮件教程
- Spring Boot WebFlux 教程
- Spring Boot ViewControllerRegistry教程
- Spring Boot CommandLineRunner教程
- Spring Boot ApplicationReadyEvent 教程
- Spring Boot CORS 教程
- Spring Boot @Order教程
- Spring Boot @Lazy教程
- Spring Boot Flash 属性
- Spring Boot CrudRepository 教程
- Spring Boot JpaRepository 教程
- Spring Boot findById 教程
- Spring Boot Data JPA @NamedQuery教程
- Spring Boot Data JPA @Query教程
- Spring Boot Querydsl 教程
- Spring Boot Data JPA 排序教程
- Spring Boot @DataJpaTest教程
- Spring Boot TestEntityManager 教程
- Spring Boot Data JPA 派生的查询
- Spring Boot Data JPA 查询示例
- Spring Boot Jersey 教程
- Spring Boot CSV 教程
- SpringBootServletInitializer教程
- 在 Spring Boot 中加载资源
- Spring Boot H2 REST 教程
- Spring Boot RestTemplate
- Spring Boot REST XML 教程
- Spring Boot Moustache 教程
- Spring Boot Thymeleaf 配置
- Spring Boot 自动控制器
- Spring Boot FreeMarker 教程
- Spring Boot Environment
- Spring Boot Swing 集成教程
- 在 Spring Boot 中提供图像文件
- 在 Spring Boot 中创建 PDF 报告
- Spring Boot 基本注解
- Spring Boot @ResponseBody教程
- Spring Boot @PathVariable教程
- Spring Boot REST Data JPA 教程
- Spring Boot @RequestParam教程
- Spring Boot 列出 bean
- Spring Boot @Bean
- Spring Boot @Qualifier教程
- 在 Spring Boot 中提供静态内容
- Spring Boot Whitelabel 错误
- Spring Boot DataSourceBuilder 教程
- Spring Boot H2 教程
- Spring Boot Web JasperReports 集成
- Spring Boot iText 教程
- Spring Boot cmd JasperReports 集成
- Spring Boot RESTFul 应用
- Spring Boot 第一个 Web 应用
- Spring Boot Groovy CLI
- Spring Boot 上传文件
- Spring Boot @ExceptionHandler
- Spring Boot @ResponseStatus
- Spring Boot ResponseEntity
- Spring Boot @Controller
- Spring Boot @RestController
- Spring Boot @PostConstruct
- Spring Boot @Component
- Spring Boot @ConfigurationProperties教程
- Spring Boot @Repository
- Spring Boot MongoDB 教程
- Spring Boot MongoDB Reactor 教程
- Spring Boot PostgreSQL 教程
- Spring Boot @ModelAttribute
- Spring Boot 提交表单教程
- Spring Boot Model
- Spring Boot MySQL 教程
- Spring Boot GenericApplicationContext
- SpringApplicationBuilder教程
- Spring Boot Undertow 教程
- Spring Boot 登录页面教程
- Spring Boot RouterFunction 教程
- ZetCode Symfony 教程
- Symfony DBAL 教程
- Symfony 表单教程
- Symfony CSRF 教程
- Symfony Vue 教程
- Symfony 简介
- Symfony 请求教程
- Symfony HttpClient教程
- Symfony Flash 消息
- 在 Symfony 中发送邮件
- Symfony 保留表单值
- Symfony @Route注解教程
- Symfony 创建路由
- Symfony 控制台命令教程
- Symfony 上传文件
- Symfony 服务教程
- Symfony 验证教程
- Symfony 翻译教程