# Docker镜像启动前端 (对接单体后台)
### 1. 下载项目
```
git clone https://gitee.com/jeecg/jeecgboot-vue3.git
```
## 2. 配置host
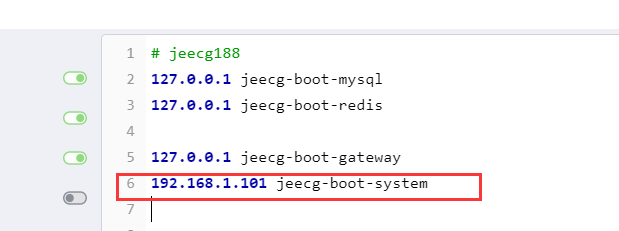
>[warning] 提醒: 注意需要把`127.0.0.1`替换成真实IP, 比如`192.`开头,不然后端不通。
```
127.0.0.1 jeecg-boot-system
127.0.0.1 jeecg-boot-gateway
```
### 3. 配置后台域名 (可忽略)
进入项目
```
cd jeecgboot-vue3
```
修改 `.env.production`
~~~
VITE_GLOB_API_URL=/jeecgboot
VITE_GLOB_DOMAIN_URL=http://jeecg-boot-system:8080/jeecg-boot
~~~
>[info] 此处的 jeecg-boot-system 对应host的域名配置。
### 4. 进入项目根目录,执行编译命令
~~~
pnpm i
npm run build
~~~
### 5. 构建镜像
~~~
docker build -t jeecgboot-vue3 .
~~~
### 6. 启动镜像
docker run --name jeecgboot-vue3-nginx -p 80:80 -d jeecgboot-vue3
### 7. 访问前台项目
http://localhost:80
### 8. 后台项目启动
[看此文档](http://doc.jeecg.com/2043889)
### 9. 常见问题
>[warning] 启动成功后,发现获取不到验证码,这个时候需要把host的ip改成你的真实ip不能用127.0.0.1,不如改成如下配置,并重启前端的docker
重启后刷新就能获取到验证码了。
*****
# Docker镜像启动前端 (对接微服务后台)
>[info] 只写 与单体的区别步骤
### 区别1. 修改后台域名
.env.production
```bash
VITE_GLOB_API_URL=/jeecgboot
VITE_GLOB_DOMAIN_URL=http://jeecg-boot-gateway:9999
```
后台微服务启动 [见此文档](http://doc.jeecg.com/2656147)
### 区别2. 修改Dockerfile文件
```bash
- 把`http://jeecg-boot-system:8080/jeecg-boot`替换成 `http://jeecg-boot-gateway:9999`
- 把`jeecg-boot-system`替换成 `jeecg-boot-gateway`
```
>[warning] 注意:微服务部署Dockerfile里location和proxy_pass最后都必须带/,否则链接gateway会报错
```
location /jeecgboot/ {
# 必须有/
proxy_pass http://jeecg-boot-gateway:9999/;
proxy_redirect off;
proxy_set_header Host jeecg-boot-gateway;
proxy_set_header X-Real-IP \$remote_addr;
proxy_set_header X-Forwarded-For \$proxy_add_x_forwarded_for;
}
```
### 其他与上面一样
```bash
镜像需要重现构建,最好把单体的镜像删掉,重新构建docker镜像。
```
- 项目介绍
- 常见问题
- 开发环境准备
- 环境准备
- 启动项目
- 切换Vue3路由
- 项目配置详细说明
- 上线部署
- 快速构建&部署
- Docker镜像启动
- 项目配置
- 菜单配置
- 菜单缓存
- 积木报表菜单配置
- 首页配置
- 国际化
- 菜单国际化
- 组件注册
- 项目规范
- 跨域处理
- 样式库
- 图标生成
- package依赖介绍
- 菜单TAB风格
- 备份文档
- 详细构建和配置
- 构建部署1.0
- 切换Mock接口
- 原生路由(作废)
- 原生菜单(作废)
- 页面开启缓存(作废)
- 环境准备1.0
- 数据 mock&联调
- UI组件
- Form 表单组件
- Table 表格
- Modal 弹窗
- Drawer 抽屉组件
- Icon 图标组件
- Button 按钮
- 更多基础组件
- JSelectUser选择用户 ✔
- JSelectPosition岗位选择 ✔
- JSelectDept部门选择 ✔
- JCheckbox ✔
- JImportModal 列表导入弹窗组件
- JInput特殊查询组件 ✔
- JPopup弹窗选择组件 ✔
- JTreeSelect树形下拉框 (异步加载) ✔
- JAreaSelect 省市县级联组件
- JDictSelectTag 字典标签 ✔
- JEllipsis 超长截取显示组件 ✔
- JUpload 上传组件 ✔
- JEasyCron 定时表达式选择组件 ✔
- JInputPopup 多行输入窗口组件 ✔
- JSwitch 开关选择组件 ✔
- JTreeDict 分类字典树形下拉组件 ✔
- JSelectInput 可输入下拉框 ✔
- JEditor 富文本编辑器 ✔
- JMarkdownEditor Markdown编辑器 ✔
- JSearchSelect 字典表的搜索组件 ✔
- JSelectUserByDept 根据部门选择用户 ✔
- JVxeTable
- 组件配置文档
- 自定义组件
- 封装自定义组件
- 自定义组件增强
- 多级联动配置
- 使用示例
- 常见问题解答
- JAreaLinkage 省市县联动组件 ✔
- JCategorySelect 分类字典树 ✔
- JImageUpload 图片上传 ✔
- JSelectMultiple 下拉多选 ✔
- JSelectRole 选择角色 ✔
- JFormContainer 表单组件禁用 ✔
- SuperQuery 高级查询
- UserSelect 高级用户选择组件
- Basic
- Page
- Authority
- PopConfirmButton
- CollapseContainer
- ScrollContainer
- LazyContainer
- CodeEditor
- JsonPreview
- CountDown
- ClickOutSide
- CountTo
- Cropper
- Description
- FlowChart
- Upload
- Tree
- Excel
- Qrcode
- Markdown
- Loading
- Tinymce
- Time
- StrengthMeter
- Verify
- Transition
- VirtualScroll
- ContextMenu
- Preview
- Loading
- 前端权限
- 表单权限
- 显隐控制 ✔
- 禁用控制 ✔
- 列表权限
- 按钮权限控制
- 列字段显隐控制
- 行编辑组件权限
- 显隐控制
- 禁用控制
- 代码生成
- Online在线代码生成
- GUI代码生成
- 代码生成模板介绍
- vue3和vue3Native详细说明
- 深入开发
- 定义Form新组件
- 自定义列表查询
- 自定义表单布局
- 开发笔记
- 组件权限控制
- 使用Antd Vue原生Form
- 自定义图表组件
- 自定义渲染函数
- 如何编写mock接口
- 缓存用法
- 精简版代码制作
- 微前端(qiankun)集成
- 前端小技巧
- 表单整体禁用
- 弹框内下拉框错位
- 界面如何设置响应式
- 抽屉(Drawer)宽度自适应
- 生成菜单脚本
- Online表单
- Online常见问题
- Online表单配置
- 配置参数说明
- 系统标准字段
- 表单类型-主子表|树表
- 自定义查询配置
- Online表单风格
- Online表单删除说明
- Online联合查询配置
- online表单视图功能说明
- Online表单开启评论
- Online表单控件介绍
- 常用基础控件
- 高级关联记录
- Online表单控件配置
- 基本配置
- 控件扩展配置
- 默认值表达式
- 自定义查询配置
- 字段href
- 默认值(填值规则)
- 导入导出自定义规则
- Online表单权限配置
- 字段权限配置与授权
- 按钮权限配置与授权
- 数据权限配置与授权
- 联合查询数据权限规则说明
- 在线增强
- 自定义按钮
- SQL增强
- JS增强
- 按钮触发JS增强
- 列表Api
- 列表操作列前置事件
- 表单Api
- beforeSubmit事件
- loaded事件
- 表单值改变事件【单表/主表】
- 表单值改变事件【从表】
- 表单值改变事件【从改主】
- 控制字段显示与隐藏
- js增强实现下拉联动
- js增强控制下拉树数据
- JS增强 触发弹窗
- JS增强 http请求
- JS增强 方法定义
- 对接表单设计器后需注意
- JAVA增强
- 快速开始
- Online java增强 导入
- Online java增强 导出
- Online java增强 查询
- Online Java增强 http-api
- 表单类
- 列表类
- 其他功能示例
- 导入数据库表支持排除表
- 通过字段Href实现三级联动
- excel数据导入支持校验
- Online报表
- Online报表配置
- 配置成菜单
- 其他功能
- 推送消息
- ISO 8601书写格式
- 系统消息跳转至详情表单
- 菜单【批量申请(自定义)】功能说明
- Online自动化测试
- online AI自动化测试数据制作
- Online AI自动化测试数据制作
- Online AI模型测试用例功能详情
- JAVA后台功能
- saas多租户切换
- 新功能实现saas租户隔离
- 第三方集成
- 敲敲云集成钉钉