[TOC]
## 一、下载软件
* 下载`elasticsearch`
[https://www.elastic.co/cn/downloads/elasticsearch](https://www.elastic.co/cn/downloads/elasticsearch)
* 下载`kibana`
[https://www.elastic.co/cn/downloads/kibana](https://www.elastic.co/cn/downloads/kibana)
* 下载`logstash`
[https://www.elastic.co/cn/downloads/logstash](https://www.elastic.co/cn/downloads/logstash)
## 二、elasticsearch
### 2.1 elasticsearch常见错误
#### 2.1.1 root用户启动elasticsearch报错
Elasticsearch为了安全考虑,不让使用root启动,解决方法新建一个用户,用此用户进行相关的操作。如果你用root启动,会出现“java.lang.RuntimeException: can not runelasticsearch as root”错误,具体如下所示:

**需要创建新用户来运行es**
##### 2.1.1.1 创建新用户
~~~
adduser [用户名]
~~~
##### 2.1.1.2 修改新用户的密码
~~~
passwd [用户名]
~~~
##### 2.1.1.3 授权sudo
**新创建的用户并不能使用sudo命令,需要给他添加授权。**
1 添加sudoers文件可写权限
~~~
chmod -v u+w /etc/sudoers
~~~
2 修改sudoers文件
~~~
vim /etc/sudoers
~~~
3 在sudoers文件中找到如下位置并添加如下内容
**\[用户名\] ALL=(ALL) ALL**(如需新用户使用sudo时不用输密码,把最后一个**ALL**改为**NOPASSWD:ALL**即可) 如:elk ALL=(ALL) NOPASSWD:ALL

4 收回sudoers文件可写权限
~~~
chmod -v u-w /etc/sudoers
~~~
##### 2.1.1.4 赋值elasticsearch文件夹的权限给新用户
改变文件夹及所有子文件(夹)所属用户和用户组
~~~
chown -R elk:elk elasticsearch-6.6.1
~~~
#### 2.1.2 JVM虚拟机内存不足
错误:“JavaHotSpot(TM) 64-Bit Server VM warning: INFO: error='Cannotallocate memory' (errno=12)”表示内存不足,其配置文件为config目录下的jvm.options,默认为2g,可以修改为1g。
#### 2.1.3 max\_map\_count过小
错误“max virtual memory areas vm.max\_map\_count \[65530\]is too low, increase to at least \[262144\]”,max\_map\_count文件包含限制一个进程可以拥有的VMA(虚拟内存区域)的数量,系统默认是65530,修改成655360。
~~~
#在/etc/sysctl.conf文件最后添加一行
vm.max_map_count=655360
#并执行命令
sysctl -p
~~~
#### 2.1.4 max file descriptors过小
错误“max file descriptors \[65535\] for elasticsearchprocess is too low, increase to at least \[65536\]”,maxfile descriptors为最大文件描述符,设置其大于65536即可。
* 解决方法是修改/etc/security/limits.conf文件
> \* 代表所有用户
> 
#### 2.1.5 外网访问设置
修改config目录下elasticsearch.yml文件
>6.x版本
>1 修改network.host为`0.0.0.0`
>2 修改discovery.zen.ping.unicast.hosts为`["0.0.0.0"]`
>7.x版本
>1. 修改network.host为`0.0.0.0`
>2. 设置node.name参数
>3. 设置cluster.initial\_master\_nodes参数:数组值需与参数node.name相同
#### 2.1.6 elasticsearch-head插件连不上
修改config目录下elasticsearch.yml文件,在最后新增以下两个参数
~~~
http.cors.enabled: true
http.cors.allow-origin: "*"
~~~
#### 2.1.7 elasticsearch线程队列不够
修改config目录下elasticsearch.yml文件,在最后新增以下参数
~~~
thread_pool.bulk.queue_size: 1000
~~~
#### 2.1.8 配置xpack(7.x版本需要)
生成证书
到elastsearch的目录下执行以下命令
~~~
bin/elasticsearch-certutil cert -out config/elastic-certificates.p12 -pass ""
~~~
修改配置
修改config目录下elasticsearch.yml文件,在最后新增以下参数
~~~
xpack.security.enabled: true
xpack.security.transport.ssl.enabled: true
xpack.security.transport.ssl.verification_mode: certificate
xpack.security.transport.ssl.keystore.path: elastic-certificates.p12
xpack.security.transport.ssl.truststore.path: elastic-certificates.p12
~~~
### 2.2 运行elasticsearch
#### 2.2.1 切换新用户
~~~
su elk
~~~
#### 2.2.2 后台运行
~~~
bin/elasticsearch -d
~~~
#### 2.2.3 初始化密码(7.x版本需要)
到elastsearch的目录下执行以下命令,两种方式二选一
1. 自动生成密码
~~~
bin/elasticsearch-setup-passwords auto
~~~
2. 手动设置密码
~~~
bin/elasticsearch-setup-passwords interactive
~~~
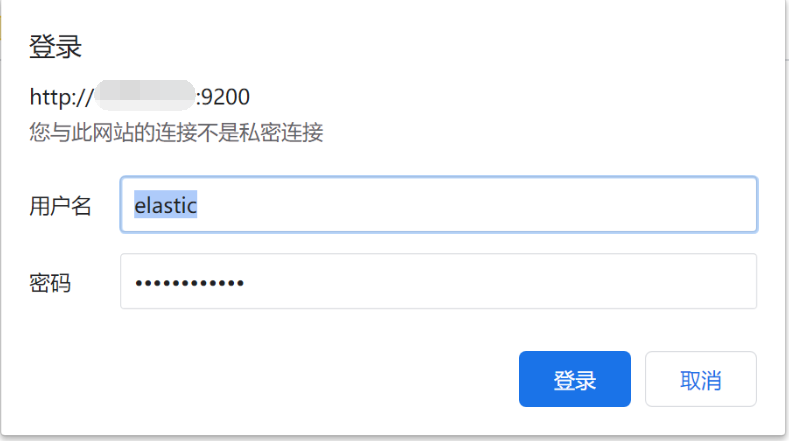
3. 验证密码是否设置成功
打开浏览器,输入我们的elasticsearch的网址,比如本地的[http://localhost:9200/](http://localhost:9200/) ,然后会弹出一个输入框,让我们输入账号和密码
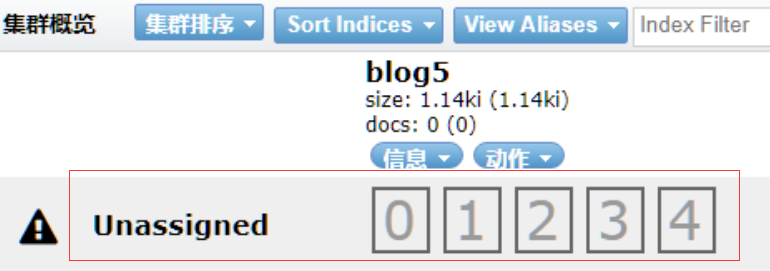
### 2.3 添加索引模板(非必需)
如果是单节点的es需要去掉索引的副本配置,不然会出现`unassigned_shards`
#### 2.3.1 更新已有索引
6.x版本
~~~
curl -X PUT "http://192.168.28.130:9200/sys-log-*/_settings" -H 'Content-Type: application/json' -d'
{
"index" : {
"number_of_replicas" : 0
}
}'
curl -X PUT "http://192.168.28.130:9200/mysql-slowlog-*/_settings" -H 'Content-Type: application/json' -d'
{
"index" : {
"number_of_replicas" : 0
}
}'
~~~
7.x版本
> 需要修改IP和密码
~~~
curl -XPUT http://192.168.28.130:9200/sys-log-*_settings \
-H 'Content-Type: application/json' \
-u elastic:qEnNfKNujqNrOPD9q5kb \
-d '{
"index" : {
"number_of_replicas" : 0
}
}'
curl -XPUT http://192.168.28.130:9200/mysql-slowlog-*_settings \
-H 'Content-Type: application/json' \
-u elastic:qEnNfKNujqNrOPD9q5kb \
-d '{
"index" : {
"number_of_replicas" : 0
}
}'
~~~
#### 2.3.2 设置索引模板
**系统日志**
6.x版本
~~~
curl -XPUT http://192.168.28.130:9200/_template/template_sys_log -H 'Content-Type: application/json' -d '
{
"index_patterns" : ["sys-log-*"],
"order" : 0,
"settings" : {
"number_of_replicas" : 0
},
"mappings": {
"doc": {
"properties": {
"message": {
"type": "text",
"fields": {
"keyword": {
"type": "keyword",
"ignore_above": 256
}
},
"analyzer": "ik_max_word"
},
"pid": {
"type": "text"
},
"serverPort": {
"type": "text"
},
"logLevel": {
"type": "text"
},
"traceId": {
"type": "text"
}
}
}
}
}'
~~~
7.x版本
> 需要修改IP和密码
~~~
curl -XPUT http://192.168.28.130:9200/_template/template_sys_log \
-H 'Content-Type: application/json' \
-u elastic:qEnNfKNujqNrOPD9q5kb \
-d '{
"index_patterns" : ["sys-log-*"],
"order" : 0,
"settings" : {
"number_of_replicas" : 0
},
"mappings": {
"properties": {
"message": {
"type": "text",
"fields": {
"keyword": {
"type": "keyword",
"ignore_above": 256
}
},
"analyzer": "ik_max_word"
},
"pid": {
"type": "text"
},
"serverPort": {
"type": "text"
},
"logLevel": {
"type": "text"
},
"traceId": {
"type": "text"
}
}
}
}'
~~~
**慢sql日志**
6.x版本
~~~
curl -XPUT http://192.168.28.130:9200/_template/template_sql_slowlog -H 'Content-Type: application/json' -d '
{
"index_patterns" : ["mysql-slowlog-*"],
"order" : 0,
"settings" : {
"number_of_replicas" : 0
},
"mappings": {
"doc": {
"properties": {
"query_str": {
"type": "text",
"fields": {
"keyword": {
"type": "keyword",
"ignore_above": 256
}
},
"analyzer": "ik_max_word"
}
}
}
}
}'
~~~
7.x版本
> 需要修改IP和密码
~~~
curl -XPUT http://192.168.28.130:9200/_template/template_sql_slowlog \
-H 'Content-Type: application/json' \
-u elastic:qEnNfKNujqNrOPD9q5kb \
-d '{
"index_patterns" : ["mysql-slowlog-*"],
"order" : 0,
"settings" : {
"number_of_replicas" : 0
},
"mappings": {
"properties": {
"query_str": {
"type": "text",
"fields": {
"keyword": {
"type": "keyword",
"ignore_above": 256
}
},
"analyzer": "ik_max_word"
}
}
}
}'
~~~
**埋点日志**
6.x版本
~~~
curl -XPUT http://192.168.28.130:9200/_template/template_point_log -H 'Content-Type: application/json' -d '
{
"index_patterns" : ["point-log-*"],
"order" : 0,
"settings" : {
"number_of_shards" : 2,
"number_of_replicas" : 0
}
}'
~~~
7.x版本
> 需要修改IP和密码
~~~
curl -XPUT http://192.168.28.130:9200/_template/template_point_log \
-H 'Content-Type: application/json' \
-u elastic:qEnNfKNujqNrOPD9q5kb \
-d '{
"index_patterns" : ["point-log-*"],
"order" : 0,
"settings" : {
"number_of_replicas" : 0
}
}'
~~~
### 2.4 安装IK分词器
查询数据,都是使用的默认的分词器,分词效果不太理想,会把text的字段分成一个一个汉字,然后搜索的时候也会把搜索的句子进行分词,所以这里就需要更加智能的分词器IK分词器了
#### 2.4.1 下载
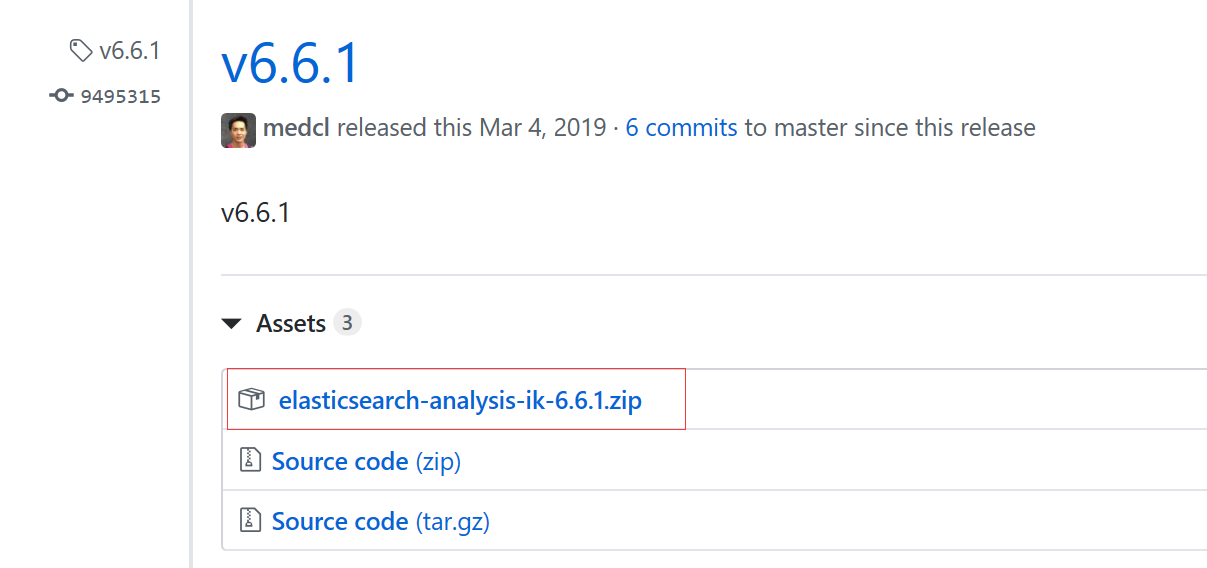
下载地址:[https://github.com/medcl/elasticsearch-analysis-ik/releases](https://github.com/medcl/elasticsearch-analysis-ik/releases)
这里你需要根据你的Es的版本来下载对应版本的IK
#### 2.4.2 解压-->将文件复制到 es的安装目录/plugin/ik下面即可
完成之后效果如下:

#### 2.4.3 重启es并检查插件是否安装成功
[http://192.168.28.130:9200/\_cat/plugins](http://192.168.28.130:9200/_cat/plugins)

## 三、kibana
### 3.1 修改配置config/kibana.yml
~~~
#端口
server.port: 5601
#主机
server.host: "0.0.0.0"
#Kibana服务名
server.name: "kibana"
#es的地址
elasticsearch.url: ["http://localhost:9200"]
#kibana在es中的索引
kibana.index: ".kibana"
#7.x版本需要以下信息
#kibana访问es的用户名和密码
elasticsearch.username: "kibana"
elasticsearch.password: "vfACoEwlS5HFM1O78A6e"
#使用中文
i18n.locale: "zh-CN"
~~~
### 3.2 后台运行
~~~
nohup bin/kibana &
~~~
### 3.3 停止kibana方法
~~~
[root@localhost bin]# ps -ef | grep node
root 3607 3247 1 13:49 pts/1 00:00:06 ./../node/bin/node --no-warnings ./../src/cli
root 3680 3247 0 13:56 pts/1 00:00:00 grep --color=auto node
[root@localhost bin]# kill -9 3607
~~~
## 四、logstash
### 4.1 准备patterns文件
* `mkdir /opt/logstash-x.x.x/patterns`
* 新建一个`java`的patterns文件,`vim java`内容如下
~~~
# user-center
MYAPPNAME ([0-9a-zA-Z_-]*)
# RMI TCP Connection(2)-127.0.0.1
MYTHREADNAME ([0-9a-zA-Z._-]|\(|\)|\s)*
~~~
>[danger] 就是一个名字叫做**java**的文件,不需要文件后缀
### 4.2 创建配置文件
**vim config/logstash.conf**
>[danger]需要修改以下地方
>1. filter 块中的`patterns_dir`路径
>2. 如果是7.x版本需要设置在output 块中的密码
>hosts => ["http://localhost:9200"]
>user => "elastic"
>password => "qEnNfKNujqNrOPD9q5kb"
~~~
input {
beats {
port => 5044
}
}
filter {
if [type] == "syslog" {
grok {
match => { "message" => "%{SYSLOGTIMESTAMP:syslog_timestamp} %{SYSLOGHOST:syslog_hostname} %{DATA:syslog_program}(?:\[%{POSINT:syslog_pid}\])?: %{GREEDYDATA:syslog_message}" }
add_field => [ "received_at", "%{@timestamp}" ]
add_field => [ "received_from", "%{host}" ]
}
syslog_pri { }
date {
match => [ "syslog_timestamp", "MMM d HH:mm:ss", "MMM dd HH:mm:ss" ]
}
}
if [fields][docType] == "sys-log" {
grok {
patterns_dir => ["/opt/logstash-x.x.x/patterns"]
match => { "message" => "\[%{NOTSPACE:appName}:%{NOTSPACE:serverIp}:%{NOTSPACE:serverPort}\] %{TIMESTAMP_ISO8601:logTime} %{LOGLEVEL:logLevel} %{WORD:pid} \[%{MYAPPNAME:traceId}\] \[%{MYTHREADNAME:threadName}\] %{NOTSPACE:classname} %{GREEDYDATA:message}" }
overwrite => ["message"]
}
date {
match => ["logTime","yyyy-MM-dd HH:mm:ss.SSS Z"]
}
date {
match => ["logTime","yyyy-MM-dd HH:mm:ss.SSS"]
target => "timestamp"
locale => "en"
timezone => "+08:00"
}
mutate {
remove_field => "logTime"
remove_field => "@version"
remove_field => "host"
remove_field => "offset"
}
}
if [fields][docType] == "point-log" {
grok {
patterns_dir => ["/opt/logstash-x.x.x/patterns"]
match => {
"message" => "%{TIMESTAMP_ISO8601:logTime}\|%{MYAPPNAME:appName}\|%{WORD:resouceid}\|%{MYAPPNAME:type}\|%{GREEDYDATA:object}"
}
}
kv {
source => "object"
field_split => "&"
value_split => "="
}
date {
match => ["logTime","yyyy-MM-dd HH:mm:ss.SSS Z"]
}
date {
match => ["logTime","yyyy-MM-dd HH:mm:ss.SSS"]
target => "timestamp"
locale => "en"
timezone => "+08:00"
}
mutate {
remove_field => "message"
remove_field => "logTime"
remove_field => "@version"
remove_field => "host"
remove_field => "offset"
}
}
if [fields][docType] == "mysqlslowlogs" {
grok {
match => [
"message", "^#\s+User@Host:\s+%{USER:user}\[[^\]]+\]\s+@\s+(?:(?<clienthost>\S*) )?\[(?:%{IP:clientip})?\]\s+Id:\s+%{NUMBER:id}\n# Query_time: %{NUMBER:query_time}\s+Lock_time: %{NUMBER:lock_time}\s+Rows_sent: %{NUMBER:rows_sent}\s+Rows_examined: %{NUMBER:rows_examined}\nuse\s(?<dbname>\w+);\nSET\s+timestamp=%{NUMBER:timestamp_mysql};\n(?<query_str>[\s\S]*)",
"message", "^#\s+User@Host:\s+%{USER:user}\[[^\]]+\]\s+@\s+(?:(?<clienthost>\S*) )?\[(?:%{IP:clientip})?\]\s+Id:\s+%{NUMBER:id}\n# Query_time: %{NUMBER:query_time}\s+Lock_time: %{NUMBER:lock_time}\s+Rows_sent: %{NUMBER:rows_sent}\s+Rows_examined: %{NUMBER:rows_examined}\nSET\s+timestamp=%{NUMBER:timestamp_mysql};\n(?<query_str>[\s\S]*)",
"message", "^#\s+User@Host:\s+%{USER:user}\[[^\]]+\]\s+@\s+(?:(?<clienthost>\S*) )?\[(?:%{IP:clientip})?\]\n# Query_time: %{NUMBER:query_time}\s+Lock_time: %{NUMBER:lock_time}\s+Rows_sent: %{NUMBER:rows_sent}\s+Rows_examined: %{NUMBER:rows_examined}\nuse\s(?<dbname>\w+);\nSET\s+timestamp=%{NUMBER:timestamp_mysql};\n(?<query_str>[\s\S]*)",
"message", "^#\s+User@Host:\s+%{USER:user}\[[^\]]+\]\s+@\s+(?:(?<clienthost>\S*) )?\[(?:%{IP:clientip})?\]\n# Query_time: %{NUMBER:query_time}\s+Lock_time: %{NUMBER:lock_time}\s+Rows_sent: %{NUMBER:rows_sent}\s+Rows_examined: %{NUMBER:rows_examined}\nSET\s+timestamp=%{NUMBER:timestamp_mysql};\n(?<query_str>[\s\S]*)"
]
}
date {
match => ["timestamp_mysql","yyyy-MM-dd HH:mm:ss.SSS","UNIX"]
}
date {
match => ["timestamp_mysql","yyyy-MM-dd HH:mm:ss.SSS","UNIX"]
target => "timestamp"
}
mutate {
convert => ["query_time", "float"]
convert => ["lock_time", "float"]
convert => ["rows_sent", "integer"]
convert => ["rows_examined", "integer"]
remove_field => "message"
remove_field => "timestamp_mysql"
remove_field => "@version"
}
}
}
output {
if [fields][docType] == "sys-log" {
elasticsearch {
hosts => ["http://localhost:9200"]
index => "sys-log-%{+YYYY.MM.dd}"
document_type => "%{[@metadata][type]}"
}
}
if [fields][docType] == "point-log" {
elasticsearch {
hosts => ["http://localhost:9200"]
index => "point-log-%{+YYYY.MM.dd}"
document_type => "%{[@metadata][type]}"
routing => "%{type}"
}
}
if [fields][docType] == "mysqlslowlogs" {
elasticsearch {
hosts => ["http://localhost:9200"]
index => "mysql-slowlog-%{+YYYY.MM.dd}"
document_type => "%{[@metadata][type]}"
}
}
}
~~~
### 4.3 后台运行
~~~
nohup bin/logstash -f config/logstash.conf &
~~~
- 微服务介绍
- 软件架构设计
- 系统简介
- 运行环境
- 模块介绍
- 启动部署命令参数
- 打包说明
- 开发说明
- Java8
- 认证理论
- 有网络隔离
- 无网络隔离
- token自动续签设计
- url级权限控制
- 单点登录
- 登录
- 用户名密码(+验证码)登录
- 通过openId获取token
- 通过手机号获取token
- 第三方系统接口对接
- 第三方系统单点登录
- 通用刷新token
- 账号登出接口
- 统一异常处理
- 日志埋点工具
- 审计日志
- yml自定义配置自动提示
- Redis使用
- CacheManager集成
- 搜索中心
- 网关zuul动态路由
- swagger
- 解决开发环境的服务冲突和实例乱窜
- 多租户理论
- 多租户实现
- 分布式锁
- 分布式id生成器
- 分布式事务
- 分库分表sharding-sphere
- 消息队列
- 系统幂等性
- X 实时搜索系统设计
- Spring Cloud性能调优
- 链路跟踪
- JWT的RSA非对称密钥生成
- jdk
- Oracle
- OpenJDK
- Dragonwell
- JVM介绍
- 常见JVM内存错误及解决方案
- JVM分析工具详解
- nexus
- docker
- 安装
- docker-compose安装
- 私有仓库搭建
- 指定数据储存目录
- 添加私有仓库
- 提交拉取镜像
- X 免Dockerfile文件构建项目镜像
- 持续集成部署CI/CD
- Confluence知识管理
- JIRA事务与项目跟踪软件
- Gitlab代码仓库
- Jenkins自动化部署
- SonarQube代码检测
- Rancher容器管理平台
- nacos
- 部署
- Rancher部署nacos
- 注册中心
- 配置中心
- 多环境
- 生产部署方案
- X 通过Nginx来实现环境隔离
- Sentinel详解
- 动态规则扩展
- 在生产环境中使用 Sentinel
- 启动配置项
- X 网关流控
- ELK日志系统和慢查询SQL
- docker安装
- 普通安装
- Filebeat安装部署
- ES数据定期删除
- 没数据问题排查思路
- X Logstash的grok语法调试
- 慢查询sql
- 审计日志
- Elasticsearch性能优化
- APM监控
- SkyWalking介绍
- Zipkin,Pinpoint,SkyWalking三种服务链路监控组件分析
- 服务端部署
- 客户端部署
- 日志清理
- Metrics监控
- 二进制包部署
- docker部署
- docker安装各组件监控
- Grafana仪表盘和告警配置
- JMeter压力测试工具
- 使用说明
- 分布式事务
- TX-LCN(同步)
- X SEATA(同步)
- X RocketMQ(异步)
- 消息队列
- RocketMQ
- RocketMQ安装部署
- RocketMQ常见异常处理
- SpringCloud-Stream
- RabbitMQ
- Redis
- 单机安装
- 主从复制
- 主从复制+哨兵
- cluster集群
- 持久化方案
- MySQL
- 单机安装
- 主从复制
- 主从切换
- 主主复制
- 高可用
- 分表分库
- Canal数据库日志解析消费
- Canal安装
- 实时同步数据到ElasticSearch
- FastDFS
- docker安装
- centos安装
- 项目管理系统
- 禅道
- 111