
操作系统:CentOS Linux release 7.7.1908 (Core)
桌面工具:gnome
远程连接工具:vnc viewer
1.安装开发者工具
`yum -y groups install "Devlement tools"`
2.安装gnome
```
yum -y groups install "GNOME Desktop"
```
3.安装vncserver
```
yum install tigervnc-server
```
4.配置服务
```
cp /lib/systemd/system/vncserver@.service /lib/systemd/system/vncserver@:1.service
```
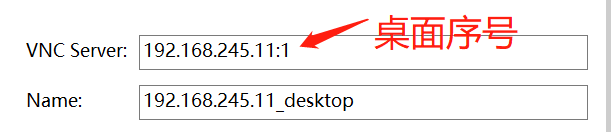
**:1表示桌面序号**,用来标识vnc客户端连接的是哪个桌面
5.设置vnc访问用户,\<USER>改为root
```
[root@localhost ~]# vi /lib/systemd/system/vncserver@:1.service
...
#ExecStart=/usr/bin/vncserver_wrapper <USER> %i
ExecStart=/usr/bin/vncserver_wrapper root %i
...
```
6.设置vnc密码
~~~
vncserver -passwd
~~~
7.配置防火墙策略
~~~
firewall-cmd --permanent --zone=public --add-port=5901/tcp
firewall-cmd --reload
firewall-cmd --list-all
~~~
8.设置vnc显示分辨率
```
[root@localhost system]# vi /usr/bin/vncserver
...
#$geometry = "1024x768";
$geometry = "1920x1080";
#$depth = 16; #此项表示颜色深度,开启后可能会导致gnome打开设置后强制退出
...
```
9.启动vnc服务
```
# 启动
systemctl start vncserver@:1.service
# 开机启动
systemctl enable vncserver@:1.service
```
10.vnc viewer连接桌面
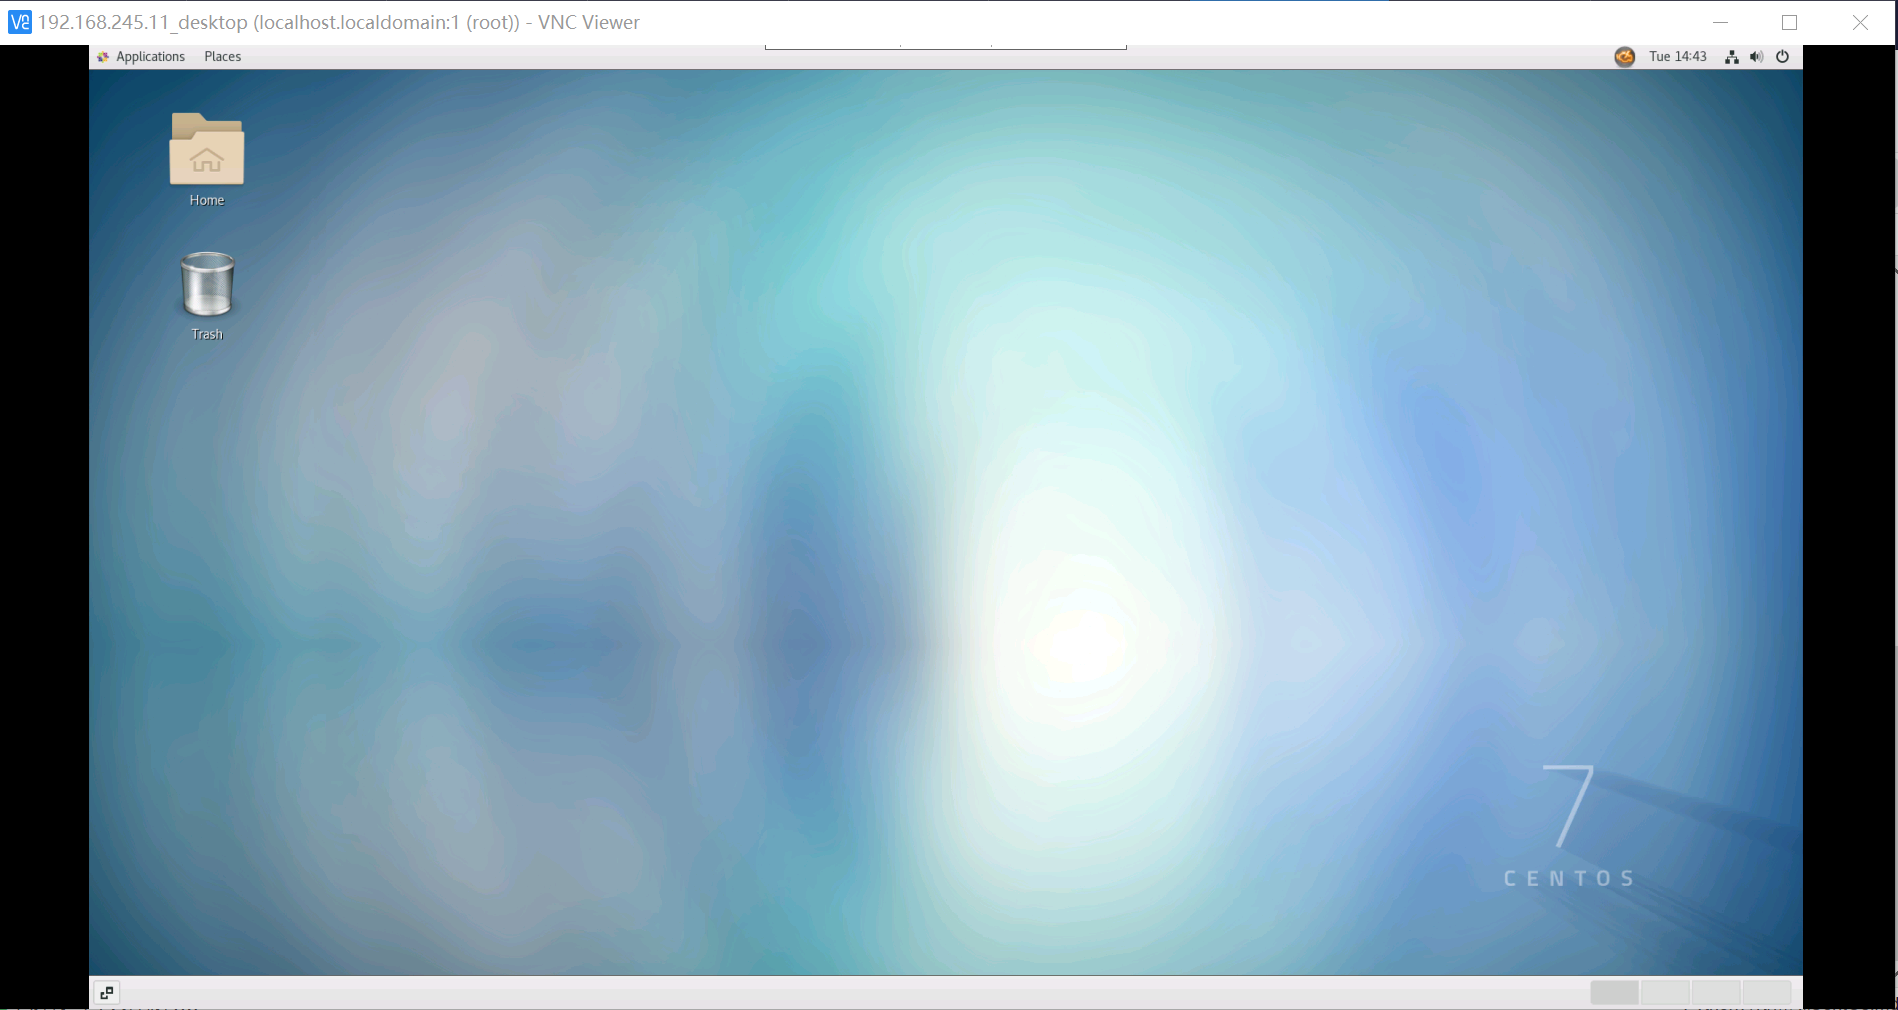
11.登录效果
*****
# 桌面美化
1.安装GTK2
~~~
yum install gtk-murrine-engine gtk2-engines
~~~
2.安装Vimix-gtk-theme([git地址](https://github.com/vinceliuice/vimix-gtk-themes))
```
# 下载
wget https://github.com/vinceliuice/vimix-gtk-themes/archive/2020-02-24.tar.gz
# 解压
tar zxvf 2020-02-24.tar.gz
# 安装
[root@localhost ~]# cd vimix-gtk-themes-2020-02-24/
[root@localhost vimix-gtk-themes-2020-02-24]# ls
AUTHORS HACKING install.sh LICENSE parse-sass.sh README.md src update-vimix-online vimix-installer
[root@localhost vimix-gtk-themes-2020-02-24]# ./install.sh
```
3.安装Vimix Icon Theme([git地址](https://github.com/vinceliuice/vimix-icon-theme))
```
# 下载
wget https://github.com/vinceliuice/vimix-icon-theme/archive/2020-07-10.tar.gz
# 解压
tar zxvf 2020-07-10.tar.gz
# 安装
[root@localhost ~]# cd vimix-icon-theme-2020-07-10/
[root@localhost vimix-icon-theme-2020-07-10]# ls
AUTHORS COPYING install.sh links Preview01.png Preview.png README.md src
[root@localhost vimix-icon-theme-2020-07-10]# ./install.sh
```
4.安装Ubuntu字体([下载地址](https://design.ubuntu.com/font/))
```
# 下载
wget https://assets.ubuntu.com/v1/0cef8205-ubuntu-font-family-0.83.zip
# 安装
unzip 0cef8205-ubuntu-font-family-0.83.zip
mv ubuntu-font-family-0.83/ /usr/share/fonts/
# 刷新字体缓存
fc-cache -fv
```
5.安装gnome-shell-extension-dash-to-dock扩展包
`yum install -y gnome-shell-extension-dash-to-dock`
## 调整主题
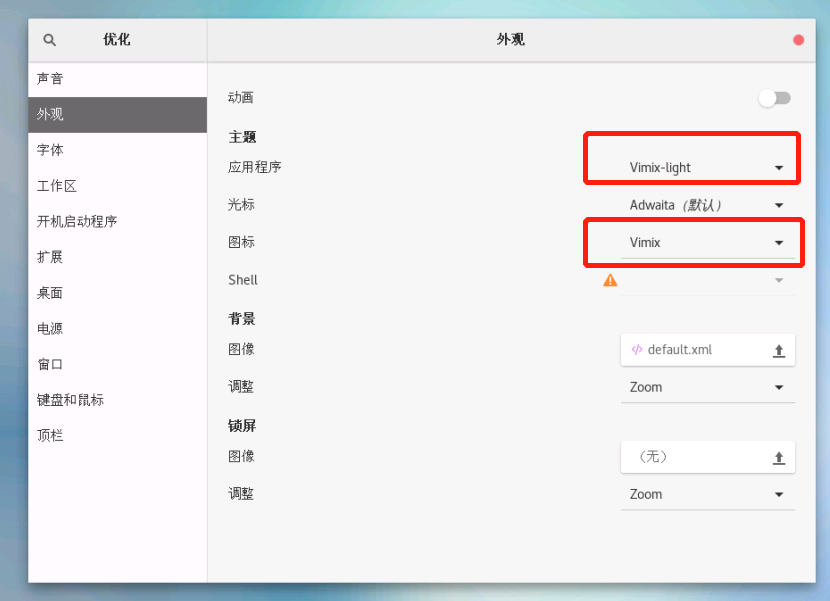
在桌面左上角选择“应用程序 > 附件 > 优化”,或直接执行系统命令“gnome-tweaks”
选择“外观”然后设置“应用程序”和“图标”,如下图所示:
## 调整字体
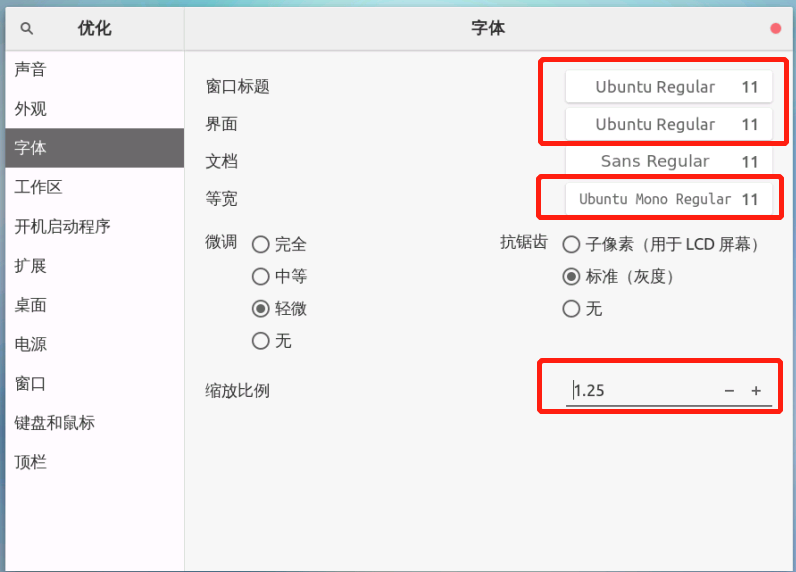
选择“字体”然后进行相应的设置,如下图所示:
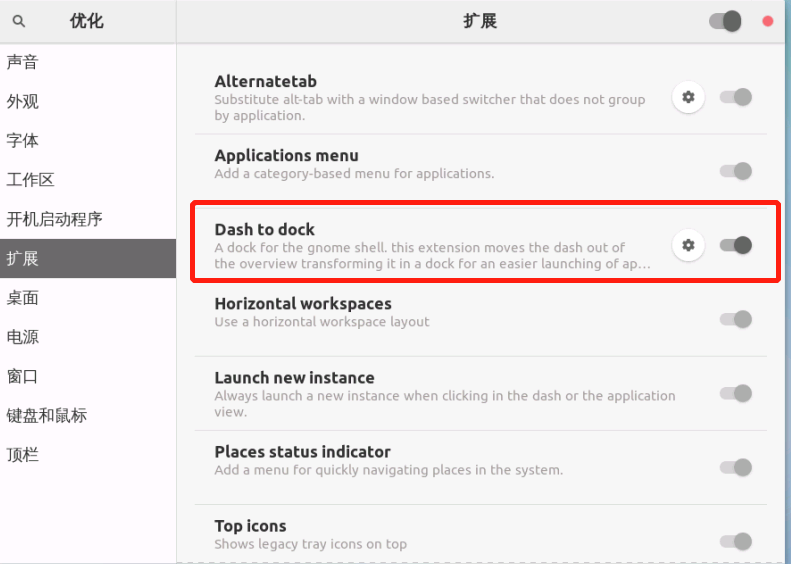
## 开启dash-to-dock
选择“扩展”然后开启“dash to dock”,如下图所示:
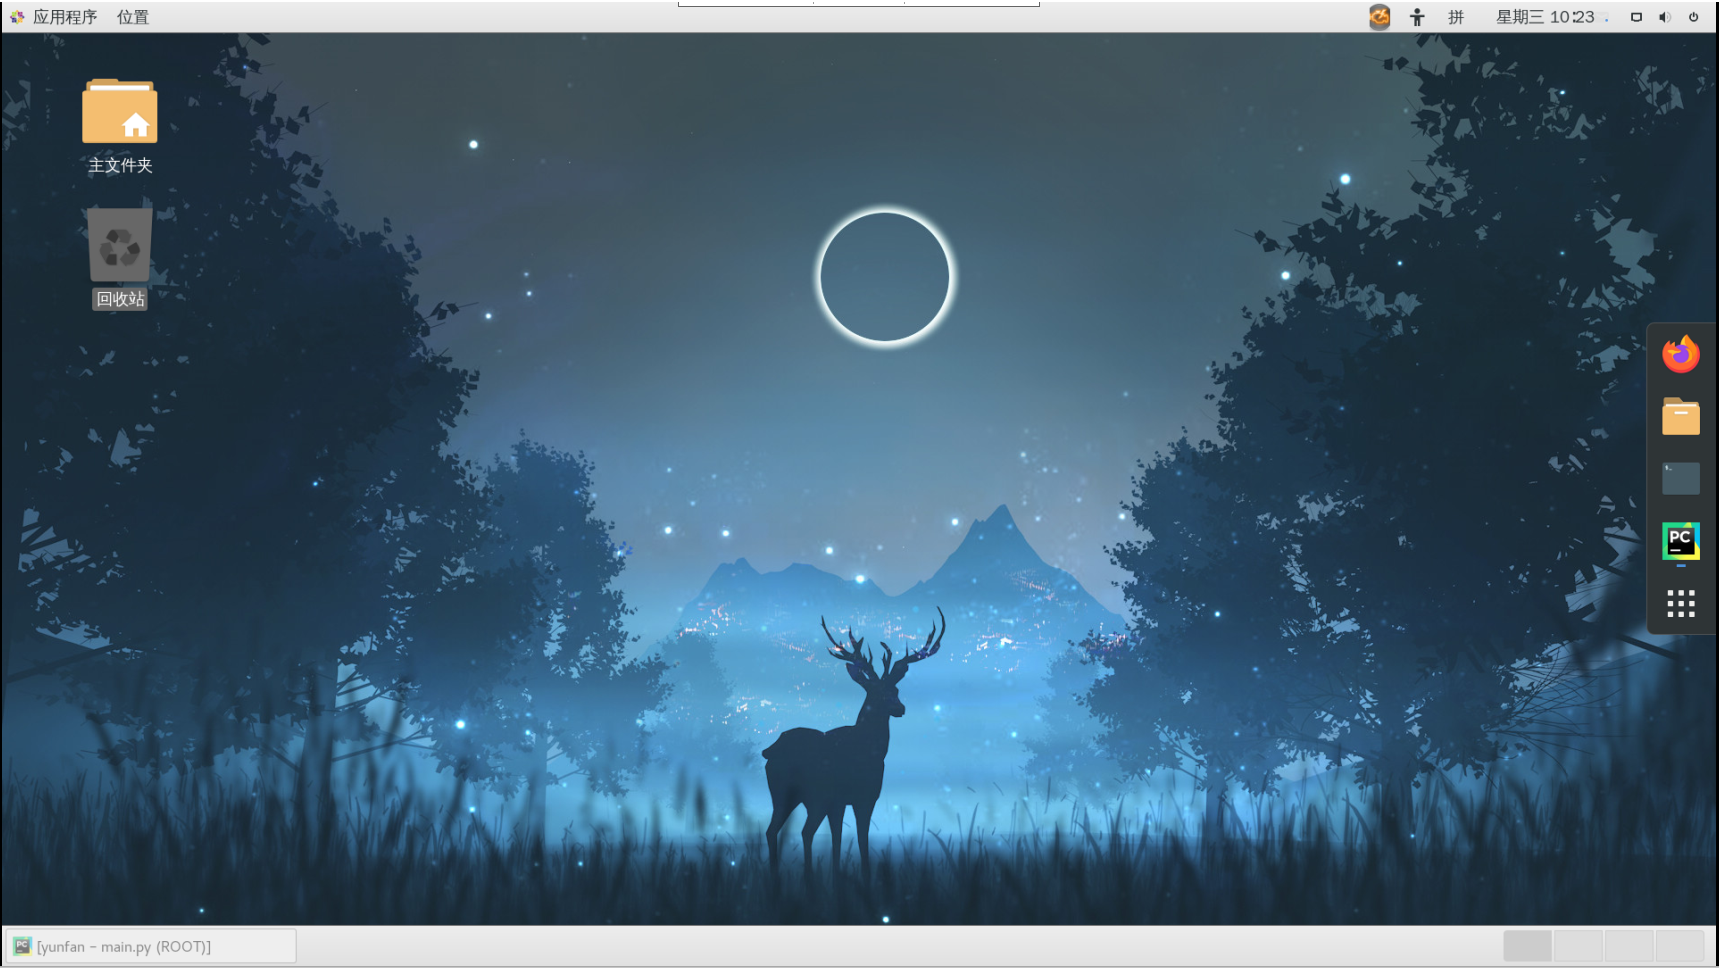
## 效果图
## 桌面壁纸
https://wallhaven.cc
https://www.pexels.com
*****
# 创建pycharm快捷图标
1.终端直接运行 pycharm.sh
2.进入pycharm后点击"tools"
3.点击"Create Desktop Entry…" 再关闭pycharm
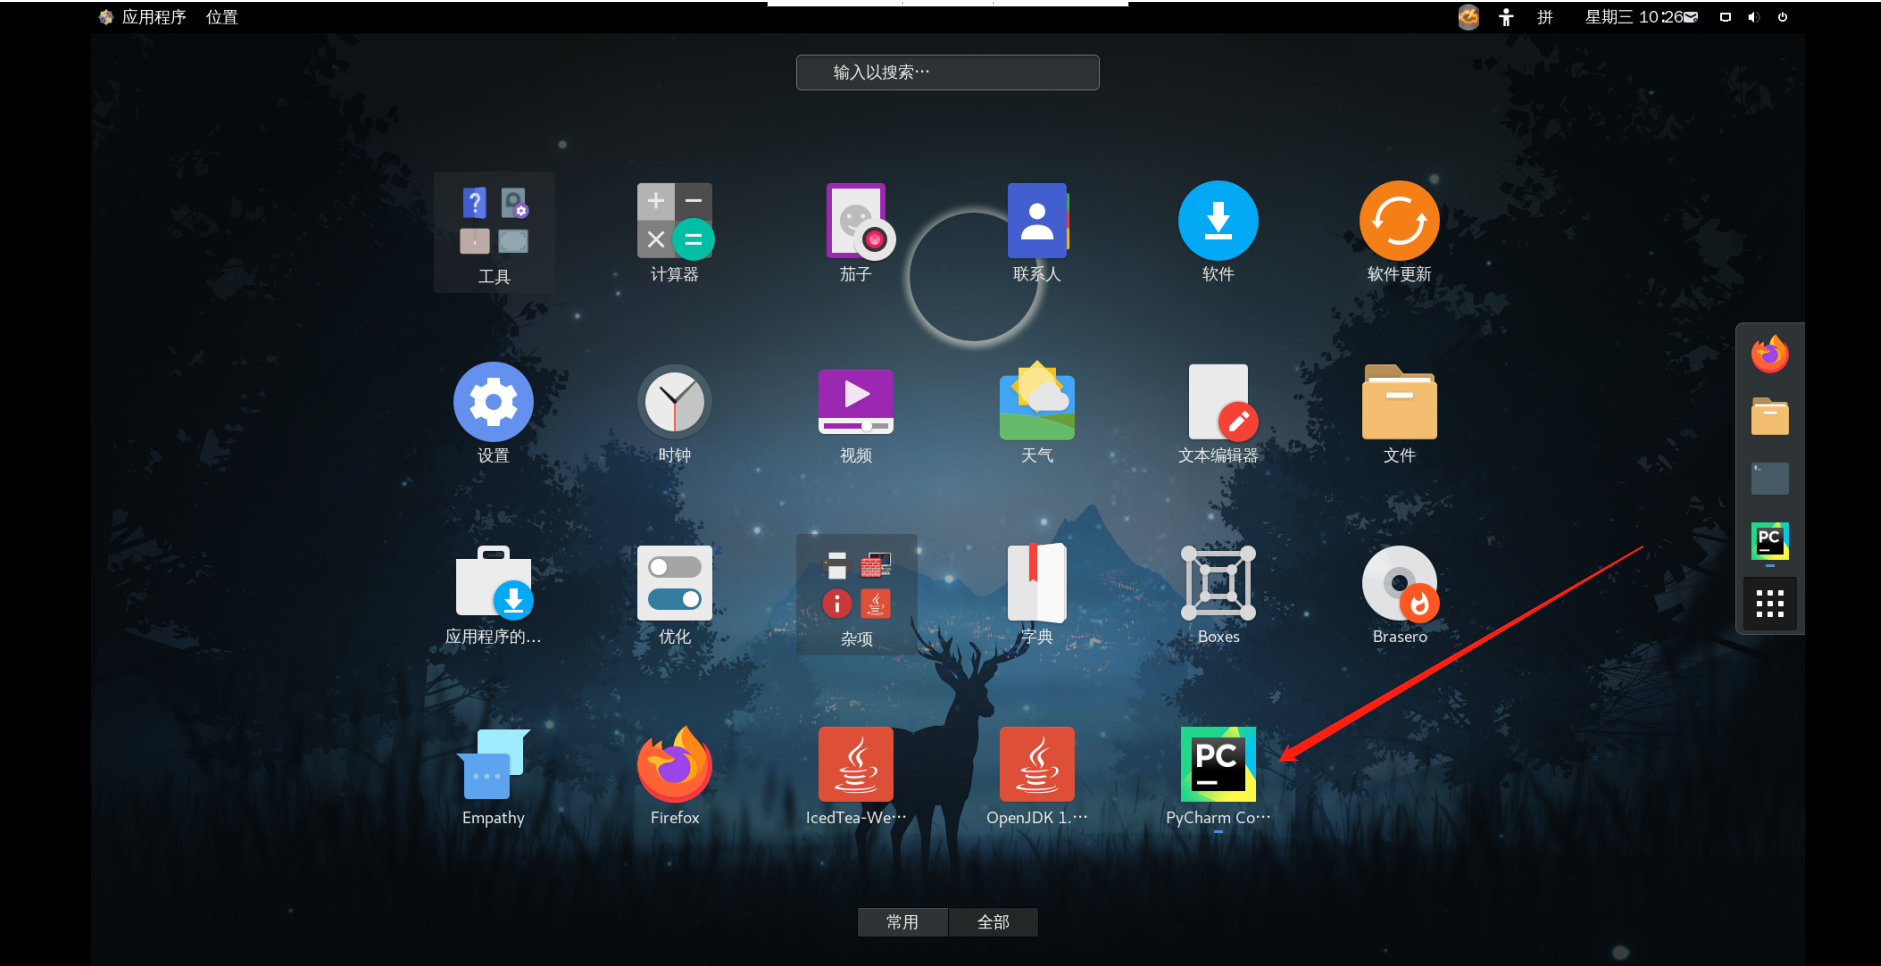
4.返回桌面,点击显示应用程序
- python setup.py install报错
- from future import absolute_import 的使用
- celery 4以上的版本不支持windows解决办法
- 'ascii' codec can't decode byte 0xe4 in position 0: ordinal not in range(128)
- Python开发环境CentOS
- dosh-to-dock启动报错
- 创建了__init__.py文件,找不到模块
- CentOS切换中文输入法
- vncserver:1非正常中断后启动不来
- CentOS7安装搜狗输入法
- 安装第三方包常见报错
- Django for Professionals
- Chapter 1:Docker
- What is Docker?
- Containers vs. Virtual Environments
- Install Docker
- Docker Hello, World
- Django Hello, World
- Pages App
- Images, Containers, and the Docker Host
- Git
- Conclusion
- 设置pip/pyenv国内加速源
- 使用stackedit在github编辑文档
- python2.x与python3.x的区别
- python多任务实现
- python执行Linux命令的方法