
# 批量安装系统-kickstart
[TOC]
## 1 环境准备
### 1.1 系统信息
```sh
cat /etc/redhat-release
CentOS Linux release 7.4.1708 (Core)
uname -r
3.10.0-693.el7.x86_64
hostname -I
10.0.0.201 172.16.1.201
```
### 1.2 防火墙、selinux
```sh
sed -i 's/SELINUX=enforcing/SELINUX=disabled/g' /etc/selinux/config
setenforce 0
systemctl stop firewalld.service
systemctl disable firewalld.service
```
## 二、 安装配置DHCP服务
### 2.1 安装DHCP
```sh
yum -y install dhcp
cat >/etc/dhcp/dhcpd.conf <<EOF
subnet 172.16.1.0 netmask 255.255.255.0 {
range 172.16.1.100 172.16.1.200;
option subnet-mask 255.255.255.0;
default-lease-time 21600;
max-lease-time 43200;
next-server 172.16.1.201;
filename "/pxelinux.0";
}
EOF
```
### 2.2 启动DHCP
```sh
systemctl start dhcpd
systemctl status dhcpd
ss -tunlp|grep dhcp
udp 0 0 0.0.0.0:67 0.0.0.0:* 1573/dhcpd
```
Kickstart系统不要开机自启动,且用完后要关闭,防止自动重装系统。
## 3 安装配置TFTP和PXE
### 3.1 安装启动TFTP
```sh
yum -y install tftp-server
systemctl start tftp.socket
```
### 3.2 配置pxe服务
```sh
yum -y install syslinux
cp /usr/share/syslinux/pxelinux.0 /var/lib/tftpboot/
```
### 3.3 拷贝配置文件
1) 挂载光盘
```sh
mkdir -p /var/www/html/{CentOS7,ks_config}
mount /dev/cdrom /var/www/html/CentOS7
```
2) 拷贝配置文件
```sh
cp -a /var/www/html/CentOS7/isolinux/* /var/lib/tftpboot/
mkdir -p /var/lib/tftpboot/pxelinux.cfg
cp /var/www/html/CentOS7/isolinux/isolinux.cfg /var/lib/tftpboot/pxelinux.cfg/default
```
3) 结果验证
```sh
tree /var/lib/tftpboot/
/var/lib/tftpboot/
├── boot.cat
├── boot.msg
├── grub.conf
├── initrd.img
├── isolinux.bin
├── isolinux.cfg
├── memtest
├── pxelinux.0
├── pxelinux.cfg
│ └── default
├── splash.png
├── TRANS.TBL
├── vesamenu.c32
└── vmlinuz
```
## 4 安装配置HTTP服务
### 4.1 服务安装
```sh
yum -y install httpd
systemctl start httpd.service
```
### 4.2 结果验证
* 浏览器访问
http://10.0.0.201/CentOS7/
能看到光盘中的内容表示正确
* 命令行验证
```sh
curl http://172.16.1.201/CentOS7/CentOS_BuildTag
20170905-1415
```
## 5 配置文件与ks文件
### 5.1 修改配置文件
```sh
mv /var/lib/tftpboot/pxelinux.cfg/default{,.bak}
cat >/var/lib/tftpboot/pxelinux.cfg/default <<'EOF'
default ks
prompt 0
label ks
kernel vmlinuz
append initrd=initrd.img ks=http://172.16.1.201/ks_config/ks-CentOS7.cfg net.ifnames=0 biosdevname=0 ksdevice=eth1
EOF
chmod 644 /var/lib/tftpboot/pxelinux.cfg/default
```
内核参数中指定http服务的地址,并增加网卡名统一参数
### 5.2 创建ks文件
```sh
cat >/var/www/html/ks_config/CentOS7-ks.cfg <<'EOF'
# Kickstart Configurator for CentOS 7 by luo gang
install
url --url="http://172.16.1.201/CentOS7/"
text
lang en_US.UTF-8
keyboard us
zerombr
bootloader --location=mbr --driveorder=sda --append="crashkernel=auto rhgb quiet"
network --bootproto=static --device=eth0 --gateway=10.0.0.254 --ip=10.0.0.202 --nameserver=223.5.5.5 --netmask=255.255.255.0 --activate
network --bootproto=static --device=eth1 --ip=172.16.1.202 --netmask=255.255.255.0 --activate
network --hostname=Cobbler
#network --bootproto=dhcp --device=eth1 --onboot=yes --noipv6 --hostname=CentOS7
timezone --utc Asia/Shanghai
authconfig --enableshadow --passalgo=sha512
rootpw --iscrypted $6$X20eRtuZhkHznTb4$dK0BJByOSAWSDD8jccLVFz0CscijS9ldMWwpoCw/ZEjYw2BTQYGWlgKsn945fFTjRC658UXjuocwJbAjVI5D6/
clearpart --all --initlabel
part /boot --fstype xfs --size 1024
part swap --size 1024
part / --fstype xfs --size 1 --grow
firstboot --disable
selinux --disabled
firewall --disabled
logging --level=info
reboot
%packages
@^minimal
@compat-libraries
@debugging
@development
tree
nmap
sysstat
lrzsz
dos2unix
telnet
wget
vim
bash-completion
%end
%post
systemctl disable postfix.service
%end
EOF
```
5.3 语法检查
```sh
yum install pykickstart
ksvalidator /var/www/html/ks_config/CentOS7-ks.cfg
```
## 6 无人值守自动安装
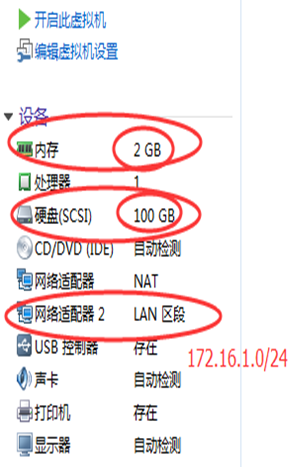
创建虚拟机,打开系统电源,出去喝杯水。过会回来,系统就以经装好了.如果安装过程出错,可以通过Alt+F2-F5切到其他控制台查看报错信息
注意centos7的虚拟机,内存要给2G以上,否则安装过程会报错
- shell编程
- 变量1-规范-环境变量-普通变量
- 变量2-位置-状态-特殊变量
- 变量3-变量子串
- 变量4-变量赋值三种方法
- 变量5-数组相关
- 计算1-数值计算命令和案例
- 计算2-expr命令举例
- 计算3-条件表达式和各种操作符
- 计算4-条件表达式和操作符案例
- 循环1-函数的概念与作用
- 循环2-if与case语法
- 循环3-while语法
- 循环4-for循环
- 其他1-判断传入的参数为0或整数的多种思路
- 其他2-while+read按行读取文件
- 其他3-给输出内容加颜色
- 其他4-shell脚本后台运行知识
- 其他5-6种产生随机数的方法
- 其他6-break,continue,exit,return区别
- if语法案例
- case语法案例
- 函数语法案例
- WEB服务软件
- nginx相关
- 01-简介与对比
- 02-日志说明
- 03-配置文件和虚拟主机
- 04-location模块和访问控制
- 05-status状态模块
- 06-rewrite重写模块
- 07-负载均衡和反向代理
- 08-反向代理监控虚拟IP地址
- nginx与https自签发证书
- php-nginx-mysql联动
- Nginx编译安装[1.12.2]
- 案例
- 不同客户端显示不同信息
- 上传和访问资源池分离
- 配置文件
- nginx转发解决跨域问题
- 反向代理典型配置
- php相关
- C6编译安装php.5.5.32
- C7编译php5
- C6/7yum安装PHP指定版本
- tomcxat相关
- 01-jkd与tomcat部署
- 02-目录-日志-配置文件介绍
- 03-tomcat配置文件详解
- 04-tomcat多实例和集群
- 05-tomcat监控和调优
- 06-Tomcat安全管理规范
- show-busy-java-threads脚本
- LVS与keepalived
- keepalived
- keepalived介绍和部署
- keepalived脑裂控制
- keepalived与nginx联动-监控
- keepalived与nginx联动-双主
- LVS负载均衡
- 01-LVS相关概念
- 02-LVS部署实践-ipvsadm
- 03-LVS+keepalived部署实践
- 04-LVS的一些问题和思路
- mysql数据库
- 配置和脚本
- 5.6基础my.cnf
- 5.7基础my.cnf
- 多种安装方式
- 详细用法和命令
- 高可用和读写分离
- 优化和压测
- docker与k8s
- docker容器技术
- 1-容器和docker基础知识
- 2-docker软件部署
- 3-docker基础操作命令
- 4-数据的持久化和共享互连
- 5-docker镜像构建
- 6-docker镜像仓库和标签tag
- 7-docker容器的网络通信
- 9-企业级私有仓库harbor
- docker单机编排技术
- 1-docker-compose快速入门
- 2-compose命令和yaml模板
- 3-docker-compose命令
- 4-compose/stack/swarm集群
- 5-命令补全和资源限制
- k8s容器编排工具
- mvn的dockerfile打包插件
- openstack与KVM
- kvm虚拟化
- 1-KVM基础与快速部署
- 2-KVM日常管理命令
- 3-磁盘格式-快照和克隆
- 4-桥接网络-热添加与热迁移
- openstack云平台
- 1-openstack基础知识
- 2-搭建环境准备
- 3-keystone认证服务部署
- 4-glance镜像服务部署
- 5-nova计算服务部署
- 6-neutron网络服务部署
- 7-horizon仪表盘服务部署
- 8-启动openstack实例
- 9-添加计算节点流程
- 10-迁移glance镜像服务
- 11-cinder块存储服务部署
- 12-cinder服务支持NFS存储
- 13-新增一个网络类型
- 14-云主机冷迁移前提设置
- 15-VXALN网络类型配置
- 未分类杂项
- 部署环境准备
- 监控
- https证书
- python3.6编译安装
- 编译安装curl[7.59.0]
- 修改Redhat7默认yum源为阿里云
- 升级glibc至2.17
- rabbitmq安装和启动
- rabbitmq多实例部署[命令方式]
- mysql5.6基础my.cnf
- centos6[upstart]/7[systemd]创建守护进程
- Java启动参数详解
- 权限控制方案
- app发包仓库
- 版本发布流程
- elk日志系统
- rsyslog日志统一收集系统
- ELK系统介绍及YUM源
- 快速安装部署ELK
- Filebeat模块讲解
- logstash的in/output模块
- logstash的filter模块
- Elasticsearch相关操作
- ES6.X集群及head插件
- elk收集nginx日志(json格式)
- kibana说明-汉化-安全
- ES安装IK分词器
- zabbix监控
- zabbix自动注册模板实现监控项自动注册
- hadoop大数据集群
- hadoop部署
- https证书
- certbot网站
- jenkins与CI/CD
- 01-Jenkins部署和初始化
- 02-Jenkins三种插件安装方式
- 03-Jenkins目录说明和备份
- 04-git与gitlab项目准备
- 05-构建自由风格项目和相关知识
- 06-构建html静态网页项目
- 07-gitlab自动触发项目构建
- 08-pipelinel流水线构建项目
- 09-用maven构建java项目
- iptables
- 01-知识概念
- 02-常规命令实战
- 03-企业应用模板
- 04-企业应用模板[1键脚本]
- 05-企业案例-共享上网和端口映射
- SSH与VPN
- 常用VPN
- VPN概念和常用软件
- VPN之PPTP部署[6.x][7.x]
- 使用docker部署softether vpn
- softEther-vpn静态路由表推送
- SSH服务
- SSH介绍和部署
- SSH批量分发脚本
- 开启sftp日志并限制sftp访问目录
- sftp账号权限分离-开发平台
- ssh配置文件最佳实践
- git-github-gitlab
- git安装部署
- git详细用法
- github使用说明
- gitlab部署和使用
- 缓存数据库
- zookeeper草稿
- mongodb数据库系列
- mongodb基本使用
- mongodb常用命令
- MongoDB配置文件详解
- mongodb用户认证管理
- mongodb备份与恢复
- mongodb复制集群
- mongodb分片集群
- docker部署mongodb
- memcached
- memcached基本概念
- memcached部署[6.x][7.x]
- memcached参数和命令
- memcached状态和监控
- 会话共享和集群-优化-持久化
- memcached客户端-web端
- PHP测试代码
- redis
- 1安装和使用
- 2持久化-事务-锁
- 3数据类型和发布订阅
- 4主从复制和高可用
- 5redis集群
- 6工具-安全-pythonl连接
- redis配置文件详解
- 磁盘管理和存储
- Glusterfs分布式存储
- GlusterFS 4.1 版本选择和部署
- Glusterfs常用命令整理
- GlusterFS 4.1 深入使用
- NFS文件存储
- NFS操作和部署
- NFS文件系统-挂载和优化
- sersync与inotify
- rsync同步服务
- rsyncd.conf
- rsync操作和部署文档
- rsync常见错误处理
- inotify+sersync同步服务
- inotify安装部署
- inotify最佳脚本
- sersync安装部署
- 时间服务ntp和chrony
- 时间服务器部署
- 修改utc时间为cst时间
- 批量操作与自动化
- cobbler与kickstart
- KS+COBBLER文件
- cobbler部署[7.x]
- kickstart部署[7.x]
- kickstar-KS文件和语法解析
- kickstart-PXE配置文件解析
- 自动化之ansible
- ansible部署和实践
- ansible剧本编写规范
- 配置文件示例
- 内网DNS服务
- 压力测试
- 压测工具-qpefr测试带宽和延时