
# Stripe支付配置说明
## 第一步:获取 API keys;
登录[https://dashboard.stripe.com/](https://dashboard.stripe.com/) (如未注册请先自行注册),进入 【API keys】
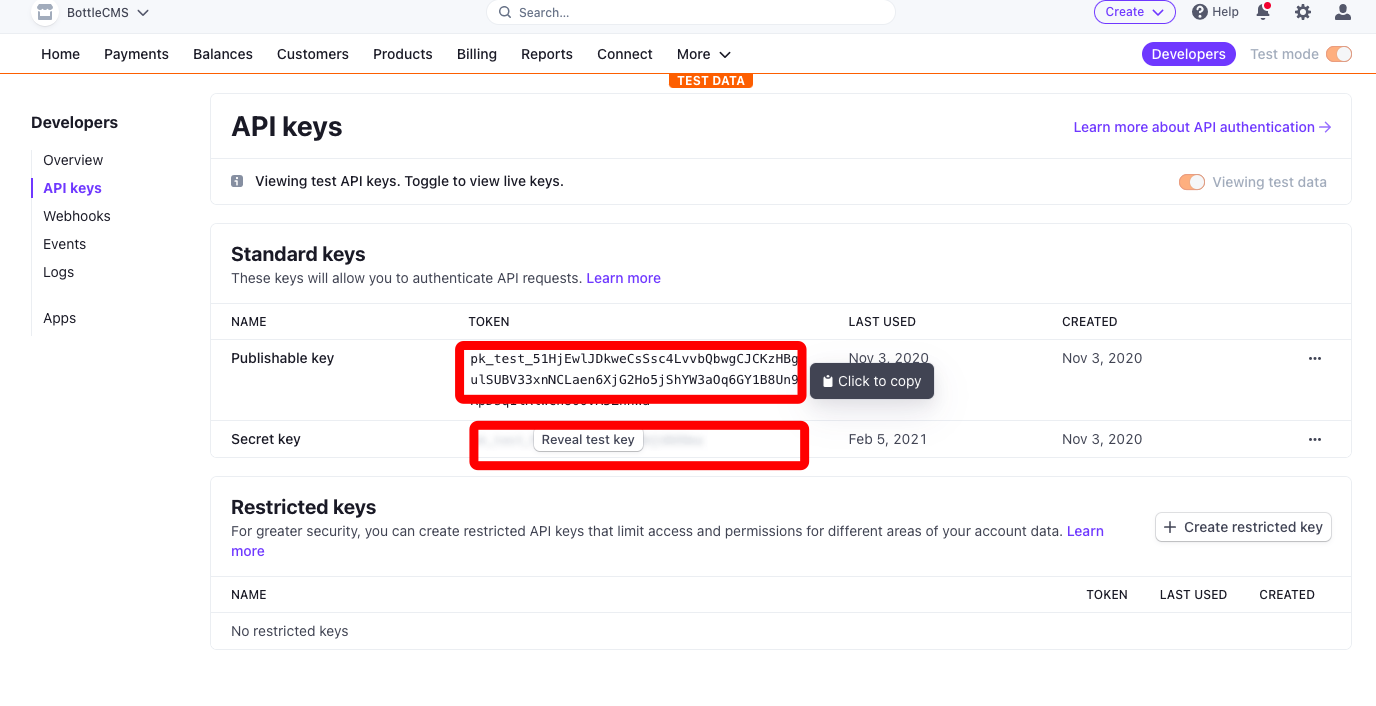
复制出Publishable key 和 Secret key 保存好备用;
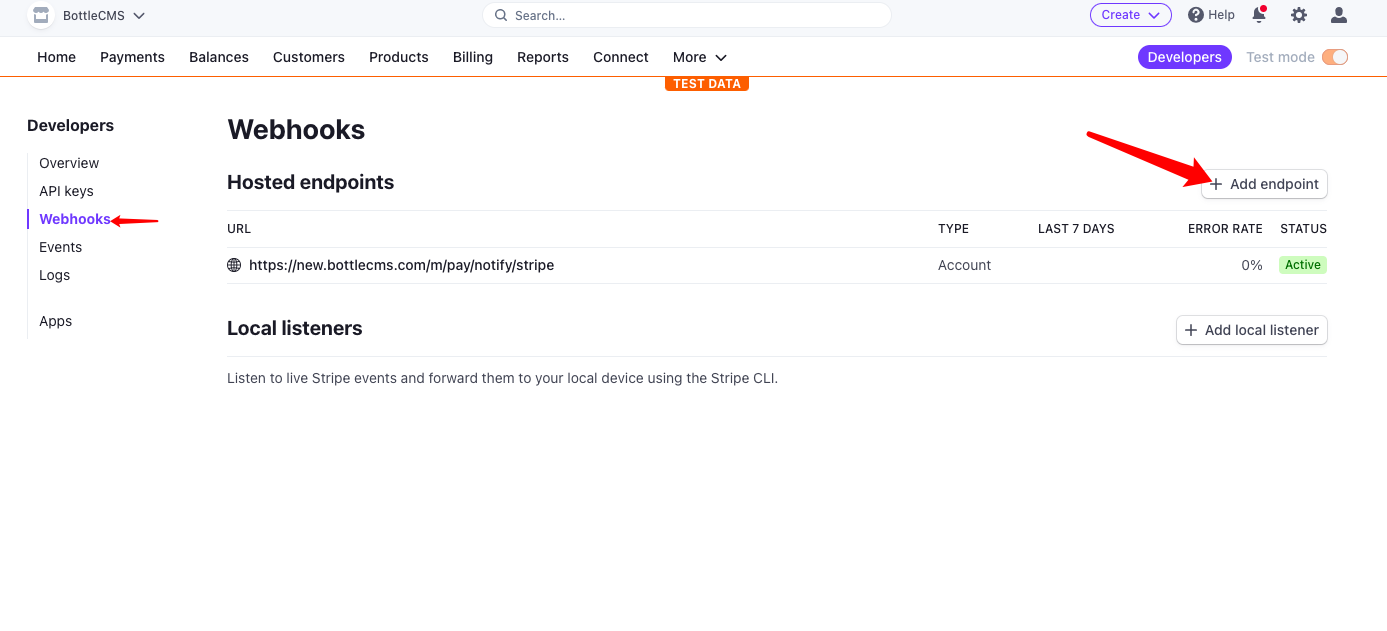
## 第二步:设置Webhooks ,进入【Webhooks】点击“Add endpoint“ 按钮;
```
Endpoint URL:输入“https://你的域名/pay/notify/stripe“或“https://你的域名/m/pay/notify/stripe“
```
Select events to listen to: 选择:
```
checkout.session.async_payment_failed
checkout.session.async_payment_succeeded
checkout.session.completed
```
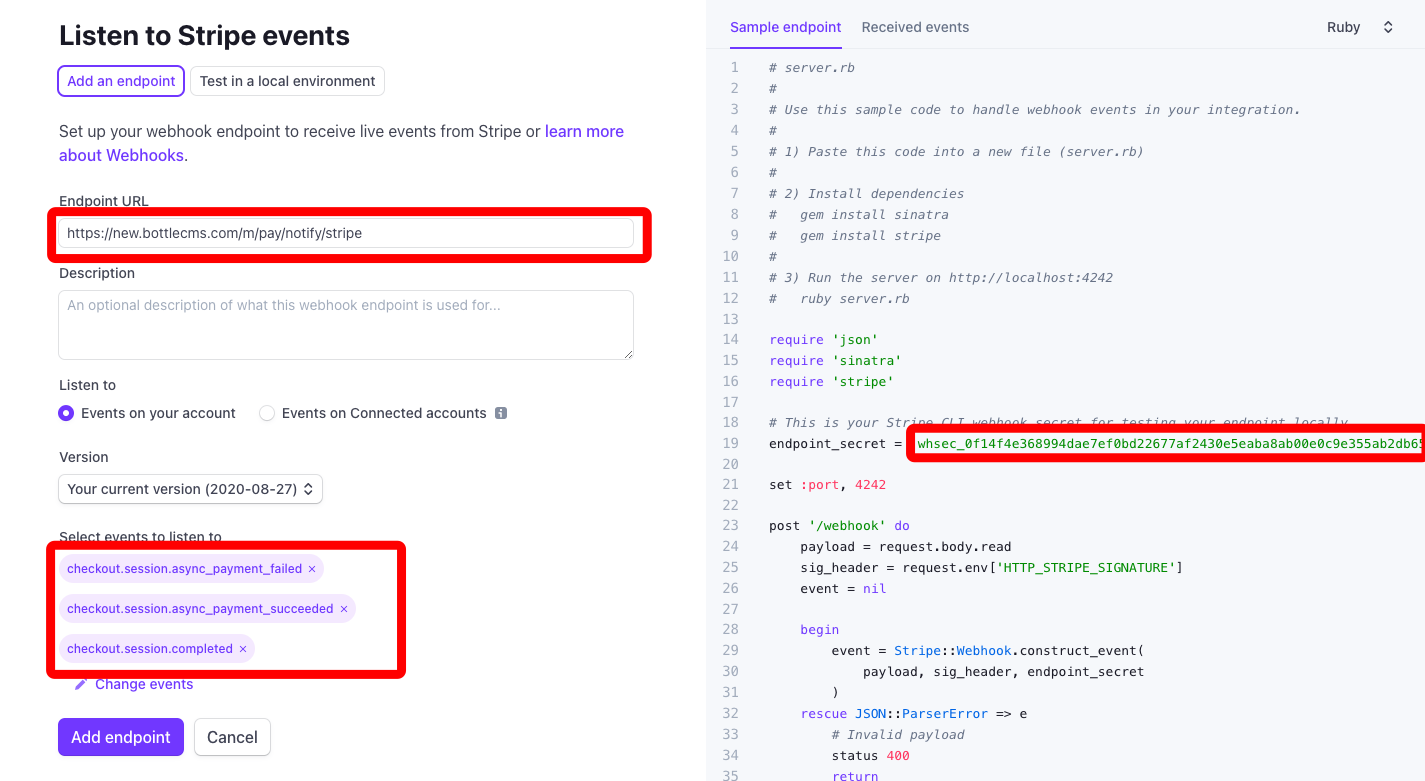
复制出:endpoint\_secret;保存好备用;
## 第三步:配置后台;
进入你的BollteCMS管理后台:【系统 - 接口设置 - 支付 - stripe - 编辑】;
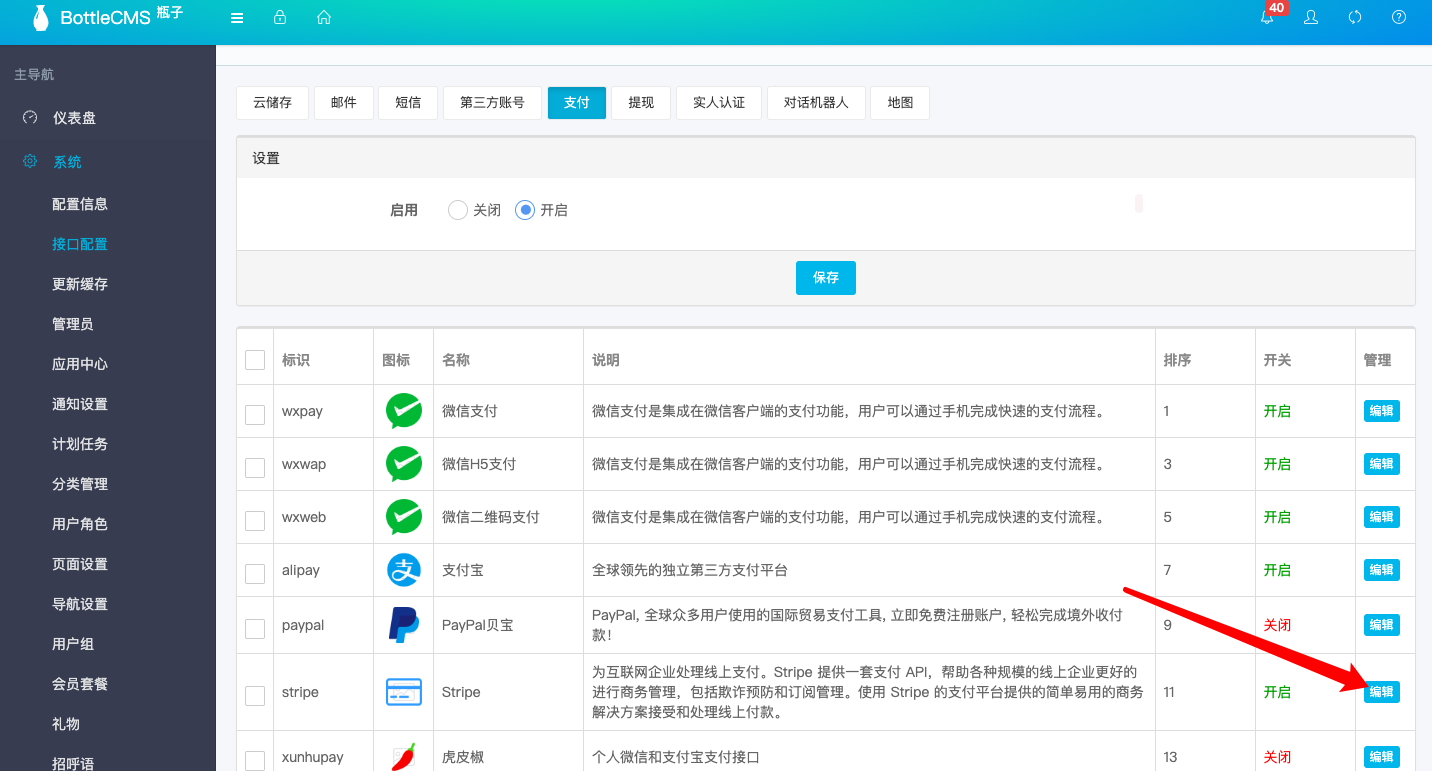
将上面获取到的:“PublishableKey“,“Secretkey“,“EndpointSecret“填入对应的输入框 保存;
注意:“更新缓存“后才能生效;
- 序言
- 安装及配置
- 环境要求
- 开始安装
- Redis配置
- 问题处理
- 图片无法显示问题
- 站点迁移
- 接口配置
- 短信
- 阿里云短信
- 腾讯云短信
- 邮件
- SMTP发送
- 阿里云邮件API
- 支付
- 微信支付
- 支付宝
- stripe
- PayPal
- 第三方账号
- 微信登录
- QQ登录
- 文件储存
- 阿里云OSS
- 七牛云KODO
- 微信公众号
- 微信公众号接口配置
- 微信模版消息
- 实人认证
- 初始设置
- 按功能设置
- 首页Banner
- 官方推荐
- 每日推荐
- 单身资料
- 单身列表
- 缘分
- 附近
- 好友
- 聊天
- 联系方式
- 礼物
- VIP套餐
- 用户组
- 推荐好友
- 活动
- 约会
- 媒婆
- 专业红娘
- 话题
- 脱单宝典
- 服务
- 广告设置
- 自定义页
- 导入单身
- 导航设置
- 审核
- 页面设置
- API接口
- 请求说明
- 上传文件
- 获取配置信息
- 获取分类
- API支付
- 获取支付方式
- 调起支付
- 获取自定义页
- 获取文章
- 获取文章列表
- 获取文章详情
- 意见反馈
- 获取广告
- 获取通知
- 注册用户
- 用户登录
- 第三方账号登录
- 完善资料
- 单身资料
- 获取单身列表
- 获取单身详情