
# h5单独部署域名
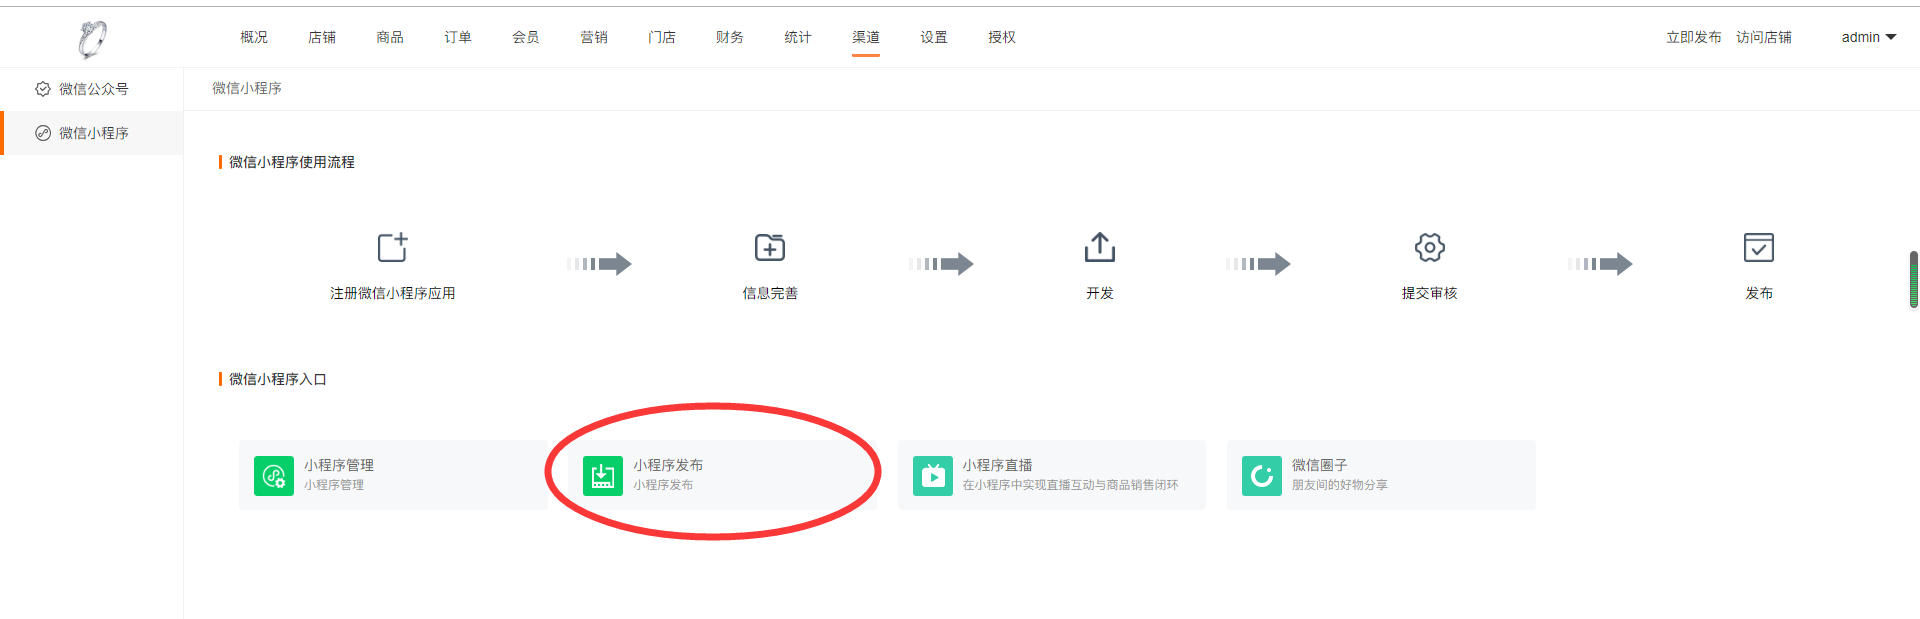
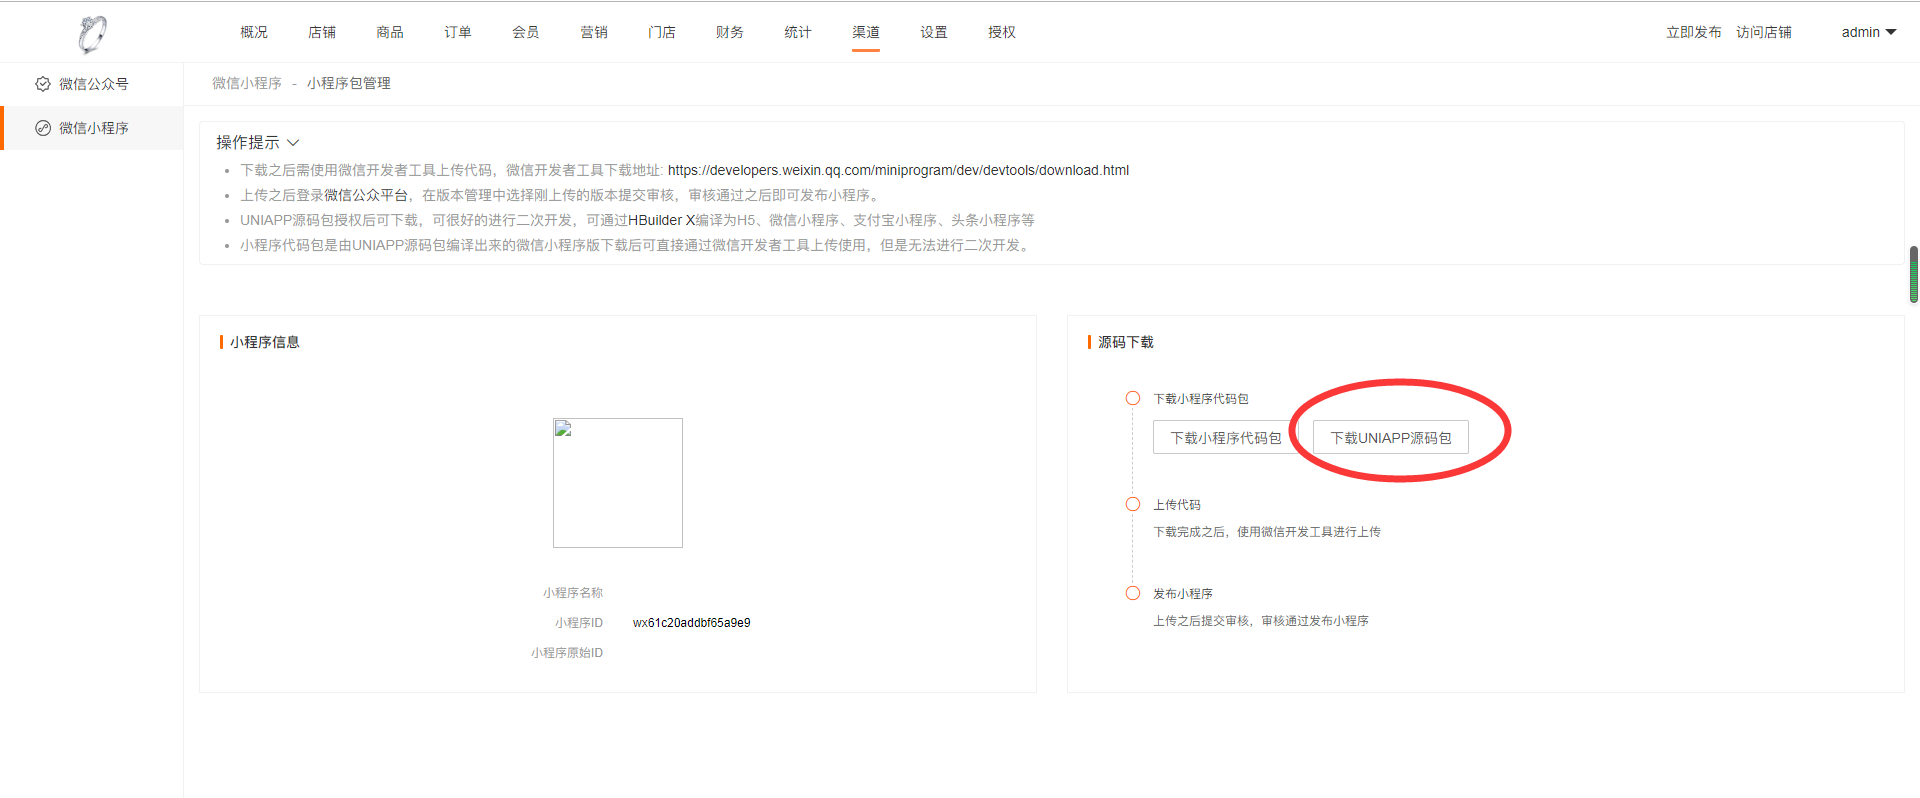
第一步:下载uniapp源码
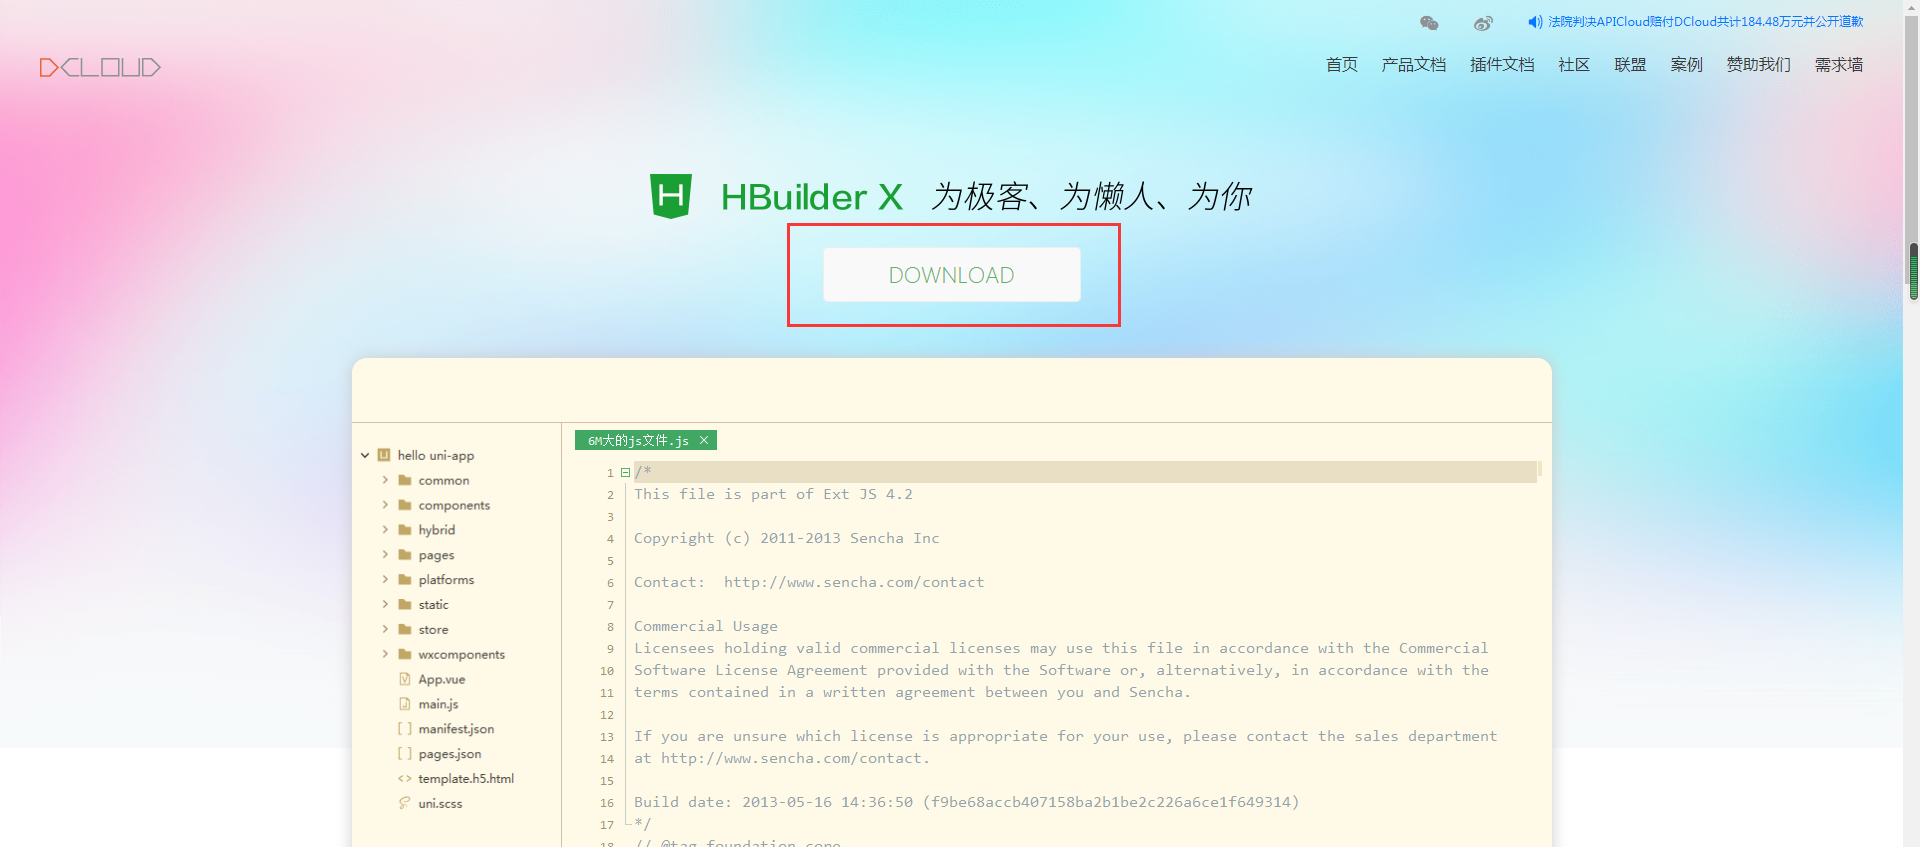
第二步:下载hbuilder(\[[https://www.dcloud.io/hbuilderx.html](https://www.dcloud.io/hbuilderx.html)\])

第三步:导入下载下的uniapp源码
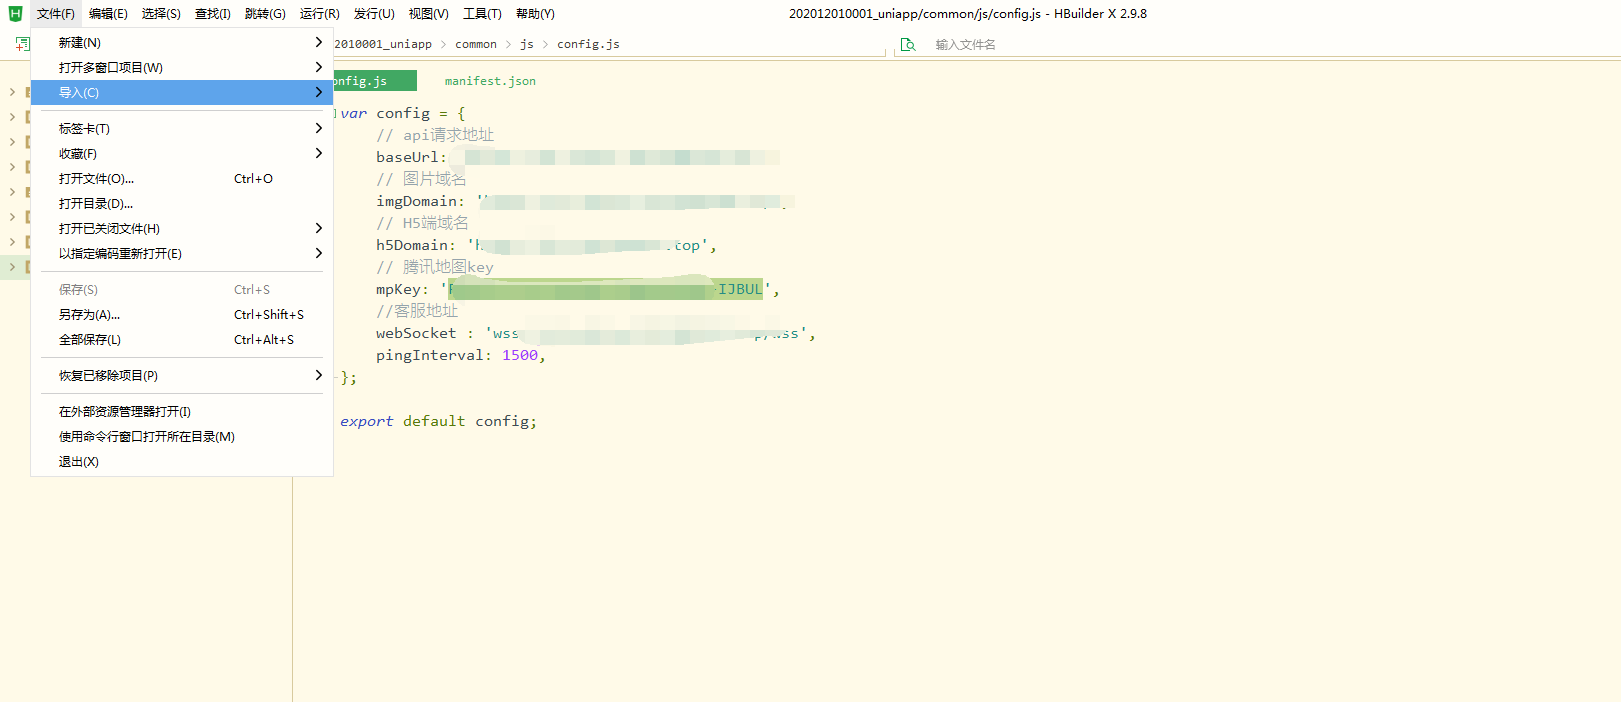
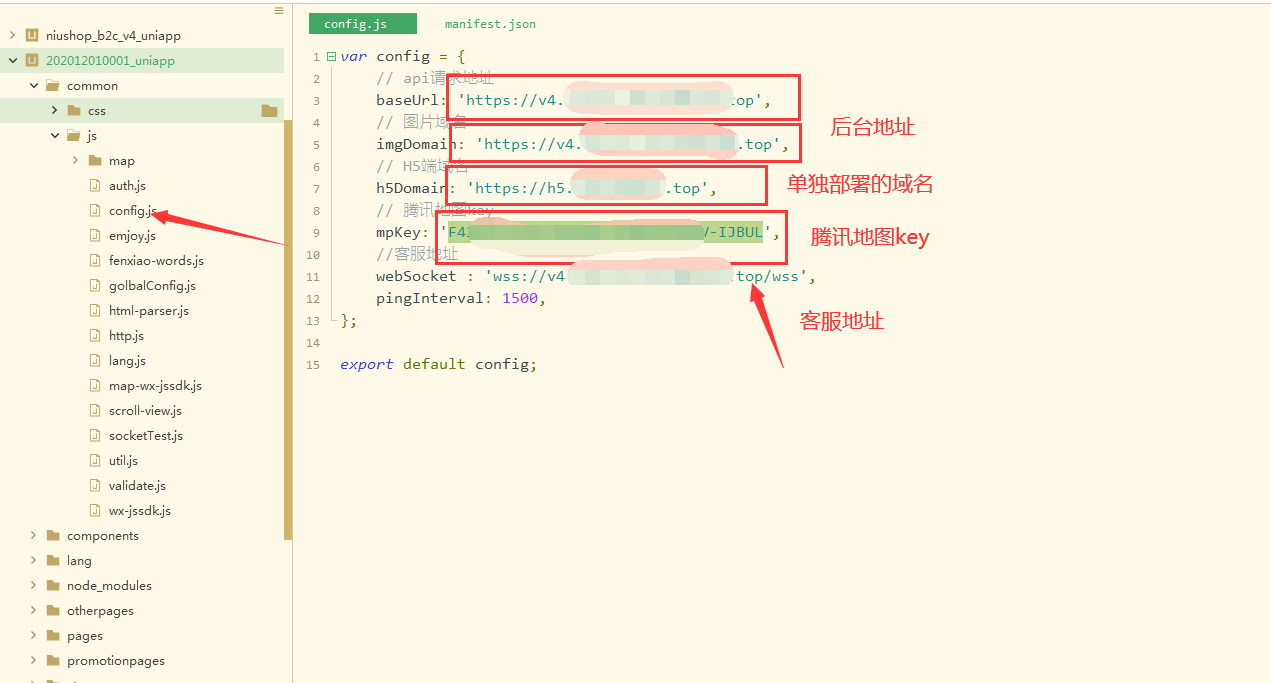
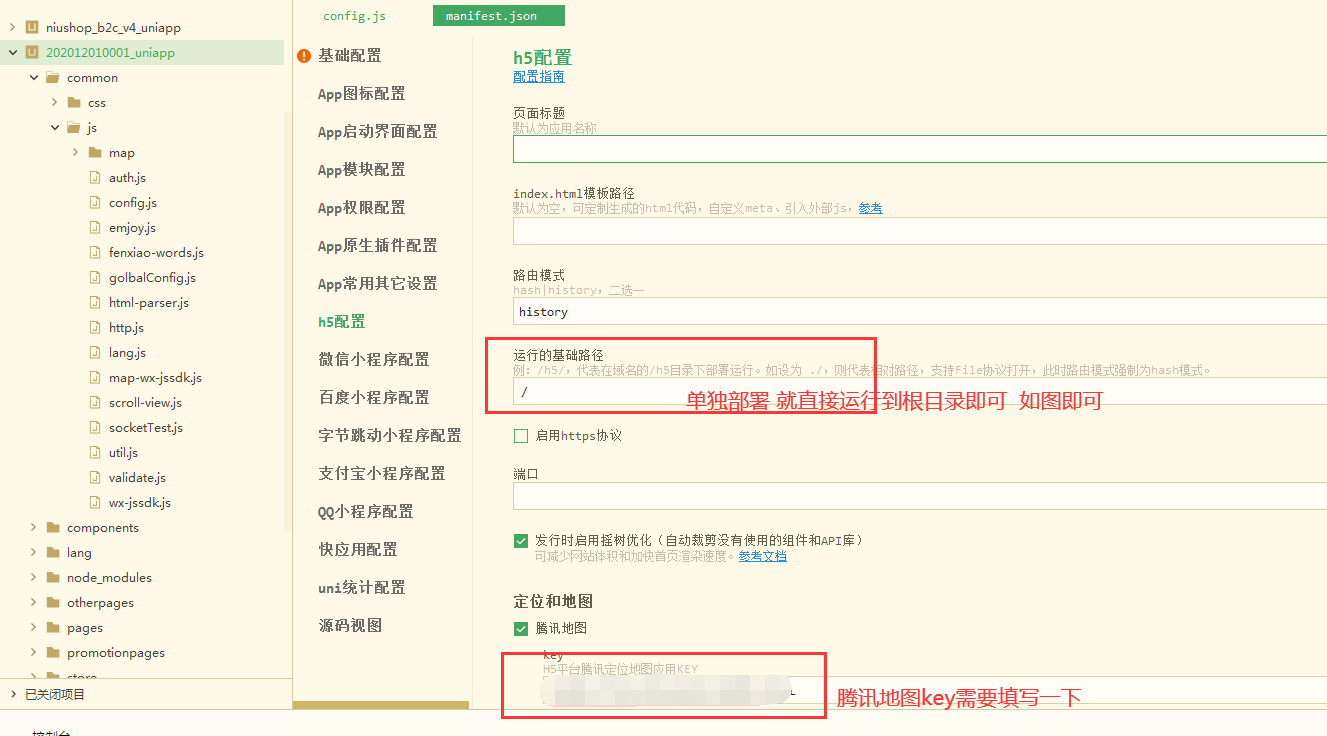
第四步:把配置文件配置好
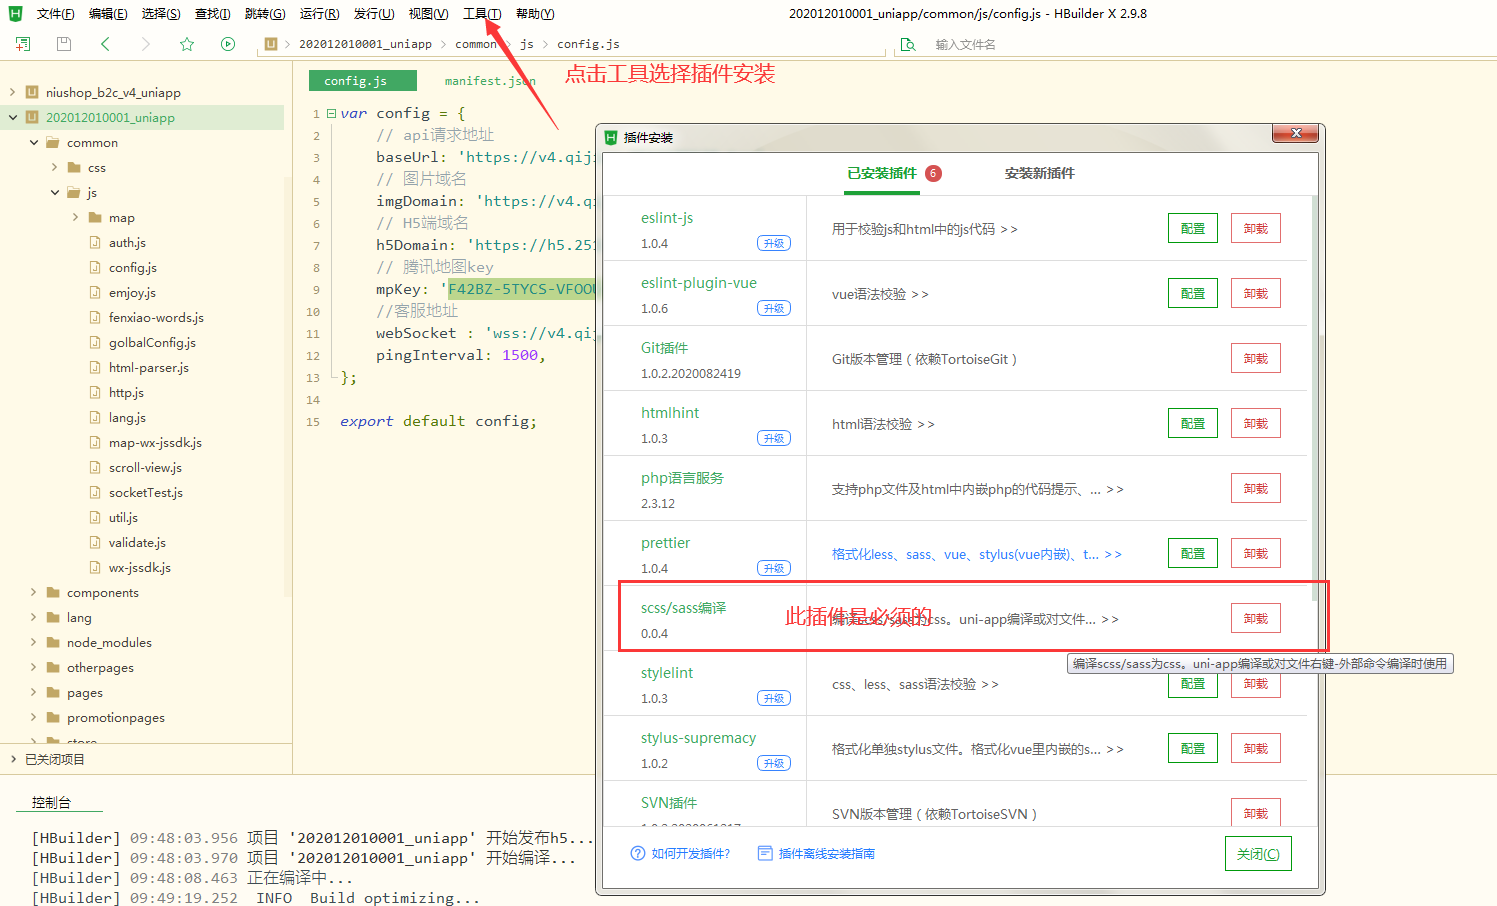
第五步:需要先安装一个插件scss/sass插件
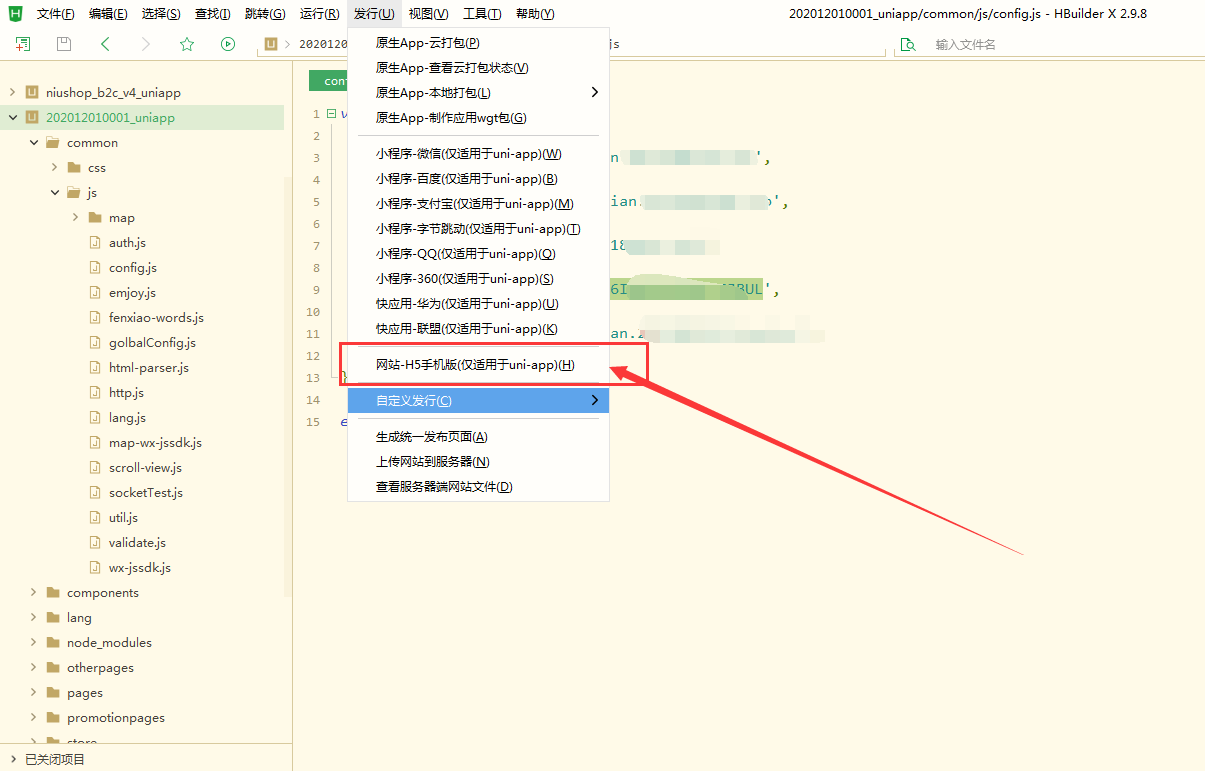
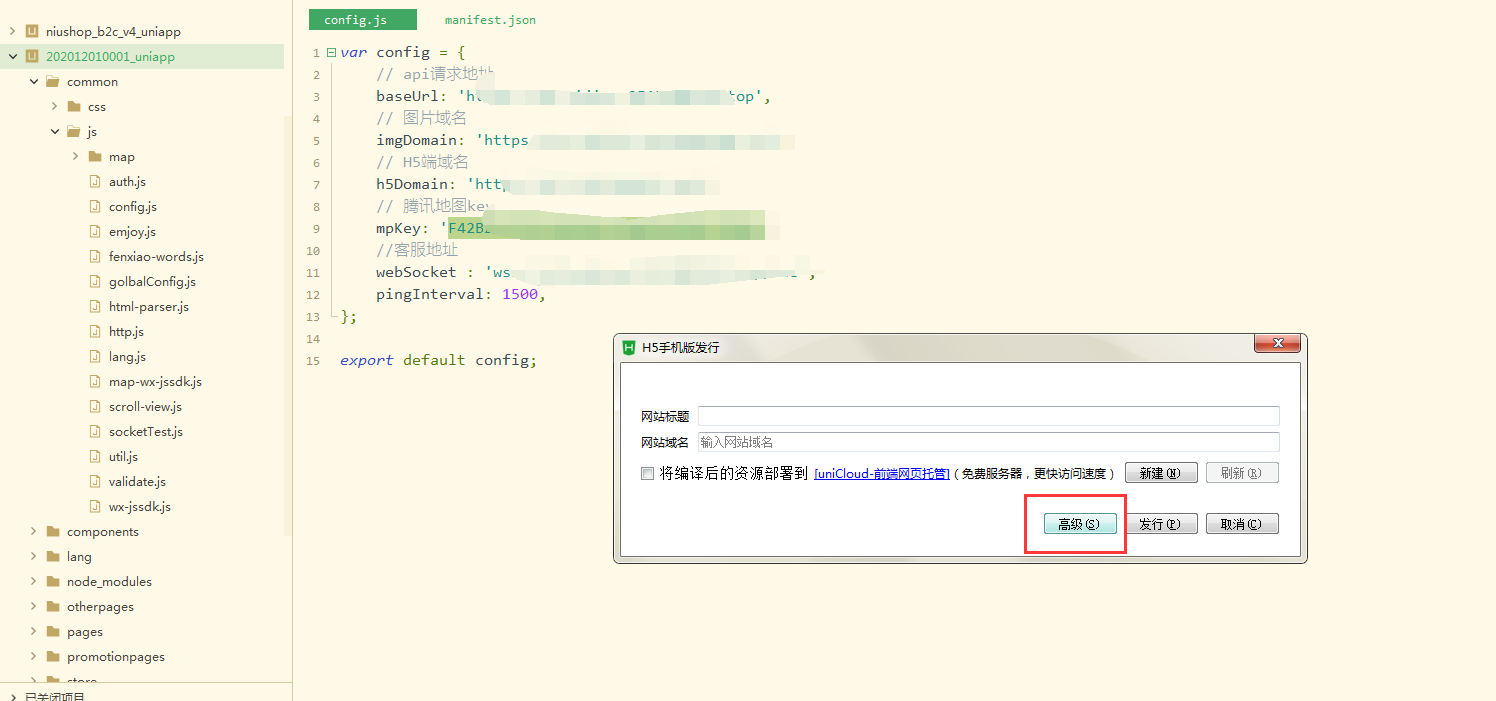
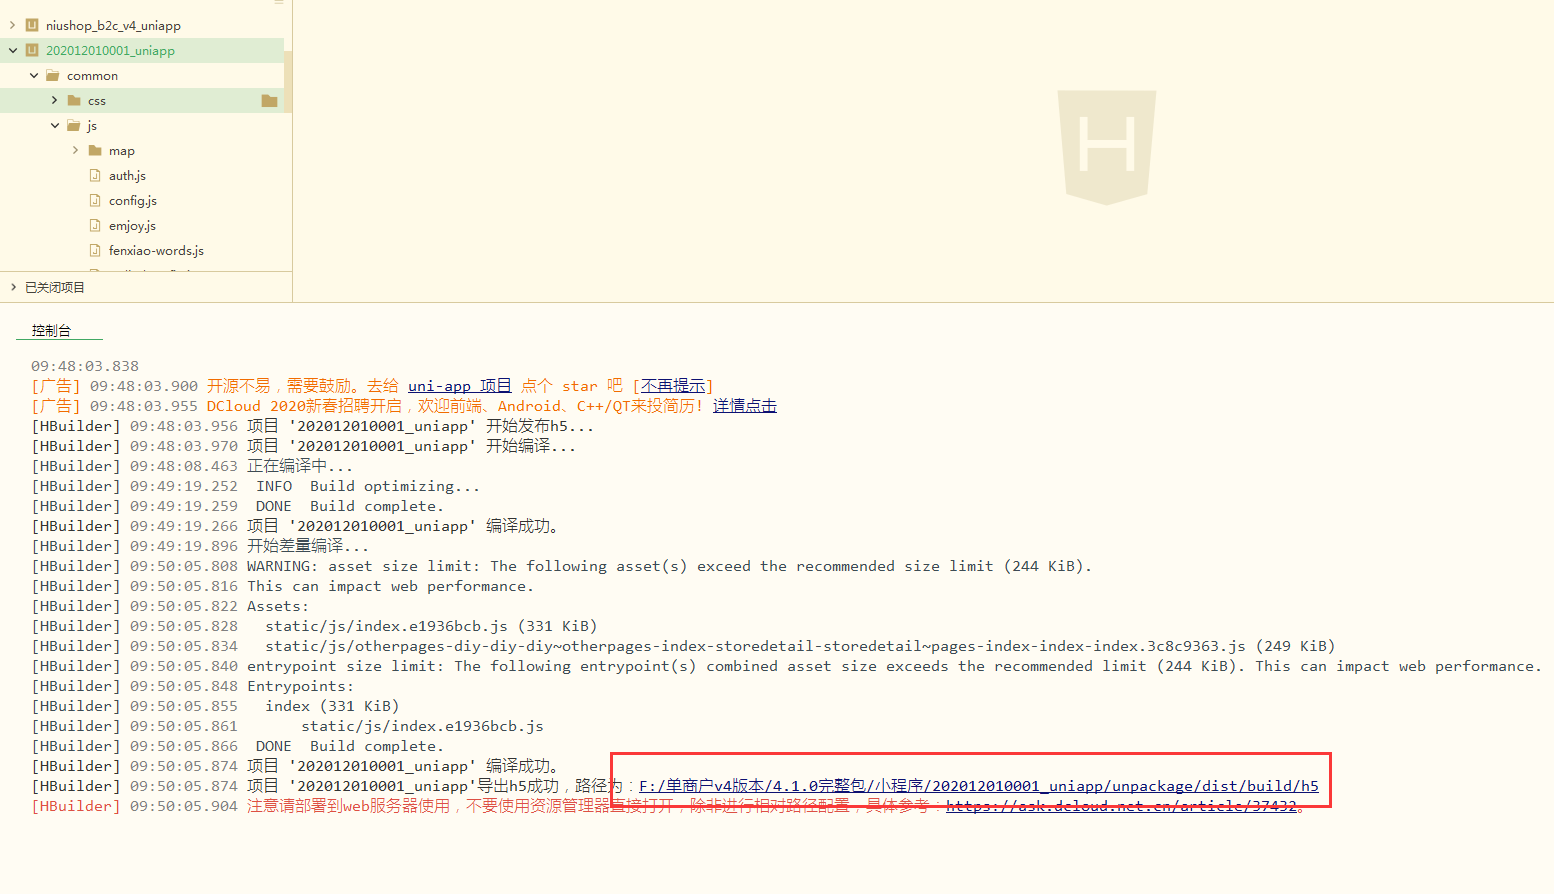
第六步:发行h5
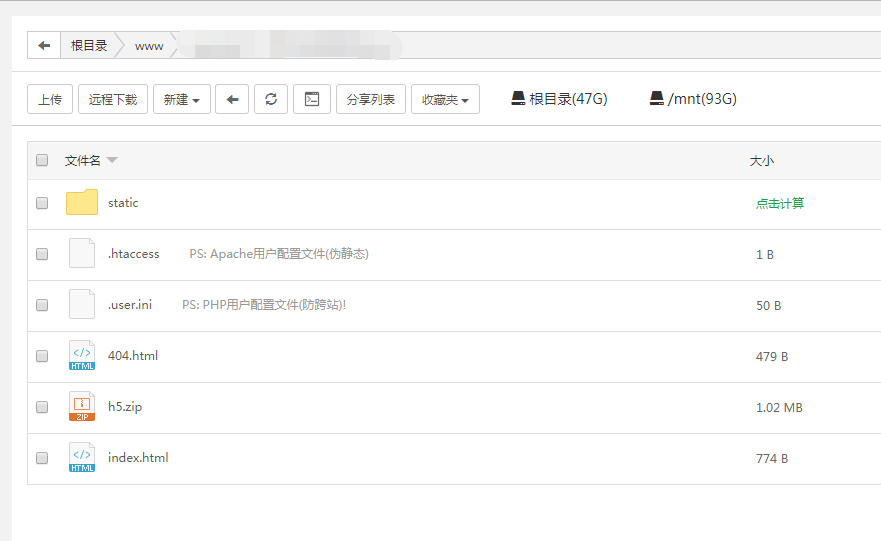
第七步:发行完之后 找到路径 把代码压缩上传到新建的站点根目录并解压到根目录
第八步:给该网站配置伪静态
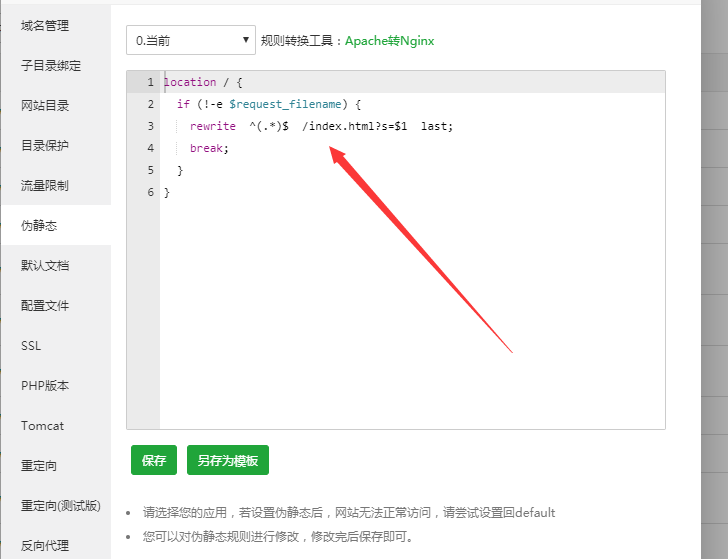
nginx环境下伪静态配置
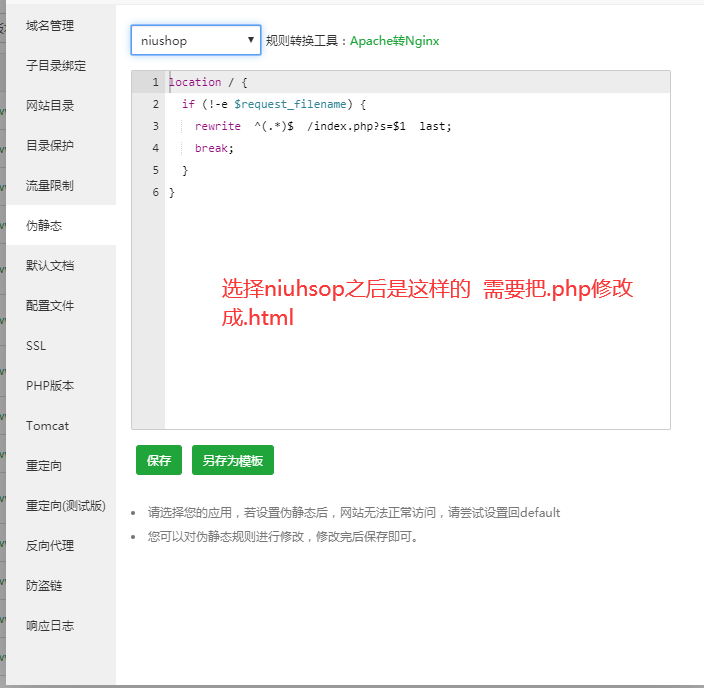
修改成如下图
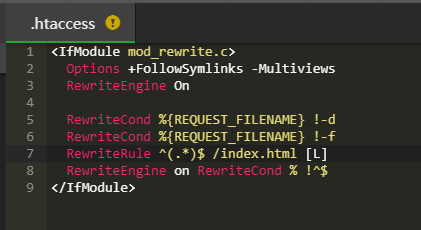
apache环境下伪静态配置
根目录下的.htaccess文件添加伪静态配置如下图
<IfModule mod_rewrite.c>
Options +FollowSymlinks -Multiviews
RewriteEngine On
RewriteCond %{REQUEST_FILENAME} !-d
RewriteCond %{REQUEST_FILENAME} !-f
RewriteRule ^(.*)$ /index.html [L]
RewriteEngine on RewriteCond % !^$
</IfModule>
第九步:后台访问手机端域名设置需要修改成你的单独配置的域名

第十步:如果需要在微信公众号中拿单独域名访问 请把此域名配置到微信公众号的业务域名、js域名、网页域名即可
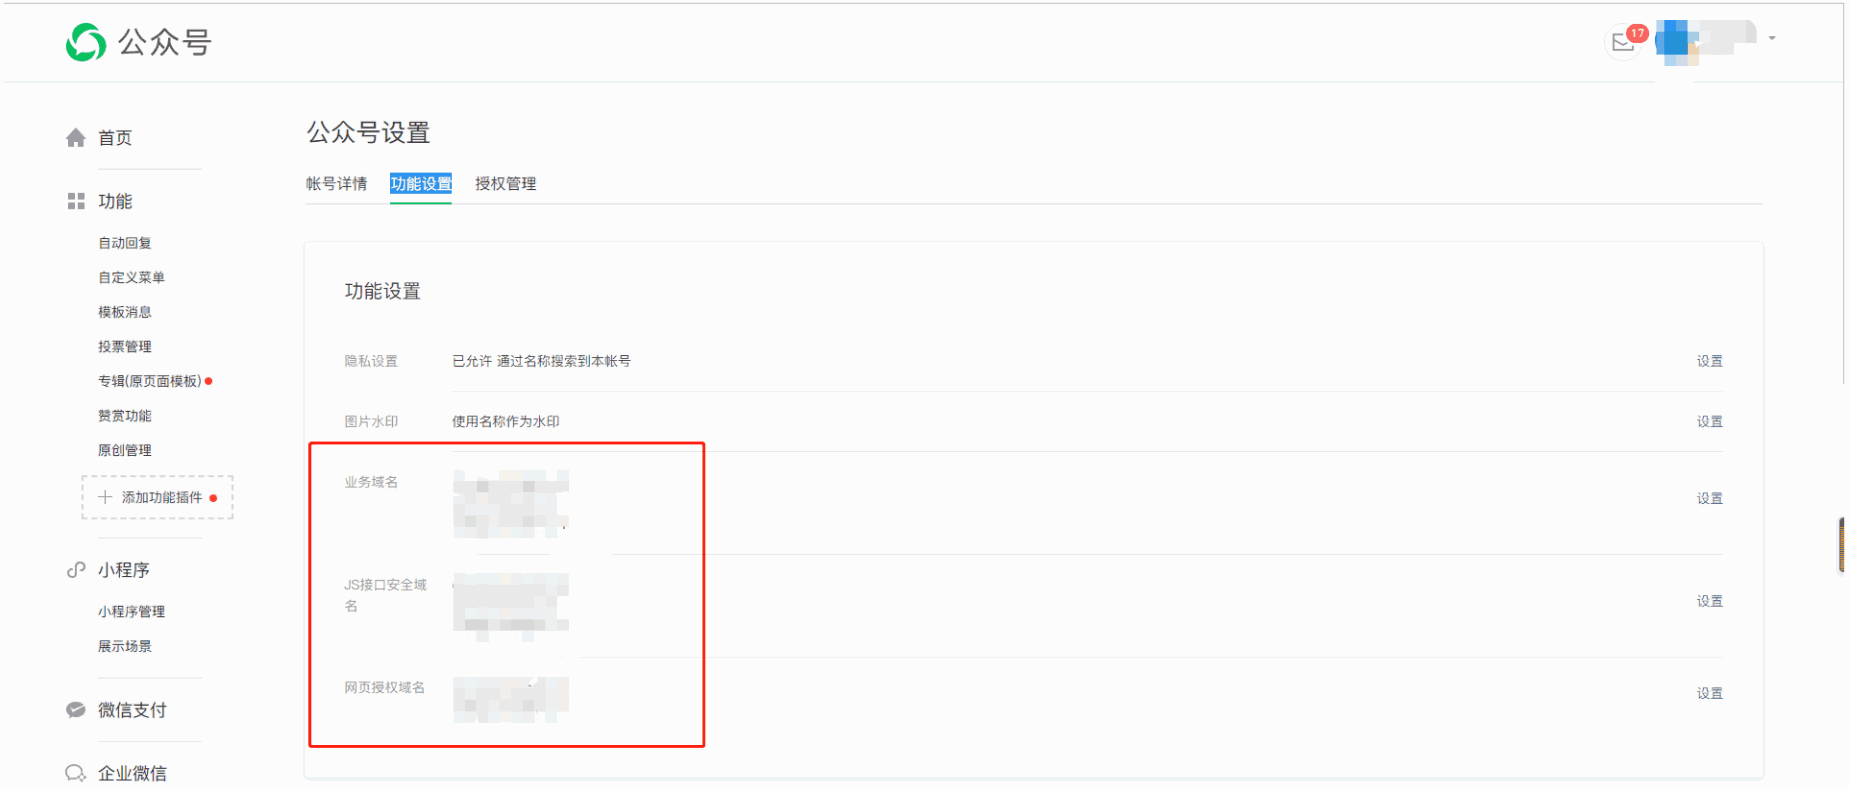
这样就单独域名配置完成了!
- 序言
- 商城简介
- 系统部署
- 功能列表
- 系统部署
- 宝塔部署
- apache部署
- iis部署(待做)
- 基础配置(基础安装)
- 微信公众号配置
- 微信公众号菜单
- 微信小程序配置
- 微信支付配置
- 微信模板消息
- 微信小程序直播配置
- 牛云短信配置
- 阿里云短信消息模板消息配置
- 地图设置
- 商家消息通知设置
- 微信小程序订阅消息
- 店铺设置
- 店铺信息
- 会员信息
- 配送设置
- 系统设置
- 会员设置
- 公众号设置
- 版权信息
- 扩展功能配置
- 支付宝支付配置
- 电子面单配置
- 小票打印
- 阿里云短信配置
- 阿里云上传
- 微信小程序开源版
- 开源版小程序发行默认h5
- 后台登录路径配置
- h5单独部署
- 视频号配置
- 店铺装修
- 主页装修
- 分类装修
- 底部导航
- 微页面
- 模板选择
- 商城风格
- 店铺帮助
- 店铺公告
- 店铺模板
- 商品管理
- 商品分类
- 商品评价
- 相册管理
- 售后保障
- 商品服务,属性
- 商品分组
- 会员
- 会员注册
- 会员价
- 会员消费
- 会员充值
- 会员提现
- 订单管理
- 订单发货
- 退款维权
- 订单核销
- 发票列表
- 资产统计
- 营销活动
- 满额包邮
- 砍价
- 组合套餐
- 优惠券
- 限时折扣
- 团购
- 满减活动
- 拼团
- 限时秒杀
- 专题活动
- 刮刮乐
- 幸运转盘
- 砸金蛋
- 预售
- 超级会员卡
- 代客下单
- 礼品卡
- 社群接龙
- 打包一口价
- 好友瓜分券
- 生日有礼
- 节日有礼
- 拼团返现
- 盲盒
- 裂变红包
- 应用管理
- 分销
- 分销概况
- 分销商品
- 分销订单
- 分销商
- 分销提现
- 分销等级
- 分销设置
- 分销市场
- 小程序直播
- 直播间
- 直播商品
- 积分抵现
- 积分商城
- 微信圈子
- 店铺笔记
- 草稿箱
- 笔记分组
- 商品采集
- 电子卡密
- 系统表单
- 虚拟评价
- 商品海报
- 门店
- 门店商品
- 收银台(待做)
- 升级说明
- V3与V4功能比对
- V3升级到V4说明
- 客服配置
- 补丁上传