
# [.NET领域驱动设计实战系列]专题六:DDD实践案例:网上书店订单功能的实现
## 一、引言
上一专题已经为网上书店实现了购物车的功能了,在这一专题中,将继续对网上书店案例进行完善,本专题将对网上书店订单功能的实现进行介绍,现在废话不多说了,让我们来一起看看订单功能是如何实现的吧。
## 二、订单功能的实现思路
在网上购过物的朋友,对于订单功能的流程自然不陌生,这里我还是先来梳理下下订单的一个流程:
* 用户点击我的购物车,可以勾选对应的商品进行结算
* 在结算页面可以提交订单来创建一个订单
* 创建订单成功之后就是进行付款了。
一般购物网站下订单的流程分上面3步,由于在本案例中并没有对接第三方的支付平台,所以这里就没有上面第三步的过程了。即在网上书店案例中订单提交成功之后就是已付款状态。
从上面下订单流程我们就可以知道订单功能的实现思路:
* 用户点击购物车中购买商品按钮来进行下订单,此时触发控制器中的结算方法进行调用
* 结算方法通过调用OrderService服务中的结算方法
* 由于订单的创建涉及了3个实体操作,包括购物车实体,购物车项实体和订单实体。所以这里需要引入领域服务。因为创建订单这个操作涉及了多个实体,则这个业务逻辑放在每个实体中都不合适,因为并属于单独一个实体的逻辑。所以这里引入领域服务来实现这种涉及多个实体的操作。
* 则OrderService服务中的结算方法通过调用领域服务中的CreateOrder方法来完成订单创建的功能。
* 领域服务中可以调用对应的实体仓储来完成实体的持久化。这里需要注意的一点:因为领域服务涉及多个实体的持久化,则需要引入工作单元模式将这些实体的操作进行统一提交,要不都成功,要不都不成功。这也就是引入工作单元初衷。
上面的思路就是订单功能的实现思路。有了上面的思路之后,实现订单功能也一目了然了。下面让我们一起在网上书店案例中实现下看看。
## 三、网上书店订单功能的实现
这里我们按照上面的实现思路由下至上地去实现订单功能。
1. 首先我们需要订单仓储来完成订单实体的持久化。具体订单仓储接口和实现如下代码所示:
```
// 订单仓储接口
public interface IOrderRepository : IRepository<Order>
{
}
// 订单仓储的实现类
public class OrderRepository : EntityFrameworkRepository<Order>, IOrderRepository
{
public OrderRepository(IRepositoryContext context) : base(context)
{
}
}
```
2\. 领域服务的实现。具体的领域服务接口和实现代码如下所示:
```
// 领域服务接口
public interface IDomainService
{
Order CreateOrder(User user, ShoppingCart shoppingCart);
}
// 领域服务类型
// 牵涉到多个实体的操作可以把这些操作封装到领域服务里
public class DomainService : IDomainService
{
private readonly IRepositoryContext _repositoryContext;
private readonly IShoppingCartItemRepository _shoppingCartItemRepository;
private readonly IOrderRepository _orderRepository;
/// <summary>
/// 创建订单,涉及到的操作有2个:1\. 把购物车中的项中购物车移除; 2.创建一个订单。
/// 这两个操作必须同时完成或失败。
/// </summary>
/// <param name="user"></param>
/// <param name="shoppingCart"></param>
/// <returns></returns>
public Order CreateOrder(User user, ShoppingCart shoppingCart)
{
var order = new Order();
var shoppingCartItems =
_shoppingCartItemRepository.GetAll(
new ExpressionSpecification<ShoppingCartItem>(s => s.ShoopingCart.Id == shoppingCart.Id));
if (shoppingCartItems == null || !shoppingCartItems.Any())
throw new InvalidOperationException("购物篮中没有任何物品");
order.OrderItems = new List<OrderItem>();
foreach (var shoppingCartItem in shoppingCartItems)
{
var orderItem = shoppingCartItem.ConvertToOrderItem();
orderItem.Order = order;
order.OrderItems.Add(orderItem);
_shoppingCartItemRepository.Remove(shoppingCartItem);
}
order.User = user;
order.Status = OrderStatus.Paid;
_orderRepository.Add(order);
_repositoryContext.Commit();
return order;
}
}
```
3\. 订单服务的实现。具体订单服务实现代码如下所示:
```
public class OrderServiceImp : ApplicationService, IOrderService
{
#region Private Fileds
private readonly IShoppingCartRepository _shoppingCartRepository;
private readonly IShoppingCartItemRepository _shoppingCartItemRepository;
private readonly IUserRepository _userRepository;
private readonly IOrderRepository _orderRepository;
private readonly IProductRepository _productRepository;
private readonly IDomainService _domainService;
private readonly IEventBus _eventBus;
#endregion
#region Ctor
public OrderServiceImp(IRepositoryContext context,
IUserRepository userRepository,
IShoppingCartRepository shoppingCartRepository,
IProductRepository productRepository,
IShoppingCartItemRepository shoppingCartItemRepository,
IDomainService domainService,
IOrderRepository orderRepository,
IEventBus eventBus) : base(context)
{
_userRepository = userRepository;
_shoppingCartRepository = shoppingCartRepository;
_productRepository = productRepository;
_shoppingCartItemRepository = shoppingCartItemRepository;
_domainService = domainService;
_orderRepository = orderRepository;
_eventBus = eventBus;
}
#endregion
public OrderDto Checkout(Guid customerId)
{
var user = _userRepository.GetByKey(customerId);
var shoppingCart = _shoppingCartRepository.GetByExpression(s => s.User.Id == user.Id);
var order = _domainService.CreateOrder(user, shoppingCart);
return Mapper.Map<Order, OrderDto>(order);
}
public OrderDto GetOrder(Guid orderId)
{
var order = _orderRepository.GetBySpecification(new ExpressionSpecification<Order>(o=>o.Id.Equals(orderId)), elp=>elp.OrderItems);
return Mapper.Map<Order, OrderDto>(order);
}
// 获得指定用户的所有订单
public IList<OrderDto> GetOrdersForUser(Guid userId)
{
var user = _userRepository.GetByKey(userId);
var orders = _orderRepository.GetAll(new ExpressionSpecification<Order>(o => o.User.Id == userId), sp => sp.CreatedDate, SortOrder.Descending, elp=>elp.OrderItems);
var orderDtos = new List<OrderDto>();
orders
.ToList()
.ForEach(o=>orderDtos.Add(Mapper.Map<Order, OrderDto>(o)));
return orderDtos;
}
```
4\. HomeController控制器中Checkout操作的实现。具体实现代码如下所示:
```
public class HomeController : ControllerBase
{
/// <summary>
/// 结算操作
/// </summary>
/// <returns></returns>
[Authorize]
public ActionResult Checkout()
{
using (var proxy = new OrderServiceClient())
{
var model = proxy.Checkout(this.UserId);
return View(model);
}
}
[Authorize]
public ActionResult Orders()
{
using (var proxy = new OrderServiceClient())
{
var model = proxy.GetOrdersForUser(this.UserId);
return View(model);
}
}
[Authorize]
public ActionResult Order(string id)
{
using (var proxy = new OrderServiceClient())
{
var model = proxy.GetOrder(new Guid(id));
return View(model);
}
}
}
```
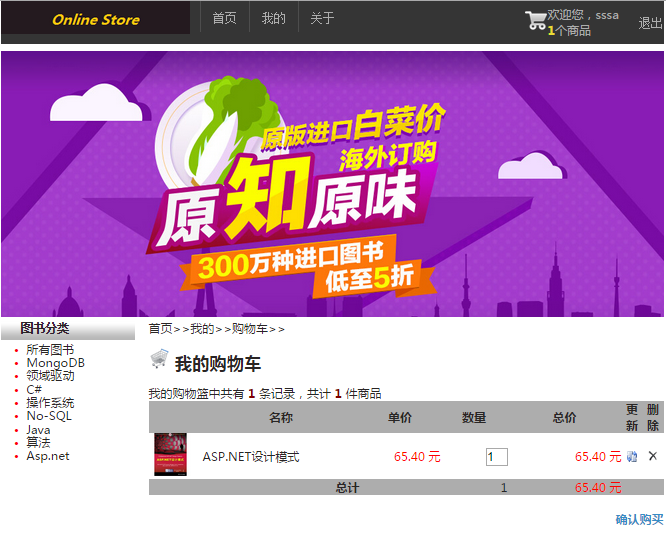
这样我们就在网上书店中实现了订单功能了。具体的视图界面也就是上一专题中实现的购物车页面。下面具体看看订单的具体实现效果:
结算页面:
点击确认购买按钮,在弹出框中点击确认来完成订单的创建:

通过我的订单来查看所有订单页面:

## 四、总结
到此,网上书店案例的订单功能的实现就完成了,在接下来的专题将继续对该案例进行完善,在下一专题中将为该案例引入后台管理操作。商家或管理员可以进入后台管理来对用户订单进行确认发货,以及添加商品,分类等操作。具体实现请见下一专题。
本专题中所有实现源码下载:https://github.com/lizhi5753186/OnlineStore_Second/
- C# 基础知识系列
- C# 基础知识系列 专题一:深入解析委托——C#中为什么要引入委托
- C# 基础知识系列 专题二:委托的本质论
- C# 基础知识系列 专题三:如何用委托包装多个方法——委托链
- C# 基础知识系列 专题四:事件揭秘
- C# 基础知识系列 专题五:当点击按钮时触发Click事件背后发生的事情
- C# 基础知识系列 专题六:泛型基础篇——为什么引入泛型
- C# 基础知识系列 专题七: 泛型深入理解(一)
- C# 基础知识系列 专题八: 深入理解泛型(二)
- C# 基础知识系列 专题九: 深入理解泛型可变性
- C#基础知识系列 专题十:全面解析可空类型
- C# 基础知识系列 专题十一:匿名方法解析
- C#基础知识系列 专题十二:迭代器
- C#基础知识 专题十三:全面解析对象集合初始化器、匿名类型和隐式类型
- C# 基础知识系列 专题十四:深入理解Lambda表达式
- C# 基础知识系列 专题十五:全面解析扩展方法
- C# 基础知识系列 专题十六:Linq介绍
- C#基础知识系列 专题十七:深入理解动态类型
- 你必须知道的异步编程 C# 5.0 新特性——Async和Await使异步编程更简单
- 全面解析C#中参数传递
- C#基础知识系列 全面解析C#中静态与非静态
- C# 基础知识系列 C#中易混淆的知识点
- C#进阶系列
- C#进阶系列 专题一:深入解析深拷贝和浅拷贝
- C#进阶系列 专题二:你知道Dictionary查找速度为什么快吗?
- C# 开发技巧系列
- C# 开发技巧系列 使用C#操作Word和Excel程序
- C# 开发技巧系列 使用C#操作幻灯片
- C# 开发技巧系列 如何动态设置屏幕分辨率
- C# 开发技巧系列 C#如何实现图片查看器
- C# 开发技巧 如何防止程序多次运行
- C# 开发技巧 实现属于自己的截图工具
- C# 开发技巧 如何使不符合要求的元素等于离它最近的一个元素
- C# 线程处理系列
- C# 线程处理系列 专题一:线程基础
- C# 线程处理系列 专题二:线程池中的工作者线程
- C# 线程处理系列 专题三:线程池中的I/O线程
- C# 线程处理系列 专题四:线程同步
- C# 线程处理系列 专题五:线程同步——事件构造
- C# 线程处理系列 专题六:线程同步——信号量和互斥体
- C# 多线程处理系列专题七——对多线程的补充
- C#网络编程系列
- C# 网络编程系列 专题一:网络协议简介
- C# 网络编程系列 专题二:HTTP协议详解
- C# 网络编程系列 专题三:自定义Web服务器
- C# 网络编程系列 专题四:自定义Web浏览器
- C# 网络编程系列 专题五:TCP编程
- C# 网络编程系列 专题六:UDP编程
- C# 网络编程系列 专题七:UDP编程补充——UDP广播程序的实现
- C# 网络编程系列 专题八:P2P编程
- C# 网络编程系列 专题九:实现类似QQ的即时通信程序
- C# 网络编程系列 专题十:实现简单的邮件收发器
- C# 网络编程系列 专题十一:实现一个基于FTP协议的程序——文件上传下载器
- C# 网络编程系列 专题十二:实现一个简单的FTP服务器
- C# 互操作性入门系列
- C# 互操作性入门系列(一):C#中互操作性介绍
- C# 互操作性入门系列(二):使用平台调用调用Win32 函数
- C# 互操作性入门系列(三):平台调用中的数据封送处理
- C# 互操作性入门系列(四):在C# 中调用COM组件
- CLR
- 谈谈: String 和StringBuilder区别和选择
- 谈谈:程序集加载和反射
- 利用反射获得委托和事件以及创建委托实例和添加事件处理程序
- 谈谈:.Net中的序列化和反序列化
- C#设计模式
- UML类图符号 各种关系说明以及举例
- C#设计模式(1)——单例模式
- C#设计模式(2)——简单工厂模式
- C#设计模式(3)——工厂方法模式
- C#设计模式(4)——抽象工厂模式
- C#设计模式(5)——建造者模式(Builder Pattern)
- C#设计模式(6)——原型模式(Prototype Pattern)
- C#设计模式(7)——适配器模式(Adapter Pattern)
- C#设计模式(8)——桥接模式(Bridge Pattern)
- C#设计模式(9)——装饰者模式(Decorator Pattern)
- C#设计模式(10)——组合模式(Composite Pattern)
- C#设计模式(11)——外观模式(Facade Pattern)
- C#设计模式(12)——享元模式(Flyweight Pattern)
- C#设计模式(13)——代理模式(Proxy Pattern)
- C#设计模式(14)——模板方法模式(Template Method)
- C#设计模式(15)——命令模式(Command Pattern)
- C#设计模式(16)——迭代器模式(Iterator Pattern)
- C#设计模式(17)——观察者模式(Observer Pattern)
- C#设计模式(18)——中介者模式(Mediator Pattern)
- C#设计模式(19)——状态者模式(State Pattern)
- C#设计模式(20)——策略者模式(Stragety Pattern)
- C#设计模式(21)——责任链模式
- C#设计模式(22)——访问者模式(Vistor Pattern)
- C#设计模式(23)——备忘录模式(Memento Pattern)
- C#设计模式总结
- WPF快速入门系列
- WPF快速入门系列(1)——WPF布局概览
- WPF快速入门系列(2)——深入解析依赖属性
- WPF快速入门系列(3)——深入解析WPF事件机制
- WPF快速入门系列(4)——深入解析WPF绑定
- WPF快速入门系列(5)——深入解析WPF命令
- WPF快速入门系列(6)——WPF资源和样式
- WPF快速入门系列(7)——深入解析WPF模板
- WPF快速入门系列(8)——MVVM快速入门
- WPF快速入门系列(9)——WPF任务管理工具实现
- ASP.NET 开发
- ASP.NET 开发必备知识点(1):如何让Asp.net网站运行在自定义的Web服务器上
- ASP.NET 开发必备知识点(2):那些年追过的ASP.NET权限管理
- ASP.NET中实现回调
- 跟我一起学WCF
- 跟我一起学WCF(1)——MSMQ消息队列
- 跟我一起学WCF(2)——利用.NET Remoting技术开发分布式应用
- 跟我一起学WCF(3)——利用Web Services开发分布式应用
- 跟我一起学WCF(3)——利用Web Services开发分布式应用
- 跟我一起学WCF(4)——第一个WCF程序
- 跟我一起学WCF(5)——深入解析服务契约 上篇
- 跟我一起学WCF(6)——深入解析服务契约 下篇
- 跟我一起学WCF(7)——WCF数据契约与序列化详解
- 跟我一起学WCF(8)——WCF中Session、实例管理详解
- 跟我一起学WCF(9)——WCF回调操作的实现
- 跟我一起学WCF(10)——WCF中事务处理
- 跟我一起学WCF(11)——WCF中队列服务详解
- 跟我一起学WCF(12)——WCF中Rest服务入门
- 跟我一起学WCF(13)——WCF系列总结
- .NET领域驱动设计实战系列
- .NET领域驱动设计实战系列 专题一:前期准备之EF CodeFirst
- .NET领域驱动设计实战系列 专题二:结合领域驱动设计的面向服务架构来搭建网上书店
- .NET领域驱动设计实战系列 专题三:前期准备之规约模式(Specification Pattern)
- .NET领域驱动设计实战系列 专题四:前期准备之工作单元模式(Unit Of Work)
- .NET领域驱动设计实战系列 专题五:网上书店规约模式、工作单元模式的引入以及购物车的实现
- .NET领域驱动设计实战系列 专题六:DDD实践案例:网上书店订单功能的实现
- .NET领域驱动设计实战系列 专题七:DDD实践案例:引入事件驱动与中间件机制来实现后台管理功能
- .NET领域驱动设计实战系列 专题八:DDD案例:网上书店分布式消息队列和分布式缓存的实现
- .NET领域驱动设计实战系列 专题九:DDD案例:网上书店AOP和站点地图的实现
- .NET领域驱动设计实战系列 专题十:DDD扩展内容:全面剖析CQRS模式实现
- .NET领域驱动设计实战系列 专题十一:.NET 领域驱动设计实战系列总结