
安装要求:
* python3
* pip8
修改端口和禁止密码登录
~~~
修改sshd配置,禁止密码登录#
[root@test-vm001 ~]# vim /etc/sshd/sshd_config
......
#Port 22
PasswordAuthentication no
[root@test-vm001 ~]# service sshd restart
~~~
1、安装yum源
~~~
wget -O /etc/yum.repos.d/CentOS-Base.repo <http://mirrors.163.com/.help/CentOS6-Base-163.repo>
~~~
2、安装epel源
~~~
rpm -ivh http://mirrors.aliyun.com/epel/epel-release-latest-6.noarch.rpm
~~~
3、清除yum缓存
~~~
yum clean all
~~~
4、安装依赖
~~~
yum -y update
yum -y install git MySQL-python wget unzip zip
# yum -y install git python-pip mysql-devel gcc automake autoconf python-devel vim sshpass lrzsz readline-devel
~~~
5、下载
> cd /opt
> git clone [https://github.com/jumpserver/jumpserver.git](https://github.com/jumpserver/jumpserver.git)
>
> 百度网盘:
>
> 链接:[https://pan.baidu.com/s/1QeFERR-vXzE98y0wVQUyXg](https://pan.baidu.com/s/1QeFERR-vXzE98y0wVQUyXg) 提取码:hbx5
6、解压缩
~~~
unzip jumpserver-rpm.zip
~~~
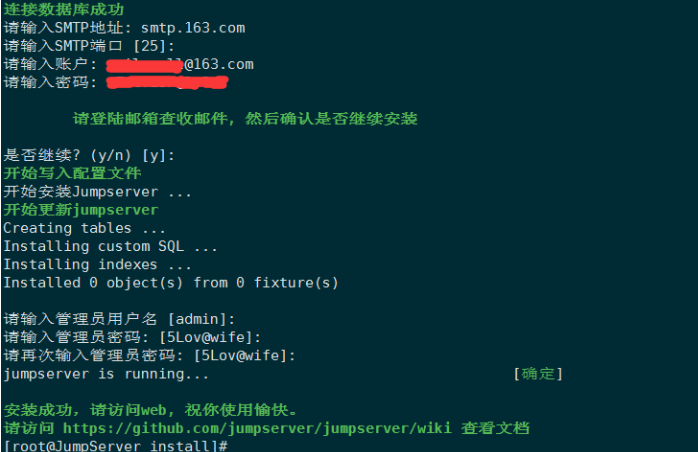
3、安装
~~~
cd jumpserver/install/
chmod 755 install.py
> ./install.py
~~~
4、
* 开始安装epel源
* 开始安装依赖包
* 开始安装pip包
* 开始关闭防火墙和selinux
* 安装设置mysql,记住账号密码(可自行先安装)
- Linux
- linux常用命令
- awk
- cp
- scp
- mv
- screen工具
- rsync
- Linux设置静态IP
- vim常用
- ssh免密登录
- linux挂载磁盘和开机自动挂载
- 文件的时间戳
- 重定向
- 防火墙
- Vultr 服务器利用快照更换IP
- ss
- node-yarn
- ES安装向导
- lnmp/lamp
- windows安装mysql
- windows安装nginx
- Let'sEncrypt 免费通配符/泛域名SSL证书
- 开机自动挂载硬盘
- 普通用户提权
- ELK日志分析系统
- Docker
- docker
- centos7安装docker
- Centos7安装redis
- CentOS 7 使用Docker搭建Nginx
- CentOS 7 使用Docker搭建Jenkins
- CentOS 7 使用Docker搭建Zookeeper
- CentOS 7 使用Docker搭建Tomcat
- CentOS 7 使用Docker搭建Mysql
- CentOS 7 使用Docker搭建PHP环境
- 使用docker搭建Swagger
- docker阿里云私有仓库
- docker zookeeper集群
- docker部署ES
- docker之java容器运行外置springboot-jar
- docker部署owncloud云盘
- ETCD
- centos7部署etcd节点
- Dockerfile
- Docker-compose
- gitlab.yml
- db.yml
- 安装docker-compose
- gitlab-docker-compose.yml
- nginx-docker-compose.yml
- Mysql
- mysql开启远程访问及相关权限控制
- mysql授权
- mysql快速导出导入大数据
- mysql单机备份
- binlog日志
- shell
- 经典案例
- 俄罗斯方块游戏
- 系统初始化
- 服务器监控
- go基础环境
- shell.监控日志.elk
- shell.检查各服务脚本
- shell.删除文件脚本
- shell.守护进程
- shell.数据库
- shell.Ansible
- shell.dev
- shell.ftp环境
- shell.docker环境
- shell.k8s环境
- k8s.二进制安装
- K8s.一主多从
- k8s.三主两从高可用
- k8s.检查服务与配置
- k8s.jenkins
- k8s.gitlab
- go-install.sh
- jenkins-install.sh
- node-install.sh
- redis-install.sh
- zabbix-install.sh
- zabbix-dockerfile.sh
- nginx-install.sh
- shell变量
- 用户自定义变量
- 环境变量
- shell特殊变量
- shell条件判断
- 流程控制
- shell运算符
- Shell _printf
- shell_test
- shell函数
- 输出重定向
- 网络相关
- 安全相关
- 堡垒机部署
- 区块链威胁情报共享平台
- 签名与验签
- 浅谈区块链
- 智能合约
- 黄金币GTF智能合约
- 节点
- 以太坊公链私链geth同步
- 比特节点同步
- BTC节点错误解决方法
- eth硬分叉
- omni钱包节点搭建
- 架构
- K8s
- 搭建k8s集群完整篇
- 二进制部署k8s
- Devops
- git
- Jenkins
- svn
- 禅道
- CI/CD
- docker+jenkins+golang持续集成持续交付(CI/CD)
- 项目部署
- config.env
- docker-compose.yml
- Dockerfile模板
- .dockerignore
- run.sh
- nginx.conf模板
- 跨域
- jenkins配置
- 测试
- Python